

Introduction
Creating believable bases for your miniatures is crucial for bringing your tabletop armies and skirmish forces to life. For those drawn to the desolate, sun-baked environments of the Ash Wastes, achieving that signature cracked earth and dusty, arid look can seem daunting. This Ash Waste Base Tutorial will guide you through the essential techniques and materials to transform ordinary bases into stunning, realistic representations of this iconic environment. As of May 2026, the demand for immersive basing continues to grow, making these skills invaluable for any hobbyist.
Last updated: May 29, 2026
Key Takeaways
- Achieve realistic Ash Wastes bases using a layered approach with texture paints, washes, and dry brushing.
- Essential materials include texture paste, sand, grit, grey and brown acrylic paints, and fine flocking.
- Cracked earth effects can be simulated with specialised texture paints or by strategically applying PVA glue and sand.
- Dusty, arid finishes are achieved through liberal dry brushing with light greys and tans.
- Consider adding subtle details like small rocks or tufts for enhanced realism.
Why Ash Wastes Basing Matters
The Ash Wastes, a staple in settings like Necromancy and beyond, represent a harsh, unforgiving world where survival is a daily struggle. Bases that reflect this environment—scorched, cracked, and dusty—immensely enhance the narrative of your miniatures. They provide context, grounding your figures in a believable world and making them stand out on the gaming table. A well-executed Ash Waste base tutorial can turn a simple model into a characterful piece that tells its own story of enduring the arid expanse.
The visual storytelling power of bases can’t be overstated. They are the foundation upon which your miniatures stand, and a compelling base draws the viewer into the scene. For Ash Wastes, this means conveying heat, dryness, and a lack of life. This attention to detail elevates your entire collection, transforming it from a mere collection of figures into a cohesive, atmospheric army. Think of it as the final layer of immersion, akin to a finely crafted frame for a masterpiece painting.
Gathering Your Ash Wastes Arsenal
To successfully tackle an Ash Waste Base Tutorial, you’ll need a specific set of materials. The foundation often involves texture paints or a mix of PVA glue, sand, and grit to build up the terrain. Acrylic paints in shades of grey, brown, tan, and off-white are crucial for the base coat, shading, and highlighting. Specialised washes, like agrax earth shade or nuln oil, are key for depth, while lighter tones will bring out the dry brushed highlights. Finally, consider adding scatter materials such as fine static grass, small gravel, or even specialised tufts designed for arid environments.
When selecting texture paints, look for those designed for grit or cracked earth effects. Brands like Citadel Technical Paints, Vallejo Texture Paints, or Army Painter Battlefields offer excellent options. If you prefer a DIY approach, a good quality PVA glue mixed with fine sand and perhaps some plaster or filler can create a versatile texture paste. For paints, acrylics from any major miniature brand will work, but ensuring you have a good range of muted, earthy tones is vital. Don’t forget your brushes: a larger, stiffer brush is ideal for dry brushing, while smaller detail brushes are useful for applying washes and fine textures.
Step-by-Step: Crafting Your Arid Landscape
The process for an Ash Waste Base Tutorial typically begins with preparing the base itself. Secure any miniatures you intend to attach later, or leave them off for now to make painting easier. Apply your chosen texture medium—either a pre-mixed texture paint, or your own PVA and sand blend—to the base, leaving areas of higher relief and lower depressions to simulate natural terrain. Ensure you leave space for your miniature if it’s not already attached.
Once the texture medium is dry, it’s time for the base coat. Apply a dark, earthy tone, such as a dark brown or a deep grey, over the entire textured surface. This initial coat serves to fill in any gaps in your texture and provides a solid foundation for subsequent layers. Allow this to dry completely before moving to the next stage. A dark undercoat helps to create depth and shadow naturally in the recesses.
Next, apply a lighter mid-tone, such as a medium brown or a lighter grey, covering most of the surface but allowing the dark base coat to show through in the deepest recesses. This is where the terrain starts to gain dimension. You can achieve this by dry brushing lightly or by carefully painting over raised areas. The goal is to begin highlighting the peaks and edges of your textured surface, mimicking how light would fall on uneven ground.
The magic of Ash Wastes realism often comes from washes and dry brushing. Apply a dark wash, like Agrax Earth shade or a similar brown wash, liberally over the entire base. This wash will flow into the cracks and lower areas, defining them and adding rich shadows. Once the wash has dried, it’s time for the crucial dry brushing step. Load a stiff brush with a very light grey or pale tan paint, wipe most of it off on a paper towel, and then lightly brush over the raised textures. This will catch the edges and peaks, creating the dusty, sun-bleached effect characteristic of the Ash Wastes.
Finally, add the finishing touches. Apply a very light, almost white, grey or tan to the most prominent edges and highest points with a fine dry brush for extreme highlights. You can then add scatter materials like fine sand, grit, or small pieces of rubble to further enhance texture. Small tufts of dead grass or arid foliage can be strategically placed to break up the monotony and add a touch of environmental storytelling. This layered approach ensures a rich, believable finish.

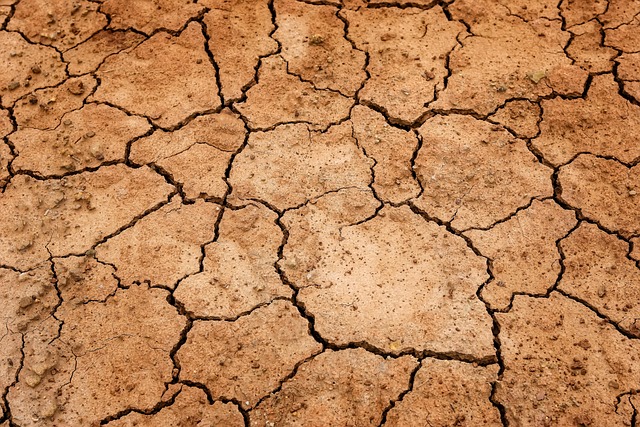
Simulating Cracked Earth Effects
One of the most iconic features of Ash Wastes bases is the cracked earth appearance. While specialised texture paints offer a direct route to this effect—they expand and crack as they dry—you can also achieve similar results with more traditional methods. One popular technique involves applying a thick layer of PVA glue mixed with fine sand and potentially a touch of filler or plaster. As this mixture dries, it can naturally develop subtle cracks. For more defined cracks, you can use a palette knife to create crevices before it fully hardens.
Another method, often favored for its control, involves painting a base coat of dark brown or black, then applying a layer of PVA glue in a cracked pattern. Once the glue is tacky but not fully dry, carefully sprinkle fine sand over it. This adheres to the glue, creating a raised, sandy surface within the cracks. Once dry, the excess sand can be brushed away. After the sand is fixed, the subsequent painting and weathering steps will bring these cracks to life, making them appear deep and shadowed. According to user reports on hobby forums as of May 2026, this method offers excellent results with common household materials.
A more advanced technique involves using specialised cracking mediums. These are applied between two layers of paint. The bottom layer is your base colour, followed by the cracking medium, and then your top colour. As the top colour dries, the cracking medium allows it to split and reveal the colour beneath, creating a naturalistic cracked look. Experimentation is key, as drying times and crack patterns can vary significantly based on environmental factors like humidity and temperature.
Dusty Finishes and Weathering Techniques
The arid nature of the Ash Wastes means dust is a constant presence. To replicate this, liberal dry brushing is your best friend. After applying your main colour scheme and washes, use a large, stiff brush and a very pale grey, tan, or off-white paint. Load the brush, wipe off almost all the paint onto a paper towel, and then lightly brush over all the raised surfaces of your base. Focus on edges, corners, and any textured detail. This technique builds up thin layers of colour, simulating accumulated dust without obscuring the underlying detail.
Pigment powders offer another superb method for achieving a dusty, weathered look. These finely ground pigments can be applied dry or mixed with a pigment binder or rubbing alcohol. Dusting them over the base, particularly in recesses and around the feet of where a miniature will stand, can add incredible realism. A light dusting of a pale brown or grey pigment powder can unify the colours on the base and give it that characteristic parched appearance. For instance, applying a light ochreaa pigment powder around the base of a miniature can make it look like it’s standing in fine, loose soil.
Consider adding subtle weathering effects beyond just dust. Streaking effects using thin washes or specialised weathering paints can simulate water stains (though rare in the wastes) or mineral deposits. Chipped paint effects on any artificial structures or metallic elements on the base can also add narrative depth. Remember, the goal is to tell a story of harsh environmental conditions, so don’t be afraid to layer these effects.

Environmental Details and Finishing Touches
To truly sell the Ash Wastes theme, incorporating small environmental details is vital. This might include small pebbles, coarse sand, or even crushed brick to represent rubble and debris. Small clumps of static grass or tufts designed for arid or desert environments can add a touch of realism, suggesting hardy, sparse vegetation clinging to life. Placing these strategically, perhaps near a crack or in a sheltered area, makes them look more natural.
For bases featuring any kind of structure, such as ruins or outposts, consider adding details like scorch marks, rust effects, or even subtle battle damage. Small pieces of wire or plasticard can be used to create broken pipes or exposed rebar. A common mistake is overdoing these details; a few well-placed elements are far more effective than a base cluttered with too much. The key is to enhance, not detract from, the overall theme and the miniature itself.
Finally, consider a matte varnish to protect your work and ensure a consistent finish. The Ash Wastes are not a glossy environment, so a matte or satin varnish will help unify the textures and colours, removing any unwanted shine from paints or glue.
Common Mistakes and How to Avoid Them
One frequent pitfall in Ash Waste basing is using too much texture paste or glue, leading to a featureless, muddy surface rather than distinct terrain. To avoid this, apply texture mediums in varied thicknesses and patterns. Don’t cover the entire base uniformly; leave some areas flatter or with less texture to create natural variations. This mimics the way real terrain isn’t consistently bumpy everywhere.
Another common error is over-brushing with highlight colours, which can make the base look chalky or unnatural. The aim of dry brushing is to catch the raised details, not to paint the entire surface. Use a light hand and gradually build up the highlights. Wipe your brush thoroughly on a paper towel until very little paint comes off before applying it to the base. Less is often more when it comes to highlighting dusty surfaces.
Failing to use washes to define recesses is also a missed opportunity. Washes are crucial for adding depth and shadow, making the texture truly pop. Without them, even a well-textured and dry brushed base can look flat. Ensure your washes reach into the cracks and low points of your texture to create contrast and realism. A dark, earthy wash can make all the difference.
Pro Tips for Expert Ash Wastes Bases
To elevate your Ash Wastes bases beyond the basic tutorial, consider incorporating elements that suggest a story. For instance, a single, broken weapon or a discarded piece of equipment can hint at a past conflict. A small cluster of hardy, dead-looking weeds could suggest a rare, resilient plant life struggling in the arid conditions. These small narrative elements add a lot of character. For example, placing a single miniature skull in a crack can hint at a previous unfortunate traveller.
When using washes, don’t be afraid to use more than one. A dark wash in the deepest cracks followed by a lighter brown or sepia wash over the mid-tones can create a more nuanced shading effect. This layering of washes, followed by careful dry brushing, is a hallmark of professional-level basing. According to hobbyists sharing techniques online as of May 2026, this layering is often what distinguishes a good base from a great one.
Don’t forget the rim of the base. A clean, neatly painted base rim anchors the entire miniature. A dark brown, black, or a matching muted colour often works best for Ash Wastes bases. A well-painted rim frames the base and the miniature, making it look much more finished and professional.

Frequently Asked Questions
What is the best texture paint for Ash Wastes bases?
Many hobbyists find success with Citadel Technical Paints‘ Stir land Mud or Armageddon Dust, or Vallejo’s Texture Paint Desert Sand. These provide a good base texture that cracks or dries with a granular finish, perfect for arid environments.
How do I make my Ash Wastes bases look cracked?
To create cracked earth, use specialised crackling texture paints that expand as they dry, or apply a PVA glue and sand mixture and encourage cracking as it cures. You can also paint a dark base, apply PVA in a crack pattern, and add fine sand before it dries.
Can I use household materials for Ash Wastes bases?
Absolutely. Fine sand mixed with PVA glue and a bit of filler or plaster makes an excellent DIY texture paste. You can also use coffee grounds (ensure they are fully dried) for grit and small stones from your garden.
What colours are best for Ash Wastes bases?
Muted earth tones are key: various shades of brown, grey, tan, ochre, and off-white. Focus on a limited palette to maintain a cohesive, arid look. Dark washes and very light dry brushing colours are essential for depth and highlights.
How long does it take to paint Ash Wastes bases?
A single base can take anywhere from 30 minutes to a few hours, depending on the complexity of the texture and drying times. Painting multiple bases at once in batches (e.g., all bases for texture, then all for base coat) significantly speeds up the process.
How do I seal my Ash Wastes bases?
Use a matte or satin spray varnish or brush-on varnish. This protects the paint job and ensures a realistic, non-glossy finish suitable for the arid environment, preventing unwanted shine.
Conclusion
Mastering the Ash Waste Base Tutorial is about layering techniques and understanding how to simulate harsh environmental conditions. By carefully applying texture mediums, using strategic washes and dry brushing, and adding subtle environmental details, you can create truly immersive bases that elevate your miniatures. The key is patience and experimentation, but the reward is a collection that visually tells the story of survival in the desolate Ash Wastes. For your next project, take these steps and see how your miniatures come to life.
Last reviewed: May 2026. Information current as of publication; pricing and product details may change.
Related read: Basement Warhammer: Crafting Your Ultimate Wargaming Haven in 2026
Editorial Note: This article was researched and written by the Tibbs Forge editorial team. We fact-check our content and update it regularly. For questions or corrections, contact us. Knowing how to address Ash Waste Base Tutorial early makes the rest of your plan easier to keep on track.

