The Contemptor Challenge Continues
The initial surge of assembling your Contemptor Dreadnought for Dreader 2016 is behind you. As of May 2026, the spirit of these hobby challenges remains strong, encouraging dedicated progress on ambitious projects. Part two of this journey focuses on the critical steps that transform a mere assembly into a display-worthy masterpiece.
Last updated: May 23, 2026
- The Dreader 2016 Part 2 phase is about detailed painting and weathering.
- Plan your color scheme and base coats carefully for a cohesive look.
- Mastering weathering techniques adds depth and realism to your Contemptor.
- Consider minor conversions or customization to make your model unique.
- Set realistic goals to complete your project by the challenge deadline.
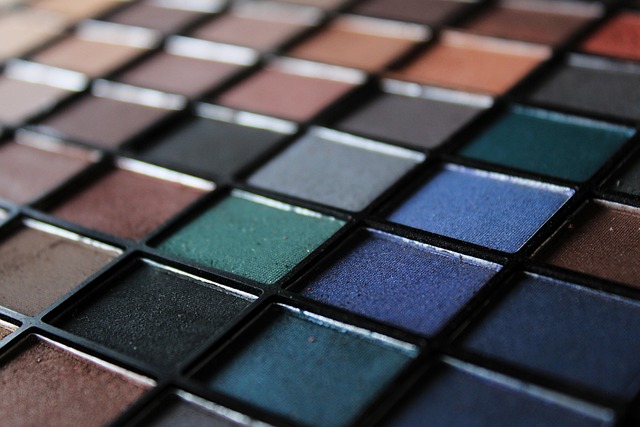
Planning You’re Contemptor Palette
Before a single brushstroke is applied, a well-defined color scheme is paramount. For a Contemptor Dreadnought, whether loyalist or chaos, consider the faction’s established color palette. Think about contrast between armor panels, metallics, and accent colors to make key details pop.
A common pitfall is choosing too many colors, leading to a visually cluttered model. For instance, a Death Guard Contemptor might benefit from muted greens and sickly yellows, accented with tarnished brass, rather than a rainbow of hues. Reference official artwork or established lore for inspiration, ensuring your palette aligns with the chosen legion or chapter.
Base Coating and Layering Techniques
Applying base coats evenly is the foundation of any good paint job. Ensure your Contemptor’s surface is clean and primed; a spray primer is often the most efficient method for large models like dreadnoughts. Multiple thin coats are always better than one thick coat, which can obscure detail.
Layering involves progressively applying lighter shades to create depth and highlight edges. For example, on a red armor plate, start with a dark red, add a slightly lighter red to the raised areas, and then a bright red or even an orange for the sharpest highlights. This gradual transition makes the armor appear more three-dimensional.
Weathering and Battle Damage Realism
A Contemptor Dreadnought, especially one from the 41st millennium, is a veteran of countless wars. Adding weathering effects brings its history to life. Techniques like dry brushing with metallic paints can simulate chipped paint and exposed metal, especially around edges and high-contact areas.
Chipping fluid or salt weathering can create realistic paint damage. Apply a layer of chipping medium over your base coat, then paint your next color over it. Once dry, use a stiff brush or even a toothpick to carefully remove paint, revealing the layer beneath. As of May 2026, advanced techniques like streaking grime using enamels offer subtle, realistic dirt and rust effects that can significantly enhance the model’s appearance.
Consider panel lines; applying a dark wash into these recesses creates shading, while a lighter wash can highlight raised details. This contrast is key to making the model’s geometry stand out.

Applying Decals and Freehand Elements
Decals are a fantastic way to add unit markings, faction symbols, and legion iconography without freehand painting. For best results, apply decals over a gloss varnish; this provides a smooth surface and prevents the decal from silvering (trapping air underneath). After applying the decal, seal it with another layer of gloss, then follow up with a matte varnish to blend it into the paintwork.
For those with steady hands and artistic flair, freehand elements can elevate your Contemptor. This could be anything from chapter symbols on cauldrons to intricate scrollwork. Practice on scrap plastic first. Even simple freehand details can add a personal touch that truly makes your Dreader project unique.
Contemptor Conversion Ideas for Part 2
While the core assembly might be complete, Part 2 of Dreader is an excellent time to consider minor conversions or customization. This could involve adding extra bits, posing the weapon arms dynamically, or even subtly altering the chassis for a more menacing silhouette.
For example, adding extra cabling, armor plates from other kits, or even some styrene rod to create custom hydraulic systems can give your Contemptor a unique flavor. The key is to ensure these additions complement the existing design and don’t detract from the overall model. A few well-placed purity seals or extra ammunition pouches can also add character without extensive modification.
Consider adding a scenic base to your Contemptor. A simple base with some texture paint and static grass can make a huge difference in presentation. For a more involved base, consider adding rubble, spent casings, or even a fallen enemy model.

Practical Tips for Completing Your Project
Completing a large project like a Contemptor Dreadnought within a hobby challenge requires discipline. Break down the painting process into manageable stages. Instead of thinking “paint the whole Dreadnought,” focus on “paint the red panels,” then “paint the metal parts,” and so on.
Set daily or weekly goals. Even 30 minutes of focused painting each day can lead to significant progress over a month. The Dreader 2016 challenge, like many others, thrives on consistent effort rather than sporadic bursts. As of May 2026, many hobbyists find digital progress trackers or simple checklists incredibly useful for staying motivated and on schedule.
Don’t be afraid to take breaks. Staring at the same model for hours can lead to burnout. Stepping away and coming back with fresh eyes can help you spot mistakes or new details to add. The goal is to finish a model you’re proud of, not to rush it into an uninspired state.
Common Mistakes to Avoid in Part 2
One of the most common mistakes is rushing the drying times between paint layers or washes. This can lead to muddy colors, unintended blending, and a generally messy finish. Patience is a virtue in miniature painting.
Another mistake is over-weathering. While battle damage is great, a model can quickly look less like a war machine and more like a scrap heap if every surface is heavily chipped, rusted, and dirtied. Apply weathering effects judiciously, focusing on areas where it would be most natural, such as the feet, lower legs, and weapon barrels.
Finally, neglecting the base detracts from the overall model. A well-painted figure on a poorly finished base just doesn’t have the same impact. Treat the base as an integral part of the narrative you’re telling with your Contemptor.
Expert Insights for Your Contemptor Build
For advanced hobbyists aiming for a truly standout Contemptor, consider color modulation. This technique involves painting armor panels with a lighter center and darker edges, creating an illusion of light source direction. It adds a professional, almost airbrushed look, even when applied with a brush.
Another tip is to think about the story your model tells. Is it a veteran that has seen centuries of war, or a newer unit still relatively pristine? Your weathering and damage should reflect this narrative. For a loyalist Contemptor, subtle damage might be more appropriate, whereas a Chaos Contemptor could bear more extreme signs of daemonic influence or brutal combat.
Referencing resources like the Warhammer 40,000 lore and official painting guides can provide specific insights into legionary markings and color schemes. For instance, Games Workshop’s own Citadel Color app offers digital guides and tutorials that are invaluable for tackling complex projects.

Frequently Asked Questions about Dreader Part 2
What is the main goal of Dreader 2016 Part 2?
The primary objective of Dreader 2016 Part 2 is to move beyond basic assembly and focus on the detailed painting and finishing stages of your Contemptor Dreadnought model.
How can I make my Contemptor look more realistic?
Achieve realism by applying weathering techniques such as dry brushing metallics for chips, using washes for shading, and adding streaking grime effects to simulate dirt and rust.
Should I add freehand elements to my Contemptor in Part 2?
Freehand elements are optional but highly recommended for unique character. Practice on scrap models first and focus on simple symbols or details that enhance the model’s faction identity.
What are some common painting mistakes to avoid?
Avoid rushing paint drying times, overdoing weathering effects, and neglecting the model’s base, as these can significantly detract from the final appearance.
How do I stay motivated to finish my Dreader project?
Break the painting process into smaller, manageable steps, set realistic daily or weekly goals, and don’t hesitate to take breaks to avoid burnout.
Can I still make conversions during Part 2 of Dreader?
Yes, minor conversions like adding extra bits, posing weapon arms, or enhancing the base are encouraged to personalize your Contemptor during this phase.
Final Thoughts on Your Dreader Journey
Completing your Contemptor Dreadnought for Dreader 2016 is a rewarding experience. Part two focuses on bringing your assembled model to life through diligent painting, weathering, and detailing. By following these steps and focusing on consistent progress, you can ensure your fearsome walker is ready to march proudly on the tabletop and in your collection by the challenge’s end.
Last reviewed: May 2026. Information current as of publication; pricing and product details may change.