
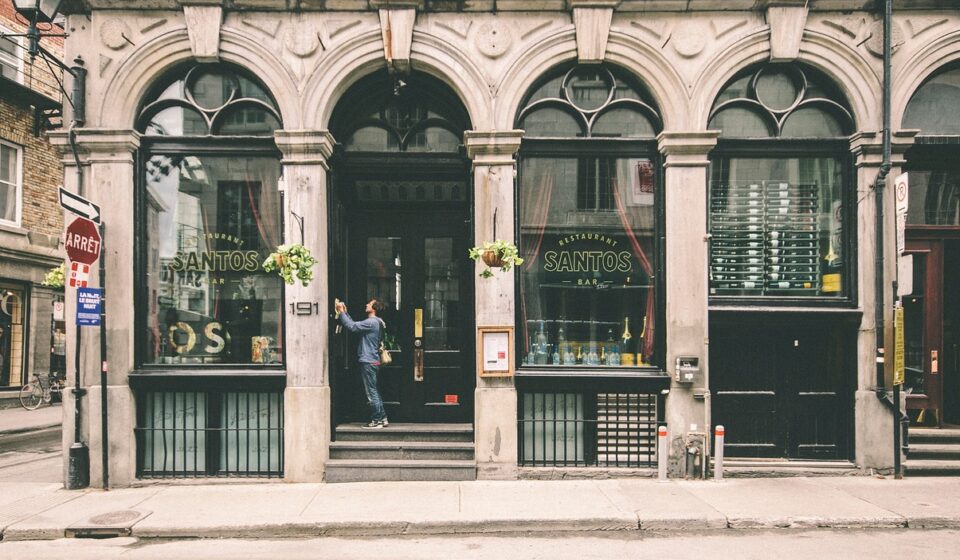
Decals lettering consists of individually cut vinyl characters and graphics pre-spaced on transfer paper for easy application onto smooth, non-porous surfaces. It provides a clean, background-free visual effect for business storefronts, vehicle displays, boat registration, and custom signage with long-lasting outdoor durability.
Unlike printed stickers with solid white or rectangular backgrounds, custom vinyl lettering is plotter-cut directly from solid-coloured vinyl rolls. Once applied and the application tape is removed, only the individual letters remain on your target surface. This distinct appearance makes cut vinyl lettering one of the most practical solutions for personalizing property and displaying commercial information.
How does vinyl decal lettering work?
Understanding how vinyl decal lettering is constructed makes installation straightforward. Every ready-to-apply vinyl graphic relies on a three-layer structure:
- Backing paper: A silicone-coated thick release paper on the bottom that protects the pressure-sensitive adhesive before installation.
- Vinyl lettering: The middle layer of precision-cut vinyl material forming your text, logo, or numbers.
- Transfer tape: A clear or semi-opaque low-tack masking tape on top that holds all letters in precise alignment when lifted off the backing paper.
During application, the transfer tape lifts the vinyl letters off the backing paper as a single unit. You align the tape onto your surface, press the vinyl firmly into place with a squeegee, and peel away the transfer tape. The acrylic adhesive on the back of the vinyl forms a stronger bond with your clean surface than it has with the transfer tape, leaving perfectly aligned characters behind.
Where can you apply decals lettering?
The versatility of cut vinyl lettering allows application across a wide array of smooth, non-porous materials. Small businesses regularly use cut lettering on storefront windows to display operating hours, phone numbers, website addresses, and promotional graphics.

Vehicle identification is another primary application. Cars, vans, delivery trucks, trailers, and work fleets rely on vinyl lettering on doors, side panels, and rear glass for clear identification and mobile advertising. Specialized applications include boat registration numbers, motorcycle fuel tanks, hard hats, and even rubber Tire lettering designed for tire sidewalls.
For interior decoration, removable vinyl lettering works well on painted interior drywall, mirrors, laptop covers, water bottles, and plastic storage containers.
Surfaces to avoid
Vinyl decal lettering requires a smooth, continuous surface to form a lasting bond. It will not adhere reliably to the following surfaces:
- Unfinished or porous wood, brick, stone, or raw concrete.
- Textured drywall, heavy orange peel, or knock-down wall finishes.
- Powder-coated metals treated with silicone or oil-repellent coats.
- Flexible fabrics, unprimed rubber, and canvas.
- Dirty, greasy, or freshly waxed surfaces that prevent adhesive contact.
Which vinyl material should you choose?
Selecting the right material determines how long your vinyl lettering lasts and how well it handles weather exposure. Reputable manufacturers like 3M and Oracal manufacture two main categories of sign vinyl: cast vinyl and calendered vinyl.
Cast vinyl
Cast vinyl is manufactured by pouring liquid PVC onto a casting sheet, resulting in a thin (typically 2 mil), dimensionally stable film without internal tension. Because it has no memory of being stretched during production, cast vinyl will not shrink, pull back, or crack when exposed to heat and sun. It conforms easily around complex curves, rivets, and vehicle contours, offering an outdoor rating of 7 to 10 years.
Calendered vinyl
Calendered vinyl is produced by rolling a plastic mass through heavy rollers, creating a thicker film (typically 2.5 to 3.5 mil). Because the process stretches the PVC material during production, calendered vinyl retains memory and may shrink slightly over time when exposed to direct heat. It is best suited for flat or simple curved surfaces.
- Intermediate calendered vinyl (e.g., Oracal 651): Uses permanent solvent adhesive and offers an outdoor rating of 3 to 6 years. Excellent for flat storefront windows, rigid signs, and flat vehicle panels.
- Removable calendered vinyl (e.g., Oracal 631): Features a matte finish and removable water-based adhesive rated for 3 years indoors. It removes cleanly without damaging indoor wall paint or leaving residue.
| Vinyl Type | Thickness | Outdoor Lifespan | Conformability | Best Application |
|---|---|---|---|---|
| Cast Vinyl (e.g., 3M 180 / Oracal 951) | 2.0 mil | 7–10 years | High (curves, rivets, deep channels) | Vehicle graphics, marine vessels, long-term outdoor signage |
| Permanent Calendered (e.g., Oracal 651) | 2.5–3.0 mil | 3–6 years | Moderate (flat or slight single curves) | Storefront windows, outdoor flat signs, fleet identification |
| Removable Calendered (e.g., Oracal 631) | 3.0 mil | 3 years (indoor) | Low (flat indoor surfaces only) | Interior wall quotes, trade show displays, short-term signage |
Designing vinyl lettering for visibility and impact
Designing effective decals lettering involves balancing typography, character height, letter spacing, and contrast. See Star Trek Characters: A Deep Dive for True Fans for detailed layout guidelines.

Font selection
Bold sans-serif fonts such as Helvetica, Arial Black, Futura, and Impact provide maximum legibility at a distance. Clean fonts remain easy to read when viewed from a moving vehicle or across a parking lot. Script, ornate, or compressed fonts can work for decorative indoor quotes, but they lose legibility quickly outdoors and feature fine lines that adhere less securely to glass or paint.
Letter height and viewing distance
A standard formula for calculating required letter height is the 1-inch per 10-feet rule. Text that is 1 inch tall can be read clearly from up to 10 feet away. If your storefront window lettering needs to be readable from 50 feet across a parking lot, choose a letter height of at least 5 inches.
Kerning and line thickness
Kerning refers to the spacing between individual letters. Tight kerning causes letters to blur together when viewed from afar, while excessive spacing makes words difficult to read quickly. Ensure character stroke weights (the width of individual letter lines) are at least 0.125 inches thick; narrow strokes tear easily during weeding and peel prematurely after installation.
How do you apply vinyl lettering step by step?
Proper surface preparation and installation technique ensure your decals lettering adheres smoothly without air pockets or misalignments.
1. Surface preparation
- Clean the application surface thoroughly with mild soap and water to remove dirt and surface grit.
- Rinse with clean water and wipe dry with a lint-free microfiber towel.
- Wipe the surface with a solution of 70% isopropyl alcohol (IPA) and water to strip remaining wax, oil, or grease. Allow to air dry completely.
2. Positioning and hinging
- Place the decal assembly (with backing paper and transfer tape intact) onto the target surface.
- Measure using a ruler from fixed reference points (such as window edges or vehicle body lines) to ensure the text is straight.
- Apply a strip of painter’s tape along the top edge of the transfer tape to create a “top hinge”, or across the middle to create a “center hinge”.
3. Dry application method
- Lift the graphic upward using your tape hinge, then peel away the backing paper from top to bottom, exposing the adhesive back of the vinyl letters.
- Hold the transfer tape taut slightly away from the surface so the vinyl does not touch prematurely.
- Using a plastic squeegee, stroke firmly from the hinge center outward toward the edges at a 45-degree angle. Work systematically downward to push out air.
4. Wet application method (for glass and large graphics)
For large window graphics or smooth metal, wet application prevents immediate tacking and allows minor repositioning. Spray the clean surface lightly with a solution of 1 quart water and 2 drops of dish soap. Position the decal, squeegee all water out thoroughly from the center outward, and let it dry for 20 to 30 minutes before removing the transfer tape.
5. Transfer tape removal
- Allow the adhesive to set for a few minutes.
- Peel the transfer tape back flat against the surface at a sharp 180-degree angle. Do not pull outward away from the surface, as this lifts the letters.
- If a letter lifts with the tape, press the tape back down, squeegee firmly over that section, and attempt peeling again.
Common installation problems and fixes
Even carefully installed vinyl lettering can encounter minor issues during or after application. Here is how to resolve common problems:
- Air bubbles under vinyl: Do not burst air bubbles by flattening them forcibly. Pierce a microscopic hole at the edge of the bubble using a fine sewing pin, then press the trapped air out through the pinhole.
- Lettering sticking to backing paper: If letters fail to transfer to the top tape when peeling, lay the decal face down on a flat surface, rub the back firmly with a squeegee, and peel the backing paper back flat.
- Wrinkles on curved vehicle channels: Apply light heat from a hairdryer on a low setting for 2 seconds to soften the vinyl, then gently stroke it into the curve using a felt-edge squeegee.
Maintenance, cleaning, and long-term care
Proper maintenance protects vinyl graphics against premature edge lifting, color fading, and peeling:
- Hand washing: Wash vinyl-lettered vehicles and storefront glass with mild car wash soap and water. Avoid abrasive sponges, stiff brushes, or harsh solvent cleaners.
- Pressure washing precautions: Keep pressure washer spray nozzles at least 12 inches away from vinyl edges. Spray perpendicular to the surface rather than aiming high-pressure water directly under the letter edges.
- Ice removal: When clearing winter ice from lettered vehicle windows, use soft brushes instead of sharp plastic ice scrapers over the graphic areas.
How to remove old vinyl lettering cleanly
When updating storefront messaging or retiring fleet vehicles, removing old vinyl lettering without damaging paint or glass requires heat and adhesive solvent:
- Warm the vinyl letters gently using a hairdryer on low heat to soften the adhesive layer.
- Lift the edge of a letter using your fingernail or a plastic scraper (avoid metal blades on painted vehicle surfaces).
- Peel the vinyl back slowly at a 45-degree angle while continuing to apply gentle heat.
- Clean residual adhesive using an automotive adhesive remover or isopropyl alcohol, then wipe clean with a microfiber towel.
Understanding costs and economic value
The upfront cost, the value, and overall durability make custom vinyl lettering one of the most cost-effective options for commercial signage.
Pricing varies based on letter height, font complexity, material grade, and single versus multi-colour designs. Small custom cut lettering sets start under a few dollars per word. Full commercial vehicle door setups or storefront business hour displays generally range from $50 to $300 for material and pre-spaced fabrication. DIY installation eliminates professional labor charges for smaller projects.
Compared to hand-painted lettering or full vehicle wraps, pre-spaced vinyl decals provide targeted visual messaging at a fraction of the cost while maintaining outdoor service life for up to a decade.
Sources: Tire lettering
Frequently asked questions
Can I apply vinyl lettering myself?
Yes, custom vinyl lettering is supplied pre-spaced on transfer tape specifically designed for DIY application. With surface cleaning, accurate positioning, and a plastic squeegee, you can achieve smooth, professional results at home.
How long does custom vinyl lettering last outdoors?
High-quality outdoor cast vinyl lettering from manufacturers like 3M or Oracal typically lasts between 5 to 10 years outdoors. Calendered outdoor vinyl generally lasts 3 to 6 years depending on sun exposure and climate conditions.
How do I remove old vinyl lettering without damaging paint?
Warm the lettering gently with a hairdryer on low heat to soften the adhesive, then peel each character back slowly at a flat angle. Clean remaining residue using isopropyl alcohol or an automotive adhesive remover with a microfiber cloth.
What is the difference between decals lettering and printed stickers?
Printed stickers consist of ink printed onto a solid background material (such as a white or clear vinyl shape). Decals lettering is cut directly out of solid-coloured vinyl rolls, leaving no background material around or between the individual letters after application.
Can vinyl lettering go through an automated car wash?
Touchless automatic car washes are safe once vinyl lettering has cured for 48 hours after installation. Avoid car washes with heavy mechanical brushes that can catch fine letter edges and cause premature peeling.