
Troubleshooting Autochk.exe Errors
This article aims to provide a concise overview of troubleshooting autochk.exe errors, offering insights into the causes of these errors and potential solutions to resolve them.
- Download and install the Exe and Dll File Repair Tool.
- The software will scan your system to identify issues with exe and dll files.
- The tool will then fix the identified issues, ensuring your system runs smoothly.
Origin of autochk exe
Autochk.exe is a crucial file in the Windows operating system that is responsible for checking the integrity of the file system during startup. It plays a vital role in preventing data loss and maintaining the health of your computer. However, sometimes you may encounter errors related to autochk.exe, which can lead to system instability and potential data loss.
To troubleshoot autochk.exe errors, you can follow these steps:
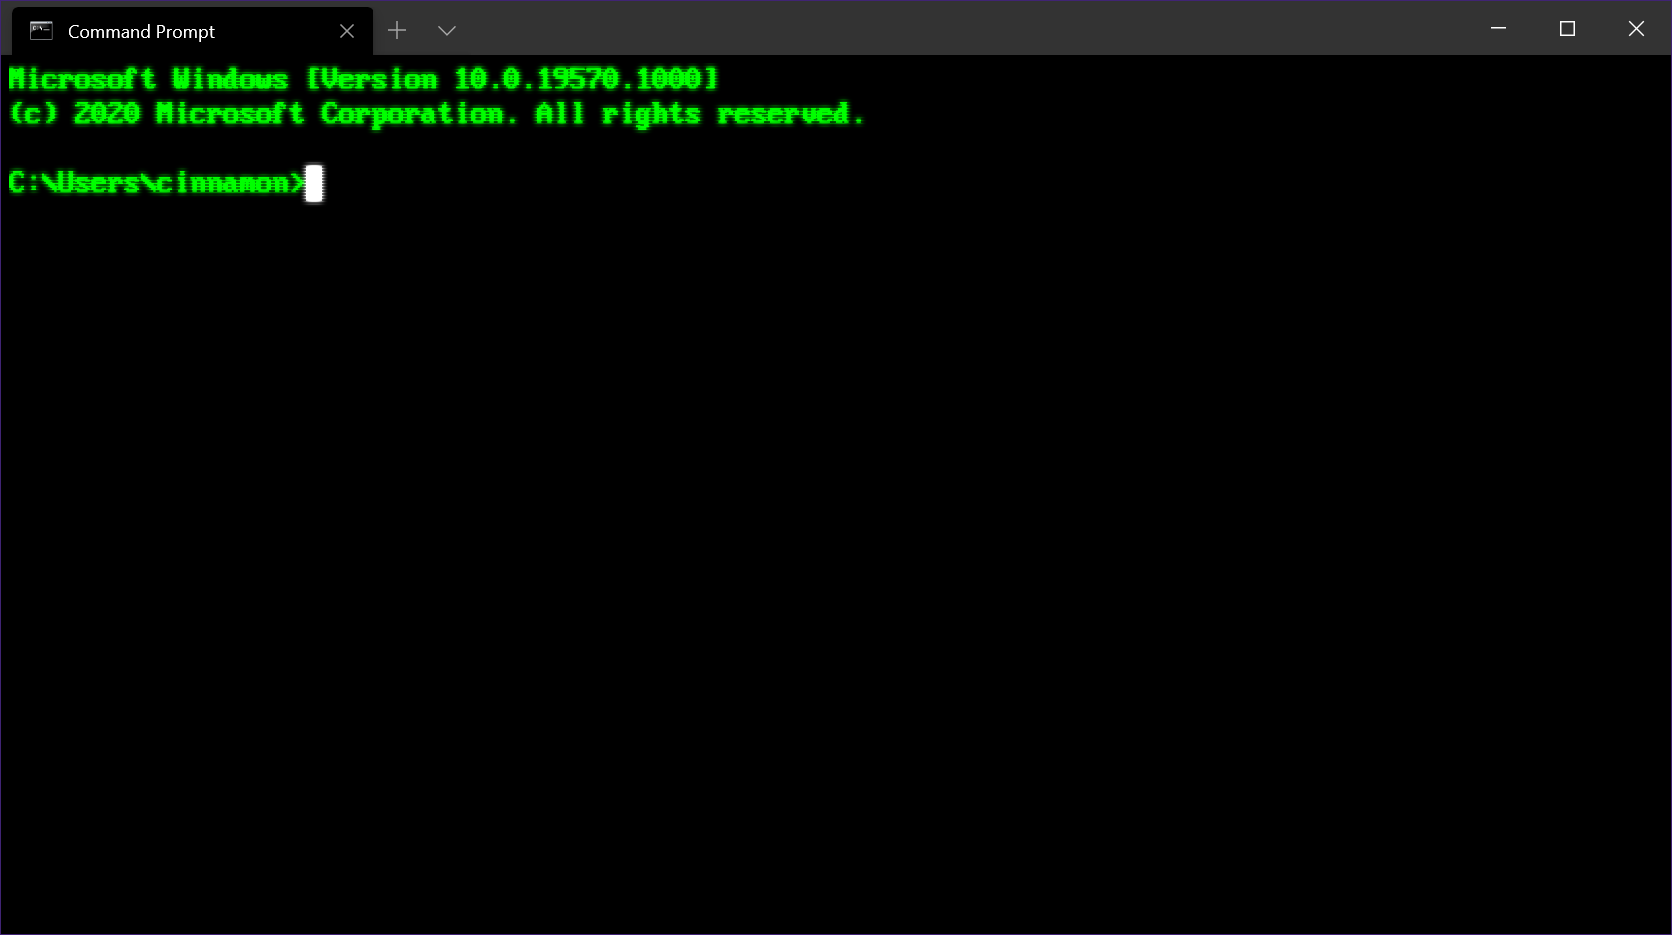
1. Boot your computer into the command-line interface by restarting and pressing F8 repeatedly.
2. Select “Safe Mode with Command Prompt” from the boot options menu.
3. Once in the command prompt, navigate to the directory where autochk.exe is located, typically C:\Windows\System32.
4. Run the command “sfc /scannow” to scan and repair any system file issues.
5. If the issue persists, you can try running the “chkdsk” command with various parameters to fix any disk errors.
6. Finally, restart your computer and check if the autochk.exe errors have been resolved.
Purpose and function of autochk exe
The autochk.exe file is a critical component of the Windows operating system and is responsible for checking and repairing errors on disk partitions. It is primarily used with the NTFS file system and is executed during the boot process or when a partition is mounted.
Autochk.exe operates through the command-line interface and performs various tasks such as checking the file system integrity, scanning for bad sectors, and correcting errors found on the disk. It plays a crucial role in maintaining the health and stability of the operating system.
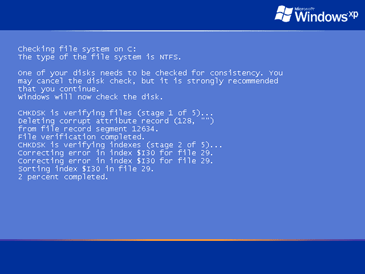
If you encounter errors related to autochk.exe, it can indicate problems with your hard disk drive or file system. To troubleshoot these errors, you can run chkdsk /f command in the Command Prompt to schedule a disk check during the next system startup.
Legitimacy of autochk exe
The legitimacy of autochk.exe, a computer program in the architecture of Windows NT, plays a crucial role in troubleshooting autochk.exe errors. Autochk.exe is an executable file that runs during the boot process to check and repair disk errors on NTFS partitions.
If autochk.exe encounters an error or fails to run properly, it can lead to various issues like system instability or failure to boot. To troubleshoot autochk.exe errors, there are a few steps you can follow:
1. First, ensure that autochk.exe is a legitimate file from Microsoft. Verify its location in the Windows directory or System32 folder.
2. Use the “sfc /scannow” command in the Command Prompt to scan and repair any corrupted system files, including autochk.exe.
3. Check for any recently installed programs or updates that may have caused conflicts with autochk.exe. Uninstalling or rolling back these changes can help resolve the issue.
4. Use the “chkdsk” command followed by the drive letter and the “/f” parameter to schedule a disk check and repair any errors.
If the problem persists, seeking assistance from a knowledgeable user or consulting Microsoft support may be necessary.
Is autochk exe safe to use?
Autochk.exe is a computer program that is safe to use as it is a built-in tool in Microsoft Windows. It is responsible for checking the integrity of the file system during the boot process and fixing any errors it detects. This executable is an essential part of the Windows operating system and is located in the System32 folder.
If you encounter errors related to autochk.exe, it could indicate a problem with your hard disk drive or file system. To troubleshoot these errors, you can try running a disk check using the chkdsk command in the command prompt. This will help identify and fix any issues with your disk.
To run a disk check, open the command prompt as an administrator and type “chkdsk /f” followed by the drive letter you want to check (e.g., C:). Press Enter and follow the on-screen instructions.
Keep in mind that disk checks can take some time to complete, so be patient. It is also recommended to close any open programs and save your work before running a disk check to avoid potential data loss.
Understanding the usage of autochk exe
Autochk.exe is a crucial component in Windows NT-based operating systems, including Microsoft Windows. It is responsible for checking the integrity of disk partitions during the boot process. If there are any errors or inconsistencies detected, autochk.exe attempts to fix them automatically.
However, there are instances where autochk.exe encounters errors itself. These errors can occur due to various reasons such as a corrupt file system, disk errors, or issues with the Windows registry. When this happens, it can cause disruptions in the boot process and lead to system instability.
To troubleshoot autochk.exe errors, you can try running a disk check using the chkdsk command in the Command Prompt. This tool can help identify and fix disk-related issues. Additionally, you can also use the System File Checker (SFC) tool to scan and repair any corrupted system files that may be causing the errors.
It’s important to note that autochk.exe errors can pose a risk to the integrity of your system and information privacy. Therefore, it’s recommended to address these errors promptly to prevent further issues. If you’re unsure or uncomfortable troubleshooting these errors yourself, it’s always best to seek assistance from a knowledgeable professional.
Potential malware associated with autochk exe
- Scan your system for malware
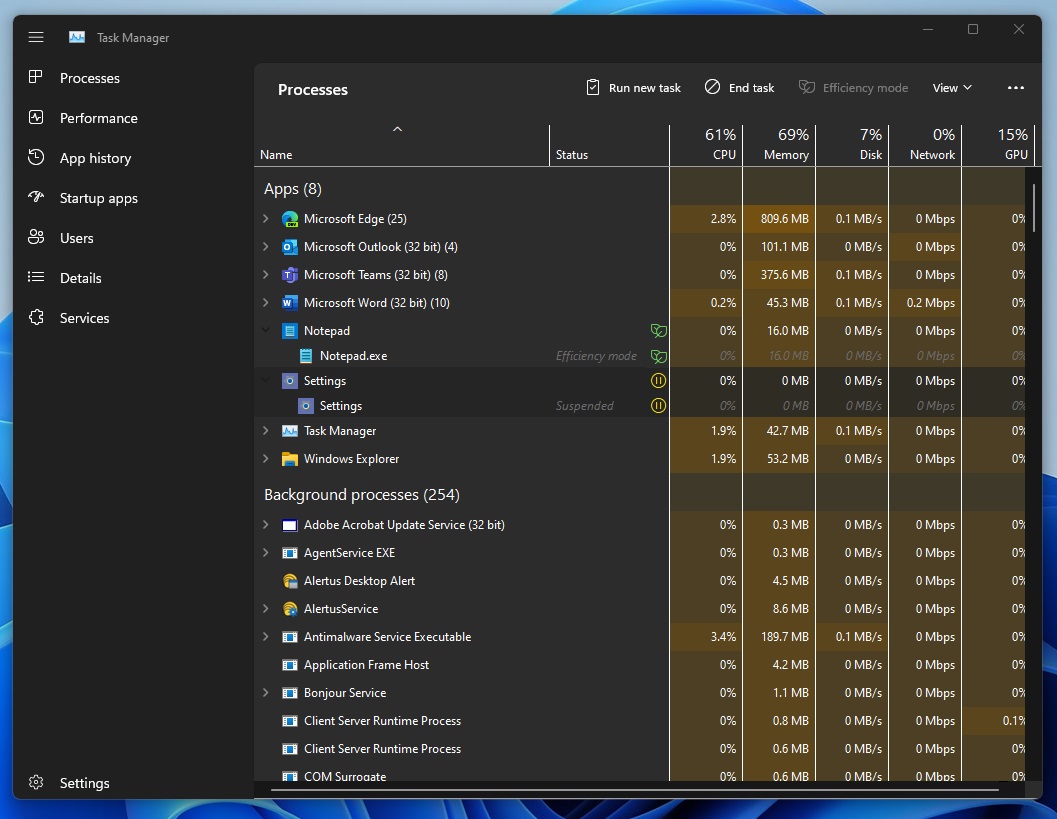
- Open Task Manager by pressing Ctrl+Shift+Esc
- Click on the Processes tab
- Look for any suspicious processes related to autochk.exe
- If found, right-click on the process and select End Task
- Run a full system scan with antivirus software
- Open your installed antivirus software
- Click on the Scan or Scan Now option
- Select Full Scan or Complete Scan
- Wait for the scan to complete and follow any prompts to remove detected malware
- Update your antivirus software and definitions
- Open your installed antivirus software
- Look for an Update or Check for Updates option

- Follow the prompts to update your antivirus software and definitions
- Perform a system restore
- Open the Start menu
- Type System Restore and select the corresponding result
- Follow the on-screen instructions to restore your system to a previous working state
- Reinstall or repair Windows
- Insert your Windows installation media (CD/DVD or USB)
- Restart your computer and boot from the installation media
- Select your language preferences and click Next
- Click on Repair your computer
- Follow the on-screen instructions to either reinstall or repair your Windows installation
Troubleshooting autochk exe running in the background
If you are experiencing issues with autochk.exe running in the background, here are a few troubleshooting steps to help you resolve the problem.
1. Check for disk errors: Run a disk check using the chkdsk command to identify and fix any errors on your disk.
2. Disable autochk.exe: If you don’t want autochk.exe to run during startup, you can disable it using the command prompt or the Registry Editor.
3. Scan for malware: Malware infections can sometimes cause autochk.exe to run in the background. Use a reliable antivirus program to scan your system and remove any threats.
4. Update your drivers: Outdated or incompatible drivers can also trigger autochk.exe errors. Update your drivers to the latest versions to ensure compatibility with your operating system.
5. Perform a system restore: If the issue started recently, you can try restoring your system to a previous point when autochk.exe was not causing any problems.
High CPU usage caused by autochk exe
If you’re experiencing high CPU usage caused by the autochk.exe process, there are a few troubleshooting steps you can take to resolve the issue.
First, check if any disk partitions are not properly configured or have errors. Open Command Prompt as an administrator and run the command chkdsk /f followed by the drive letter of the problematic partition. This will scan and fix any errors found.
Next, check if any scheduled tasks are causing the high CPU usage. Open the Task Scheduler and navigate to Task Scheduler Library. Look for any tasks related to autochk.exe and disable or delete them.
In some cases, a corrupt or outdated Windows installation can cause high CPU usage. Consider running a System File Checker scan by opening Command Prompt as an administrator and running the command sfc /scannow.
If the issue persists, it’s recommended to seek further assistance from a knowledgeable user or contact Microsoft support for help in troubleshooting this specific error.
autochk exe as a system file

Autochk.exe is a system file in Windows that helps with disk checking and repairing errors. If you encounter errors related to autochk.exe, there are a few troubleshooting steps you can take.
First, try running a virus scan to ensure that the file is not infected. Viruses or malware can modify or corrupt system files, including autochk.exe.
If the file is not infected, you can try running a system file checker tool to scan and repair any corrupted system files, including autochk.exe. Open a command prompt with administrator privileges and run the command “sfc /scannow“.
If the issue persists, you can also try running a disk check using the chkdsk command. Open a command prompt with administrator privileges and run the command “chkdsk C: /f /r“, replacing “C:” with the drive letter of the partition you want to check.
Remember to restart your computer after running these troubleshooting steps to apply any changes made.
Associated software with autochk exe
- Open Task Manager by pressing Ctrl+Shift+Esc.
- Go to the Processes tab and end any processes related to the associated software.
- Open the Control Panel by clicking on the Start button and selecting Control Panel.
- Click on Programs and Features or Add or Remove Programs.
- Locate the associated software from the list of installed programs.
- Select the software and click on Uninstall or Remove.
- Follow the prompts to complete the uninstallation process.
- Visit the official website of the software and download the latest version.
- Run the installation file and follow the on-screen instructions to install the updated software.
Repair Method 2: Run System File Checker
- Open Command Prompt as an administrator by pressing Windows Key + X and selecting Command Prompt (Admin).
- Type sfc /scannow and press Enter.
- Wait for the System File Checker to scan and repair any corrupt system files.
- Restart your computer.
Repair Method 3: Perform a Clean Boot
- Press Windows Key + R to open the Run dialog box.
- Type msconfig and press Enter to open the System Configuration window.
- Go to the Services tab and check the box that says Hide all Microsoft services.
- Click on Disable all to disable all non-Microsoft services.
- Go to the Startup tab and click on Open Task Manager.
- Disable all startup programs by selecting each one and clicking on Disable.
- Close the Task Manager and go back to the System Configuration window.
- Click on Apply and then OK.
- Restart your computer and check if the autochk.exe error is resolved.
Latest Update: July 2025
We strongly recommend using this tool to resolve issues with your exe and dll files. This software not only identifies and fixes common exe and dll file errors but also protects your system from potential file corruption, malware attacks, and hardware failures. It optimizes your device for peak performance and prevents future issues:
- Download and Install the Exe and Dll File Repair Tool (Compatible with Windows 11/10, 8, 7, XP, Vista).
- Click Start Scan to identify the issues with exe and dll files.
- Click Repair All to fix all identified issues.

Creator of autochk exe
Autochk.exe is a crucial component of the Windows operating system that performs disk checking and repairs during the boot process. However, encountering errors with autochk.exe can disrupt the system startup and cause inconvenience.
To troubleshoot autochk.exe errors, start by checking the disk partitions for any issues using the Disk Management tool. Ensure that the drive is properly connected and functioning correctly.
If the error persists, try running the CHKDSK command in Command Prompt with the /f parameter to fix any potential file system errors.
You can also schedule a disk check during the next system restart by using the chkntfs /c command. This can help identify and repair any disk errors before Windows starts up.
If the problem persists, consider running a scan for malware using a reliable antivirus program, as infections can also cause autochk.exe errors.
Safe to end task autochk exe?
If you encounter an error related to the autochk.exe file, you may be wondering if it is safe to end the task. In most cases, it is not recommended to end the autochk.exe task as it plays a crucial role in the disk checking process. Autochk.exe is responsible for checking the integrity of your hard drive and fixing any errors that it finds.
Ending the autochk.exe task prematurely may result in incomplete disk checking and potentially lead to further issues down the line. It is best to allow autochk.exe to complete its task uninterrupted.
If you are experiencing errors with autochk.exe, it is advisable to troubleshoot the issue rather than ending the task. This can be done by running a disk check using the chkdsk command in the command prompt or using the built-in Windows Error Checking tool.
Description of the autochk exe process
Autochk.exe is a vital process in Windows that runs during system startup to check and repair disk errors. It is responsible for verifying the integrity of file systems, ensuring data consistency, and fixing any issues it detects.
When a computer is booted, Autochk.exe automatically scans all connected drives for errors, such as bad sectors or corrupted file systems. It then attempts to repair these errors to prevent further damage and improve system performance.
If you encounter errors related to Autochk.exe, it could indicate underlying issues with your hard drive or file system. To troubleshoot these errors, you can try running a disk check using the chkdsk command in Command Prompt. This can help identify and resolve any problems with your disk partitions.
Additionally, make sure you have the latest updates and patches installed for your operating system, as these can often address known issues with Autochk.exe. If the problems persist, consider seeking assistance from a knowledgeable technician or referring to Microsoft’s support documentation.
autochk exe not responding – what to do?
If you are encountering the “autochk.exe not responding” error, there are a few steps you can take to troubleshoot the issue.
First, try restarting your computer and see if the error persists. Sometimes, a simple reboot can resolve the problem.
If the error continues, you can try running a disk check using the Command Prompt. To do this, open the Command Prompt as an administrator and type “chkdsk /f” followed by the drive letter of the partition you want to check. This will scan and fix any errors on the disk.
Another option is to run a system file checker scan. Open the Command Prompt as an administrator and type “sfc /scannow“. This will scan and repair any corrupted system files that may be causing the autochk.exe error.
Removal tools for autochk exe
- Registry cleaner: A reliable registry cleaner can help identify and remove any invalid or corrupted entries related to autochk.exe in the Windows registry.
- Antivirus software: Run a full system scan using a reputable antivirus program to detect and remove any malware or viruses that may be causing issues with autochk.exe.
- System File Checker (SFC): Use the SFC command in the Command Prompt to scan for and restore corrupted system files, including autochk.exe.
- Windows Update: Ensure that your operating system is up to date by installing the latest Windows updates, as Microsoft often releases patches and fixes for known issues with system files like autochk.exe.
- Driver updates: Check for and install any available driver updates for your hardware components, as outdated or incompatible drivers can cause autochk.exe errors.
- Disk cleanup: Use the built-in Disk Cleanup tool to free up disk space and remove unnecessary files, as a full or fragmented hard drive can lead to autochk.exe errors.
- Startup programs: Disable any unnecessary startup programs that may be conflicting with autochk.exe during system boot-up.
- System Restore: If the autochk.exe errors started recently, consider using the System Restore feature to revert your computer’s settings to a previous point in time when the errors were not occurring.
Configuring autochk exe at startup
To configure autochk.exe at startup, follow these steps:
1. Open the Command Prompt as an administrator by right-clicking on the Start menu and selecting “Command Prompt (Admin).”
2. Type “chkntfs /x C:” and press Enter, replacing “C:” with the drive letter you want to exclude from autochk.exe. This prevents autochk.exe from running on that specific drive during startup.
3. To include the drive in autochk.exe, type “chkntfs /d” and press Enter. This will reset the exclusion for all drives.
4. If you want to schedule autochk.exe to run at the next startup, type “chkntfs /c” and press Enter. This will enable autochk.exe for all drives during the next system boot.
5. To check the current autochk.exe configuration for all drives, type “chkntfs” and press Enter.
Performance impact of autochk exe
The performance impact of autochk.exe can vary depending on the specific error being encountered. When autochk.exe encounters an error during the boot process, it can significantly slow down the boot time of the system. This is because autochk.exe is responsible for checking and repairing disk partitions during startup.
To troubleshoot autochk.exe errors and minimize performance impact, follow these steps:
1. Check disk partitions: Ensure that all disk partitions are properly configured and functioning correctly.
2. Repair disk errors: Use the chkdsk command to scan and repair any disk errors. This can be done by opening a command prompt and typing “chkdsk /f” followed by the drive letter.
3. Update system architecture: Keep your Windows NT architecture up to date by installing the latest updates and patches.
4. Manage file system: Regularly clean up unnecessary files and defragment your hard drive to optimize performance.
Updating autochk exe
Updating autochk.exe is an important step in troubleshooting autochk.exe errors. To begin, you’ll need to identify the version of Windows you’re using and make sure you have administrative privileges.
First, locate the autochk.exe file on your computer. It is usually found in the %SystemRoot%\System32 folder.
Next, download the latest version of autochk.exe from a trusted source, ensuring it matches your Windows version and architecture.
Before replacing the existing autochk.exe file, create a backup in case something goes wrong.
Now, open the Command Prompt with administrative privileges and navigate to the folder where the new autochk.exe file is located. Use the ren command to rename the existing autochk.exe file to something like autochk.exe.old.
Finally, use the copy command to copy the new autochk.exe file to the System32 folder. Restart your computer and test if the autochk.exe errors have been resolved.
Downloading autochk exe
If you are experiencing errors related to the autochk.exe file, you can try troubleshooting the issue by downloading a fresh copy of the file. This may help resolve any corruption or missing file issues that could be causing the error.
To download autochk.exe, you can follow these steps:
1. Open your web browser and search for “autochk.exe download”.
2. Look for a reliable source or website that offers downloads for system files.
3. Download the autochk.exe file from a trusted source.
4. Once the download is complete, locate the downloaded file on your computer.
5. Right-click on the file and select “Copy”.
6. Navigate to the directory where the original autochk.exe file is located.
7. Right-click in the directory and select “Paste” to replace the old file with the new one.
8. Confirm any prompts or warnings that may appear during the process.
By replacing the existing autochk.exe file with a fresh copy, you may be able to resolve any errors that were occurring. Remember to always use caution when downloading files from the internet and to scan them for viruses before using them.
If the issue persists, it may be necessary to seek further assistance from a computer technician or support forum.
Compatibility with different Windows versions
![]()
- Step 1: Verify the compatibility of Autochk.exe with the Windows version
- Check the version of Windows installed on your computer.
- Ensure that Autochk.exe is compatible with the version of Windows you are using.
- Step 2: Update or reinstall the Autochk.exe file
- Visit the official Microsoft website.
- Search for the latest version of Autochk.exe compatible with your Windows version.
- Download and install the updated or compatible Autochk.exe file.
- Step 3: Run the Windows Compatibility Troubleshooter
- Open the Control Panel.
- Click on “Troubleshooting” or “System and Security” (depending on your Windows version).
- Select “Run programs made for previous versions of Windows” or “Run compatibility troubleshooter”.
- Follow the on-screen instructions to run the troubleshooter.
- Apply the recommended compatibility settings for Autochk.exe.
- Step 4: Utilize Windows Compatibility Mode
- Locate the Autochk.exe file on your computer.
- Right-click on the file and select “Properties”.
- Go to the “Compatibility” tab.
- Check the box that says “Run this program in compatibility mode for”.
- Select the previous Windows version from the drop-down menu.
- Click “Apply” and then “OK” to save the changes.
- Step 5: Consult with Microsoft Support
- If the above steps do not resolve the compatibility issue, contact Microsoft Support for further assistance.
- Provide them with details about the Autochk.exe error and your Windows version.
- Follow their guidance and instructions to troubleshoot the problem.
Alternatives to autochk exe
When troubleshooting autochk. exe errors, it’s important to know that there are alternatives to this program. One alternative is using the chkdsk command in the command prompt. Simply open the command prompt as an administrator and type “chkdsk /f” to scan and fix any errors on your disk.
Another alternative is to use third-party disk partitioning tools, such as MiniTool Partition Wizard or EaseUS Partition Master, which can perform similar functions to autochk. exe. These tools often have more advanced features and user-friendly interfaces. Additionally, you can try using the Windows Recovery Environment (WinRE) to troubleshoot autochk.
exe errors. By booting into WinRE, you can access various tools and utilities that can help diagnose and fix issues with autochk. exe.
