Troubleshooting Winpeshl.exe Windows 11 Errors
This article provides valuable insights into troubleshooting Winpeshl.exe errors that may occur in Windows 11, offering effective solutions to resolve these issues.
- Download and install the Exe and Dll File Repair Tool.
- The software will scan your system to identify issues with exe and dll files.
- The tool will then fix the identified issues, ensuring your system runs smoothly.
What is winpeshl.exe in Windows 11?
Winpeshl.exe is a program in Windows 11 that is responsible for launching the Windows Preinstallation Environment (WinPE) Shell. This shell provides a command-line interface for troubleshooting and repairing issues with the operating system.
If you encounter errors related to winpeshl.exe, it could indicate a problem with your Windows installation. One common error is the “0xc000000f” error code, which may occur if the winpeshl.ini file is missing or corrupted.
To troubleshoot winpeshl.exe errors, you can try the following steps:
1. Make sure your computer meets the minimum system requirements for Windows 11.
2. Check for any virus/malware infections using a reliable antivirus program like Norton AntiVirus.
3. Update your Windows 11 installation to the latest version.
4. Verify the integrity of the winpeshl.exe file by checking its MD5 checksum, SHA1, and CRC32 values.
5. Ensure that the winpeshl.ini file is present and correctly configured.
6. If you’re using a virtual machine, such as VMware or VirtualBox, make sure the virtualization settings are properly configured.
7. Try bypassing the winpeshl.exe process by using the startnet.cmd file instead.
8. If you’re experiencing a boot loop or winpeshl.exe not launching successfully, you may need to repair your Windows installation using a bootable USB or DVD.
Is winpeshl.exe in Windows 11 safe?
Winpeshl.exe is a safe component in Windows 11 used for troubleshooting errors. However, if you encounter any issues related to winpeshl.exe, there are several steps you can follow to troubleshoot and resolve them.
First, ensure that your Windows 11 system is up to date by installing the latest KB updates. Additionally, check for any third-party software or drivers that may be causing conflicts and try disabling or uninstalling them.
If you have a Fujitsu notebook or other devices running Windows 10, make sure that the winpeshl.exe file is not corrupted. You can verify this by checking its MD5 checksum, which should match “fd429c23a5ccbe5e2453d17e591ec005”.
If you’re experiencing a boot loop or error code 0xc000000f, try bypassing Windows and launching the startnet.cmd file instead. You can also use tools like virtualbox or vmware to troubleshoot the issue.
In some cases, the winpeshl.ini file may be causing errors. Check its location and ensure that it is properly configured. If necessary, you can try replacing it with a known working winpeshl.ini file.
The purpose of winpeshl.exe in Windows 11
Winpeshl.exe is a crucial component in Windows 11 that can sometimes encounter errors. If you’re facing issues with winpeshl.exe, there are a few troubleshooting steps you can take to resolve them.
First, check for any virus or malware infections on your computer, as they can cause winpeshl.exe errors. Use a reliable antivirus program like Norton AntiVirus to scan your system and remove any threats.
If the winpeshl.ini file is corrupt or missing, you can try bypassing the Windows startup process by pressing the Shift key and clicking Restart on the login screen. This will open the Advanced Startup Options menu, where you can select Troubleshoot, then Advanced Options, and finally Command Prompt. In the Command Prompt, type “startnet.cmd” and press Enter. This should successfully launch the boot.wim file and resolve the error 0xc000000f.
It’s important to note that winpeshl.exe errors can also occur due to hardware or driver issues. Ensure that all your drivers are up to date, especially for your motherboard and storage devices. Additionally, check if your TPM (Trusted Platform Module) is enabled and ready for use.
python

import os
def run_command_in_pe_shell(command):
# Define the command to run in the PE shell
pe_shell_command = f'winpeshl.exe "{command}"'
# Execute the command using the PE shell
os.system(pe_shell_command)
# Example usage
run_command_in_pe_shell('echo Hello, Windows!')
In this sample code, we define a function `run_command_in_pe_shell` that takes a command as input. It constructs the command to be executed using winpeshl.exe and the specified command. The `os.system` function is then used to execute the constructed command in the PE shell.
Legitimacy of winpeshl.exe in Windows 11
Winpeshl.exe is a legitimate file in Windows 11 that can sometimes cause errors. If you’re experiencing issues with winpeshl.exe, there are a few troubleshooting steps you can try.
First, check for any virus or malware infections on your PC using a reliable antivirus program like Norton AntiVirus. This can help identify and remove any potential threats that may be affecting the winpeshl.exe file.
Next, ensure that your Windows 11 is up to date with the latest updates and patches. Microsoft regularly releases updates to address bugs and improve the overall performance of the operating system.
If the issue persists, you can try bypassing the winpeshl.ini file by following these steps:
1. Insert a Windows installation USB or DVD into your computer.
2. Boot from the USB or DVD and select the “Repair your computer” option.
3. Choose the “Troubleshoot” option and open the Command Prompt.
4. Type “startnet.cmd” and press Enter.
5. This should successfully launch the boot.wim file and bypass the winpeshl.ini error.
If none of these solutions work, it may be helpful to seek assistance from the Windows community on platforms like Reddit. They may have encountered similar issues and can offer additional guidance.
Should I delete winpeshl.exe in Windows 11?
If you’re experiencing errors related to winpeshl.exe in Windows 11, deleting the file is not recommended. Winpeshl.exe is a legitimate Windows system file and deleting it can cause further issues with your operating system. Instead, try these troubleshooting steps:
1. Update Windows: Make sure your Windows 11 is up to date with the latest updates and patches. This can resolve many system-related errors.
2. Scan for virus/malware: Run a full scan with a reliable antivirus program to check for any potential infections that may be causing the error.
3. Repair system files: Use the System File Checker tool to scan for and repair any corrupted system files that could be causing the winpeshl.exe error.
4. Check hardware compatibility: Ensure that your hardware, such as the motherboard and storage devices, meet the minimum requirements for Windows 11. Incompatible hardware can cause various errors.
5. Seek professional help: If the error persists, consider seeking assistance from a professional technician or contacting Microsoft support for further guidance.
Origin of winpeshl.exe in Windows 11
Winpeshl.exe is a critical system file in Windows 11 that is responsible for launching the Windows Preinstallation Environment (WinPE) Shell. It is commonly used for troubleshooting and repairing various system errors.
If you encounter winpeshl.exe errors, it could indicate a problem with the file itself or other underlying issues on your system. To troubleshoot these errors, follow these steps:
1. Check the file location: Verify that winpeshl.exe is located in the correct directory, typically “C:\Windows\System32”.
2. Scan for viruses/malware: Run a full system scan using a reliable antivirus program to detect and remove any potential infections.
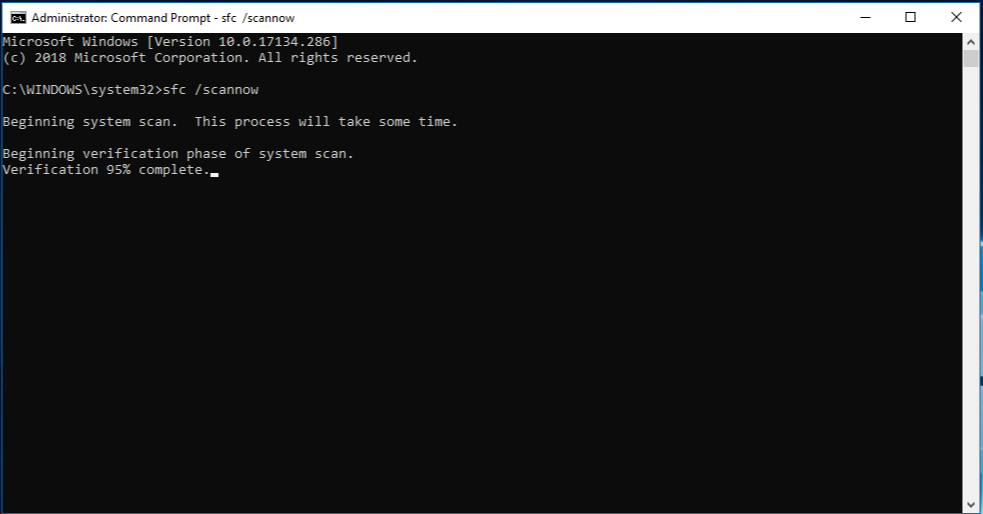
3. Repair system files: Use the System File Checker (SFC) tool to scan and repair corrupted system files. Open Command Prompt as an administrator and run the command “sfc /scannow“.
4. Update drivers: Outdated or incompatible drivers can cause winpeshl.exe errors. Update your drivers to the latest versions from the manufacturer’s website.
5. Perform a clean boot: Temporarily disable all startup programs and non-Microsoft services to identify any conflicts that may be causing the error.
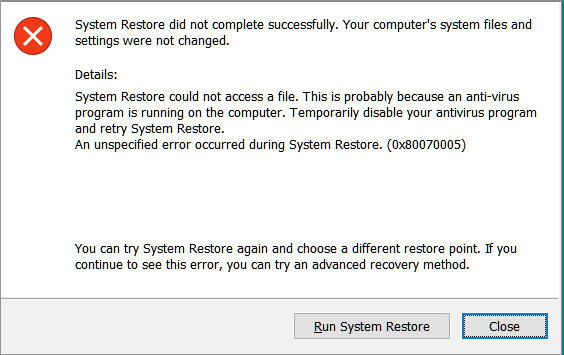
6. Restore the system: If the issue started recently, try using System Restore to revert your system to a previous working state.
Understanding the usage of winpeshl.exe in Windows 11
Winpeshl.exe is a crucial component in Windows 11 that is used during the troubleshooting process. It is responsible for executing commands and initializing necessary processes when starting the Windows Preinstallation Environment (WinPE).
If you encounter errors related to winpeshl.exe, there are a few steps you can take to troubleshoot the issue.
Firstly, ensure that your system meets the hardware requirements for Windows 11, including TPM 2.0 and Secure Boot. These features are essential for winpeshl.exe to function properly.
If your system meets the requirements, you can try bypassing the winpeshl.ini file by modifying the startnet.cmd. This file controls the initialization process and can help resolve certain errors.
Additionally, make sure that the boot.wim file, which contains the necessary files for WinPE, is not corrupted. You can verify its integrity by checking its SHA1 and CRC32 values.
If none of these solutions work, it is possible that your system has been infected by a virus or malware. Run a thorough scan using reliable antivirus software to eliminate any potential threats.
Dealing with winpeshl.exe malware in Windows 11
If you’re dealing with winpeshl.exe malware in Windows 11, you may encounter various errors that can be frustrating to troubleshoot. Here are some steps to help you address these issues:
1. Disable Secure Boot: Access your computer’s BIOS settings and disable Secure Boot. This can help bypass certain restrictions and allow you to make necessary changes.
2. Check for virus/malware infections: Run a thorough scan using reliable antivirus software like Norton AntiVirus to detect and remove any malicious programs that may be causing winpeshl.exe errors.
3. Repair corrupted system files: Use the System File Checker (SFC) tool to scan and repair any corrupted system files. Open the Command Prompt as an administrator and run the command “sfc /scannow” to initiate the scan.
4. Update drivers and Windows: Ensure that all your drivers and Windows 11 are up to date. Outdated drivers or software can sometimes cause compatibility issues, leading to winpeshl.exe errors.
5. Check disk for errors: Run the CHKDSK utility to scan and repair any errors on your storage device. Open Command Prompt as an administrator and run the command “chkdsk C: /f” (replace “C:” with the appropriate drive letter).
Troubleshooting winpeshl.exe in Windows 11: Can’t delete
If you’re facing issues with winpeshl.exe in Windows 11, such as being unable to delete it, follow these troubleshooting steps:
1. Check the File Location: Ensure that winpeshl.exe is located in the correct directory, which is typically C:\Windows\System32.
2. Scan for Virus/Malware Infections: Run a thorough scan using reliable antivirus software to detect and remove any potential infections.
3. Repair Corrupted Files: Use the System File Checker (SFC) tool to scan for and repair any corrupted system files that may be causing the issue.
4. Check Startup Programs: Open the Task Manager and look for any suspicious or unwanted programs that may be launching winpeshl.exe during startup. Disable or remove them if necessary.
5. Use Command Prompt: Open the Command Prompt as an administrator and execute the following commands to bypass windows and startnet.cmd, respectively:
bcdedit /set {default} bootmenupolicy legacy
bcdedit /set {default} bootstatuspolicy ignoreallfailures
6. Check Boot Configuration: Ensure that the boot.wim file is properly configured and hasn’t been corrupted. You can try using the Windows installation media to repair the boot configuration.
winpeshl.exe running in the background in Windows 11
First, check if any recently installed programs or updates may be causing the issue. Uninstalling or rolling back these changes can sometimes resolve the problem.
Next, ensure that your antivirus software is up to date and perform a full scan of your system to check for any virus or malware infections.
If the issue persists, you can try bypassing the winpeshl.exe process by following these steps. Open the command prompt by pressing Win + X and selecting “Command Prompt (Admin)”. Then, enter the following commands:
startnet.cmd
If the command is successfully launched, it means that the winpeshl.ini file is not causing the error.
If you are still experiencing the error code 0xc000000f, it may indicate a problem with your boot configuration. In this case, you can try using the Windows Recovery Environment to repair your system.
High CPU usage caused by winpeshl.exe in Windows 11
If you’re experiencing high CPU usage caused by winpeshl.exe in Windows 11, here are some troubleshooting steps to help resolve the issue.
1. Check for virus/malware infections: Run a full scan with a reliable antivirus program like Norton AntiVirus 2009 Gaming Edition to ensure your system is clean.
2. Inspect winpeshl.ini file: Verify that the winpeshl.ini file is correctly configured and not causing any conflicts. You can find this file in the root directory of your storage device.
3. Bypass Windows startup: Use the startnet.cmd file to bypass Windows startup and directly launch the desired boot.wim file.
4. Verify boot.wim integrity: Check for any corruption in the boot.wim file. If necessary, replace it with a working copy to ensure successful launching.
5. Update drivers and software: Make sure all your drivers and software are up to date, including Windows 11 and any relevant KB updates.
6. Perform a clean boot: Disable all unnecessary startup programs and services to identify any potential conflicts.
winpeshl.exe as a system file in Windows 11
Troubleshooting Winpeshl.exe Windows 11 Errors:
If you’re experiencing errors related to winpeshl.exe in Windows 11, there are a few steps you can take to resolve the issue. First, ensure that your system is up to date with the latest Windows 11 updates. This can help address any known bugs or compatibility issues.
Next, check for any virus or malware infections on your PC using a reliable antivirus program such as Norton AntiVirus. Viruses or malware can corrupt system files, including winpeshl.exe, causing errors.
If the issue persists, you can try repairing the winpeshl.ini file or the startnet.cmd file. These files are crucial for winpeshl.exe to function properly. Repairing or replacing them may resolve the error.
Additionally, make sure that your USB hard drive or any other external devices are properly connected and recognized by your system. Issues with external devices can sometimes cause winpeshl.exe errors.
If none of these steps solve the problem, it may be worth seeking further assistance from Windows support forums or contacting Microsoft directly for more specific troubleshooting advice.
Latest Update: July 2025
We strongly recommend using this tool to resolve issues with your exe and dll files. This software not only identifies and fixes common exe and dll file errors but also protects your system from potential file corruption, malware attacks, and hardware failures. It optimizes your device for peak performance and prevents future issues:
- Download and Install the Exe and Dll File Repair Tool (Compatible with Windows 11/10, 8, 7, XP, Vista).
- Click Start Scan to identify the issues with exe and dll files.
- Click Repair All to fix all identified issues.

Associated software with winpeshl.exe in Windows 11
- Check for Malware or Viruses
- Scan your computer using a reliable antivirus software.
- Remove any detected malware or viruses.
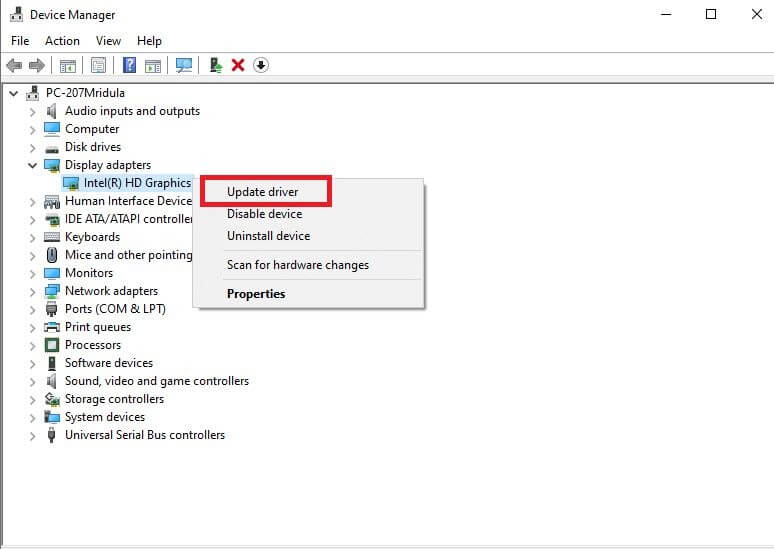
- Update Device Drivers
- Open Device Manager by pressing Windows Key + X and selecting Device Manager from the menu.
- Expand the categories and locate the driver associated with the winpeshl.exe error.
- Right-click on the driver and select Update driver.
- Follow the on-screen prompts to update the driver.
- Perform a System File Check
- Open Command Prompt as an administrator by pressing Windows Key + X and selecting Command Prompt (Admin) from the menu.
- Type sfc /scannow and press Enter.
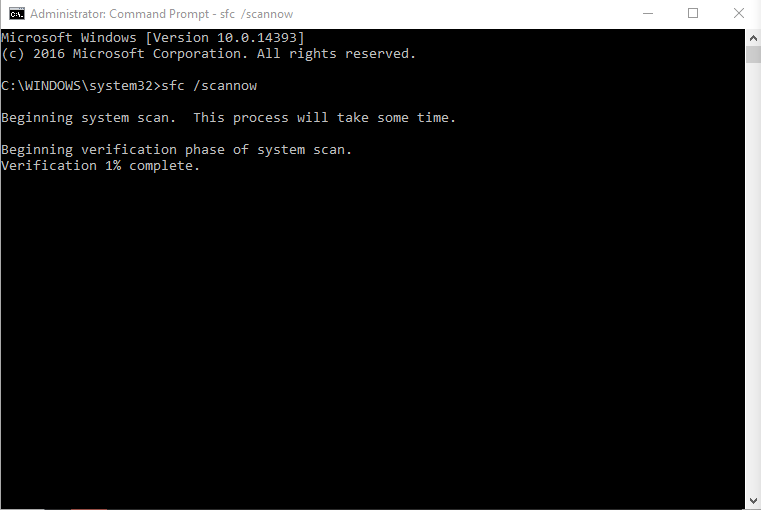
- Wait for the scan to complete and repair any corrupted system files.
- Check for Windows Updates
- Open Settings by pressing Windows Key + I.
- Go to Windows Update and click on Check for updates.
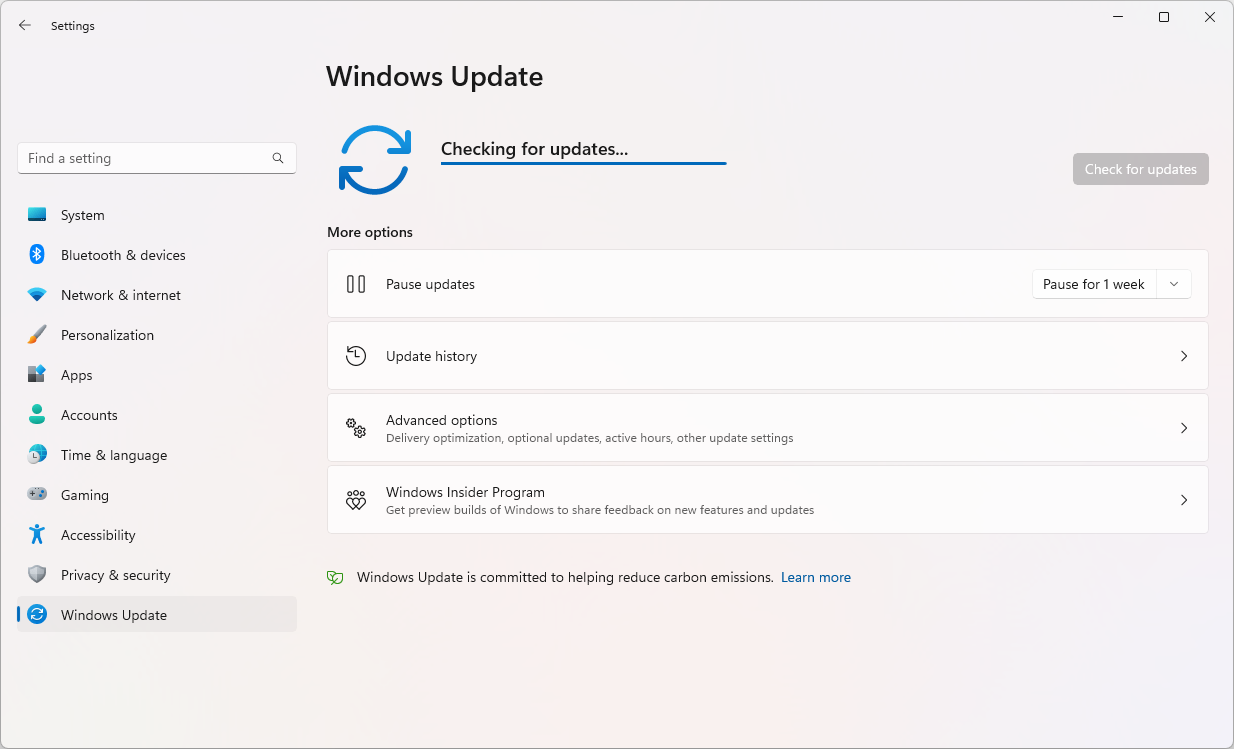
- If updates are available, download and install them.
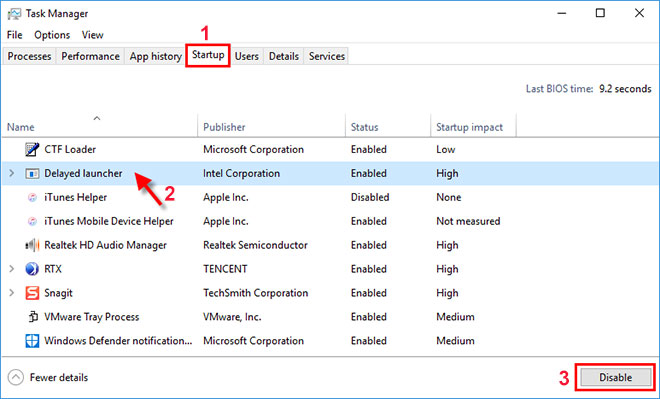
- Perform a Clean Boot
- Open Task Manager by pressing Ctrl+Shift+Esc.
- Go to the Startup tab and click on Open Task Manager.
- Disable any unnecessary startup programs by right-clicking on them and selecting Disable.
- Reinstall Associated Software
- Open Control Panel by pressing Windows Key + X and selecting Control Panel from the menu.
- Go to Programs and click on Uninstall a program.
- Locate the software associated with winpeshl.exe error.
- Right-click on it and select Uninstall.
- Download the latest version of the software from the official website and install it.
Who created winpeshl.exe in Windows 11?
Winpeshl.exe in Windows 11 was created by Microsoft. It is a crucial component of the Windows Preinstallation Environment (WinPE) used for troubleshooting and repairing operating system issues. If you encounter errors related to winpeshl.exe, there are a few steps you can take to resolve them.
First, check for any virus or malware infections as they can cause winpeshl.exe errors. Run a thorough scan using a reliable antivirus program, such as Norton AntiVirus.
Next, ensure that the winpeshl.ini file and startnet.cmd are properly configured. These files control the initialization and launch of WinPE. Make sure they are correctly set up to avoid any errors.
If you are experiencing a boot error with the code 0xc000000f, it may indicate a problem with the boot.wim file. Try repairing it using the Windows 11 installation media.
Is it safe to end task winpeshl.exe in Windows 11?
Ending the task winpeshl.exe in Windows 11 is generally safe and can help troubleshoot errors related to this process. Winpeshl.exe is responsible for launching the Windows PE (Preinstallation Environment) Shell, which is used during system recovery and diagnostics.
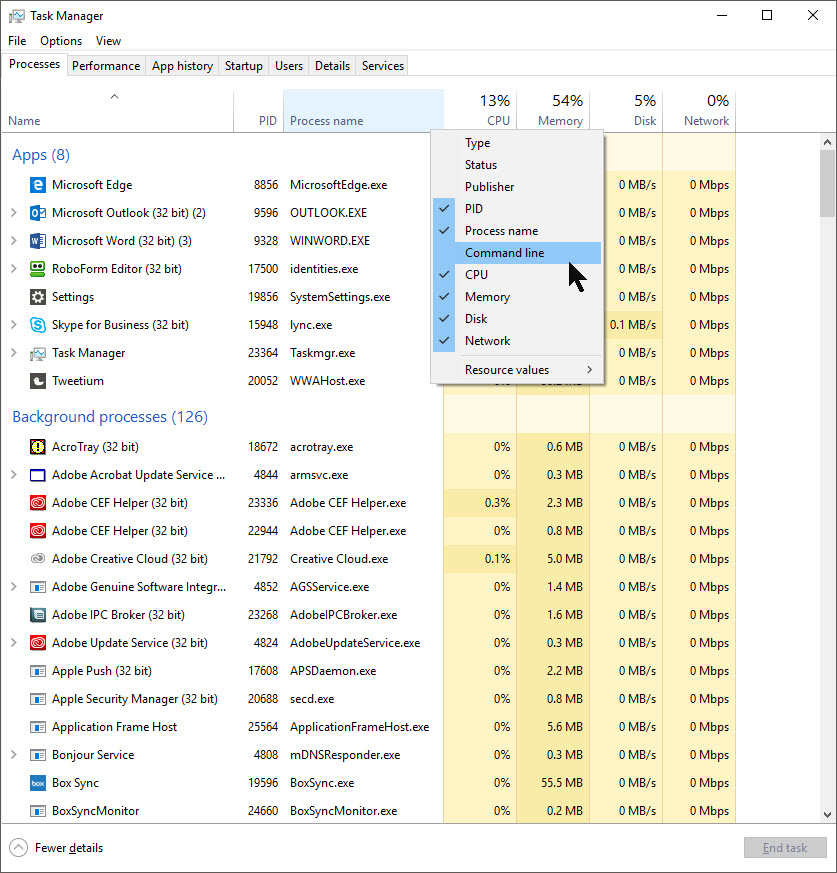
If you encounter an error with winpeshl.exe, you can try ending the task to resolve the issue. To do this, press Ctrl + Shift + Esc to open the Task Manager, navigate to the Processes tab, locate winpeshl.exe, right-click on it, and select End Task.
It’s important to note that ending the task may interrupt ongoing system repairs or diagnostics, so make sure you understand the potential consequences. Additionally, if you suspect a virus/malware infection, it’s advisable to run a thorough scan with reliable security software like Norton AntiVirus.
Detailed description of the winpeshl.exe process in Windows 11
The winpeshl.exe process in Windows 11 is a crucial component for troubleshooting errors. It is responsible for launching the startnet.cmd file, which is used to initialize the Windows Preinstallation Environment (PE). This process is essential for booting into the PE environment and resolving various issues.
If you encounter an error with winpeshl.exe, such as “error 0xc000000f,” there are several steps you can take to troubleshoot the problem. Firstly, ensure that the winpeshl.ini file is properly configured and contains the correct commands. Additionally, check that the boot.wim file is not corrupted and can be successfully launched.
If you are experiencing the “Windows 10 – Unclickable” error, it may be caused by a virus/malware infection or corruption in the winpeshl.exe process. In such cases, running a thorough scan with a reliable antivirus program like Norton AntiVirus 2009 Gaming Edition can help identify and remove any malicious software.
winpeshl.exe in Windows 11 not responding: Troubleshooting tips
-
Restart your computer:
- Close all open programs and save your work.
- Click on the Start button in the taskbar.

- Click on the Power button.
- Choose Restart and wait for your computer to reboot.
-
Perform a clean boot:
- Press the Windows key and type “msconfig”.
- Click on System Configuration from the search results.
- In the General tab, select Selective startup.
- Uncheck the box next to Load startup items.

- Go to the Services tab.
- Check the box next to Hide all Microsoft services.

- Click on Disable all.
- Go to the Startup tab.
- Click on Open Task Manager.
- In the Startup tab of Task Manager, disable all startup items by right-clicking on each item and selecting Disable.
- Close Task Manager and go back to the System Configuration window.
- Click on OK and restart your computer.
-
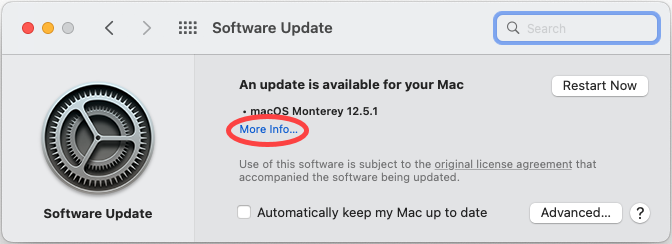
Run Windows Update:
- Press the Windows key and type “Windows Update”.
- Click on Windows Update settings from the search results.
- Click on Check for updates.
- If there are any available updates, click on Install now and follow the on-screen instructions.
- Restart your computer after the updates are installed.
-
Perform a system file check:
- Press the Windows key and type “Command Prompt”.
- Right-click on Command Prompt from the search results and select Run as administrator.
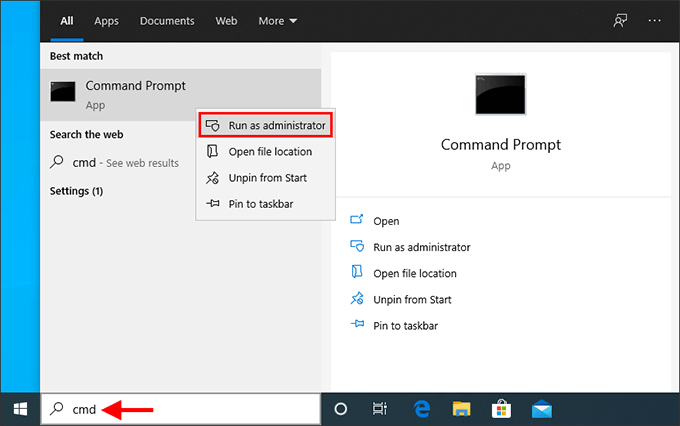
- In the Command Prompt window, type “sfc /scannow” and press Enter.
- Wait for the system file check to complete.
- If any errors are found, restart your computer and run the system file check again.
-
Perform a system restore:
- Press the Windows key and type “System Restore”.
- Click on Create a restore point from the search results.

- In the System Properties window, click on System Restore.
- Click on Next and choose a restore point before the issue started occurring.
- Follow the on-screen instructions to perform the system restore.
- Restart your computer after the system restore is completed.
Removal tools for winpeshl.exe in Windows 11
- Method 1: Using Task Manager
- Open Task Manager by pressing Ctrl+Shift+Esc
- Select the Processes tab
- Locate and select the winpeshl.exe process
- Click on the End Task button
- Confirm the action by clicking End Process
- Method 2: Using Command Prompt
- Press Windows key + X and select Command Prompt (Admin)
- Type taskkill /F /IM winpeshl.exe and press Enter
- Wait for the command to execute and close Command Prompt
- Method 3: Using Windows PowerShell
- Press Windows key + X and select Windows PowerShell (Admin)
- Enter the command Get-Process to list all running processes
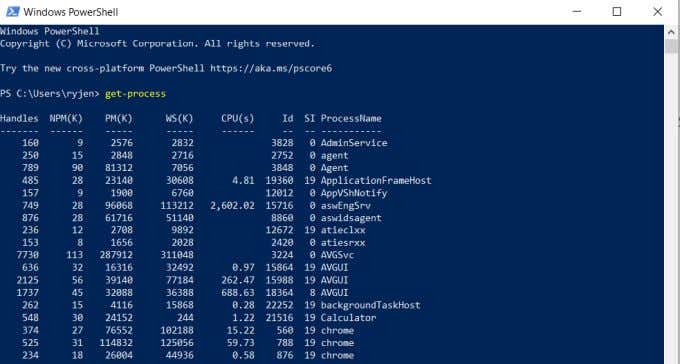
- Identify the winpeshl.exe process
- Use the command Stop-Process -Name “winpeshl.exe” to terminate the process
- Close Windows PowerShell
- Method 4: Using System Configuration
- Press Windows key + R to open the Run dialog box
- Type msconfig and press Enter
- In the System Configuration window, navigate to the Services tab
- Scroll down and uncheck the box next to winpeshl.exe
- Click Apply and then OK
- Restart your computer for the changes to take effect
Managing winpeshl.exe at startup in Windows 11
- Understanding winpeshl.exe and its role in the Windows 11 startup process
- Common errors related to winpeshl.exe and their potential causes

- Troubleshooting winpeshl.exe errors using built-in Windows 11 tools
- Using System Configuration to manage winpeshl.exe at startup
- Modifying registry settings to resolve winpeshl.exe errors
- Reinstalling or updating device drivers to fix winpeshl.exe issues
- Performing a clean boot to isolate winpeshl.exe errors
- Scanning for and removing malware that may be affecting winpeshl.exe
- Creating a system restore point before making any changes to winpeshl.exe
- Seeking professional assistance if unable to resolve winpeshl.exe errors independently
Troubleshooting winpeshl.exe issues in Windows 11
Once in safe mode, open the Command Prompt by typing “cmd” in the search bar. From there, navigate to the winpeshl.ini file location using the “cd” command. Check if the startnet.cmd file is present and properly configured. If not, create or modify the file as needed.
If these steps don’t solve the problem, try repairing Windows using the installation media. Boot from a USB hard drive or DVD and select the “Repair your computer” option. Follow the on-screen instructions to repair any system files that may be causing the winpeshl.exe errors.
Performance impact of winpeshl.exe in Windows 11
The performance impact of winpeshl.exe in Windows 11 can vary depending on various factors.
One potential issue that can arise is errors related to winpeshl.exe, which can affect the overall performance of your system. To troubleshoot these errors, you can try a few steps. First, make sure that your system is up to date with the latest Windows updates.
Next, check for any virus or malware infections that could be affecting winpeshl.exe. Running a reliable antivirus program can help identify and remove any malicious software.
If the issue persists, you can also try disabling unnecessary startup programs or services that may be conflicting with winpeshl.exe. To do this, open the Task Manager and navigate to the Startup tab. Here, you can disable any programs that are not essential for your system’s operation.
Additionally, you may want to consider checking the winpeshl.ini file and the startnet.cmd file for any errors or conflicts.
winpeshl.exe update in Windows 11: What to expect
When troubleshooting Winpeshl.exe errors in Windows 11, there are a few things you can expect. First, ensure that your operating system is up to date with the latest winpeshl.exe update. This can help resolve any known issues or bugs.
If you’re experiencing errors, it’s important to check the winpeshl.ini file and the startnet.cmd file for any potential issues or misconfigurations. Make sure these files are properly configured and that there are no typos or errors present.
Another troubleshooting step is to check for any virus or malware infections on your system. Run a thorough scan using a reliable antivirus program like Norton AntiVirus to detect and remove any potential threats.
If the issue persists, consider booting from a Windows 11 installation media and running a repair or reinstallation process. This can help fix any corrupted files or settings that may be causing the winpeshl.exe errors.
Downloading winpeshl.exe for Windows 11
To troubleshoot winpeshl.exe errors in Windows 11, you may need to download winpeshl.exe. Follow these steps to download winpeshl.exe for Windows 11:
1. Open a web browser and search for “winpeshl.exe download for Windows 11.”
2. Look for a reliable source, such as the official Microsoft website or trusted software download platforms.
3. Click on the download link for winpeshl.exe.
4. Save the file to a location on your computer, such as the Downloads folder.
5. Once the download is complete, locate the winpeshl.exe file on your computer.
6. Before using the file, make sure to scan it with an updated antivirus program to ensure it is free from any virus or malware infections.
7. After scanning, you can use winpeshl.exe to troubleshoot any winpeshl.exe errors in Windows 11.
Compatibility of winpeshl.exe with different Windows versions
- Windows 11: Compatible
- Windows 10: Compatible
- Windows 8.1: Compatible
- Windows 8: Compatible
- Windows 7: Compatible
- Windows Vista: Compatible

- Windows XP: Compatible
Alternatives to winpeshl.exe in Windows 11
If you’re experiencing errors with winpeshl.exe in Windows 11, there are alternatives you can try. One option is to use the startnet.cmd file instead of the winpeshl.ini file. This file allows you to specify commands that will run during the WinPE startup process. Another alternative is to use the boot.wim file, which contains the Windows Preinstallation Environment (WinPE) and can be used to boot your system.
Additionally, you can troubleshoot winpeshl.exe errors by checking for virus/malware infections using a reliable antivirus program, such as Norton AntiVirus. It’s also a good idea to ensure that your Windows 11 system is up to date with the latest Service Pack and updates. If you’re using an OEM computer, you can reach out to the manufacturer, such as Fujitsu, for further assistance.