Fixing WerFault.exe Application Error in Windows 10 – Stop Issues
This article explores the various methods to fix the WerFault.exe Application Error in Windows 10, addressing the common issues associated with it.
- Download and install the Exe and Dll File Repair Tool.
- The software will scan your system to identify issues with exe and dll files.
- The tool will then fix the identified issues, ensuring your system runs smoothly.
Purpose of werfault.exe -u -p -s
The purpose of the “werfault.exe -u -p -s” command in fixing the WerFault.exe application error in Windows 10 is to disable the Windows Error Reporting System. This command stops the system from generating error reports when an application crashes, including WerFault.exe itself. By disabling this feature, you can prevent the constant appearance of error notifications and improve system performance.
To use the command, open the Command Prompt as an administrator and enter “werfault.exe -u -p -s” without the quotation marks. Press Enter to execute the command. This will disable the Windows Error Reporting System and stop the error notifications.
Legitimacy of werfault.exe -u -p -s
The legitimacy of werfault.exe -u -p -s in fixing the WerFault.exe application error in Windows 10 is questionable. While some sources suggest using this command in the command prompt can resolve the issue, it is not a guaranteed solution.
It is important to note that werfault.exe is a legitimate Windows process responsible for handling error reports. However, using the -u -p -s flags with this command may not always fix the problem.
If you are experiencing WerFault.exe application errors, it is recommended to try other troubleshooting steps such as updating your Windows version, running a malware scan, or disabling any security software that may be causing conflicts.
If the issue persists, it may be necessary to seek further assistance from Microsoft support or consult with a professional technician.
Origin and creator of werfault.exe -u -p -s
Werfault.exe -u -p -s is a process in Windows 10 that is responsible for handling error reporting. It was created by Microsoft and is a component of the operating system.
This process is designed to collect information about errors and crashes that occur in various programs and send them to Microsoft for analysis. It helps identify issues and improve the overall stability of the system.
If you are experiencing a Werfault.exe Application Error, it could be due to a memory violation or corruption in a program. This error message may appear on your computer screen, indicating a problem with a specific application.
To fix this error, you can try a few troubleshooting steps. First, check if your Windows 10 version is up to date and install any pending updates. You can also try disabling any security software or antivirus programs temporarily, as they may interfere with the functionality of Werfault.exe.
If the error persists, you can try running the built-in Windows Defender or other security software to scan for any malware or viruses that may be causing the issue.
In some cases, the error may be related to a specific program or game. If you recently installed or updated a program, try uninstalling or reinstalling it to see if that resolves the issue.
Usage and function of werfault.exe -u -p -s
The werfault.exe -u -p -s command is used to configure the behavior of the Windows Error Reporting (WER) service. This command allows users to specify how errors are reported and handled by the system. By using these specific options, you can customize the WER service to suit your needs.
The -u option enables user notifications for errors, ensuring that users are informed when an error occurs. The -p option allows you to specify the path where error reports are saved, giving you control over the storage location. The -s option enables memory corruption detection, helping to identify and prevent memory-related issues.
To use these options, open a command prompt as an administrator and type “werfault.exe -u -p [path] -s” (without quotes), replacing [path] with the desired location for error reports.
By correctly configuring the werfault.exe -u -p -s command, you can enhance the functionality of the WER service and effectively address werfault.exe application errors in Windows 10.
Associated software and system file with werfault.exe -u -p -s
Fixing WerFault.exe Application Error in Windows 10 – Stop Issues
When encountering the WerFault.exe application error in Windows 10, it can be helpful to understand the associated software and system files. Below is a table listing some of the key information:
| Associated Software | System File |
|---|---|
| Microsoft Windows Operating System | windows\system32\werfault.exe |
| Windows Error Reporting | windows\system32\wer.dll |
| Microsoft Visual Studio | Program Files (x86)\Common Files\Microsoft Shared\DW\dw20.exe |
| Third-party software | Varies depending on the specific application |
By understanding the associated software and system files, you can troubleshoot and fix the WerFault.exe application error more effectively.
Is werfault.exe -u -p -s safe to end task?
If you encounter the “WerFault.exe -u -p -s” error in Windows 10, you may be wondering if it is safe to end the task. The answer is yes, it is safe to end the “WerFault.exe” process. This process is responsible for handling Windows Error Reporting, which notifies you when an application crashes.
To end the task, follow these steps:
1. Press Ctrl + Shift + Esc to open Task Manager.
2. Click on the Processes tab.
3. Locate and select the WerFault.exe process.
4. Click on the End Task button.
Ending the task will stop the error message from appearing, but it won’t fix the underlying issue causing the error. If you continue to experience problems, it is recommended to troubleshoot the specific application or software that is triggering the error.
Latest Update: July 2025
We strongly recommend using this tool to resolve issues with your exe and dll files. This software not only identifies and fixes common exe and dll file errors but also protects your system from potential file corruption, malware attacks, and hardware failures. It optimizes your device for peak performance and prevents future issues:
- Download and Install the Exe and Dll File Repair Tool (Compatible with Windows 11/10, 8, 7, XP, Vista).
- Click Start Scan to identify the issues with exe and dll files.
- Click Repair All to fix all identified issues.

Troubleshooting and performance impact of werfault.exe -u -p -s
If you are experiencing issues with the werfault.exe -u -p -s process on Windows 10, it is important to troubleshoot and understand its impact on your system’s performance.
Some common symptoms of werfault.exe errors include application crashes, error messages, and high CPU or memory usage. These errors can be caused by various factors, such as conflicting software, memory protection violations, or issues with the sandboxie control.
To resolve these issues, you can try the following steps:
1. Update your Windows edition: Ensure that you have the latest updates installed on your computer, as this can fix known issues with werfault.exe.
2. Disable sandboxie: If you are using sandboxie for application isolation, try disabling it temporarily to see if it resolves the problem.
3. Check for memory violations: Use Dell Endpoint Security Suite Enterprise or a similar memory protection tool to scan for any violations that may be causing the werfault.exe errors.
4. Disable unnecessary apps: Some apps or services running in the background may be causing conflicts with werfault.exe. Try disabling or uninstalling them to see if the issue persists.
5. Use Windows Defender: Ensure that your Windows Defender is up to date and running, as it can help detect and resolve issues with werfault.exe.
High CPU usage and impact on system performance
High CPU usage can have a significant impact on system performance, causing sluggishness and slow response times. In the case of the WerFault. exe Application Error in Windows 10, this issue can be particularly frustrating. Symptoms may include a game or client crashing, a notification about a Memory Protection violation, or general system malfunction. The cause of this error is often related to the WerFault.
exe component, which is responsible for handling error messages in Windows. To resolve this issue, you can try a few steps. First, make sure your Windows edition is up to date. Next, you can try disabling any unnecessary programs or processes running in the background. If the problem persists, you may need to download the latest version of WerFault.
exe from a trustworthy source. Additionally, some users have found success by running their system in a sandbox environment using software like Sandboxie Control. By taking these steps, you can effectively stop the issues caused by the WerFault. exe Application Error and improve your system’s performance.
Malware potential and removal tool for werfault.exe -u -p -s
Malware Potential and Removal Tool for werfault.exe -u -p -s:
If you suspect that the werfault.exe process on your Windows 10 system is infected with malware, it’s crucial to take immediate action to prevent any further damage. To address this issue, you can utilize a powerful malware removal tool. This tool will scan your system thoroughly and eliminate any malicious files associated with werfault.exe. Remember to download the tool from a trusted source to avoid downloading additional malware.
To remove malware from werfault.exe, follow these steps:
1. Download a reputable malware removal tool from a trusted source.
2. Install the tool on your Windows 10 system.
3. Run a full scan of your system to detect and remove any malware.
4. Follow the tool’s instructions to quarantine or delete the detected malware.
5. Restart your computer to ensure that all changes are applied.
By employing a reliable malware removal tool, you can safeguard your system from potential threats and ensure a smooth and secure computing experience.
Running in the background and not responding issues
If you are experiencing issues with WerFault.exe running in the background and not responding, there are a few steps you can take to fix the problem.
First, try restarting your computer. This can often resolve any temporary glitches or conflicts that may be causing the issue.
If that doesn’t work, you can try running a memory diagnostic test to check for any memory protection violations. To do this, open the Windows Memory Diagnostic tool by searching for it in the start menu.
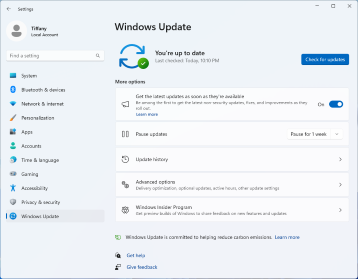
If the problem persists, you may need to download and install the latest updates for your Windows 10 operating system. Check for updates in the Windows Update settings and install any available updates.
Another possible cause of the issue could be a conflict with other software or applications on your computer. Try disabling any unnecessary startup programs or running your computer in a clean boot environment to isolate the source of the problem.
If none of these solutions work, it may be worth reaching out to the client or manufacturer of the software that is causing the issue for further assistance.
Windows version compatibility and werfault.exe -u -p -s
Windows version compatibility is crucial when dealing with the werfault.exe error in Windows 10. This error, often caused by memory protection violations, can lead to application malfunctions and error windows popping up on your laptop screen. To fix this issue, follow these steps:
1. Ensure that your Windows version is compatible with the werfault.exe utility.
2. Open the Command Prompt as an administrator by searching for “cmd” in the Start menu, right-clicking on it, and selecting “Run as administrator.”
3. Type “werfault.exe -u -p -s” in the Command Prompt and press Enter.
4. Wait for the notification that says “WerFault.exe has been reset.” This will reset the Windows Error Reporting service.
5. If the issue persists, consider downloading and installing the latest updates for your operating system.
6. If you are using Dell Endpoint Security Suite Enterprise, contact your administrator for further assistance.
Download and update options for werfault.exe -u -p -s
- Download the latest version of werfault.exe from a reliable source.
- Update werfault.exe to the latest version available.
- Use the “-u” command to update werfault.exe.
- Apply the “-p” option to perform a repair installation of werfault.exe.
- Resolve werfault.exe issues by using the “-s” command to scan and fix any errors.
Alternatives to werfault.exe -u -p -s
- Open Run dialog by pressing Win + R.
- Type services.msc and press Enter.
- In the Services window, scroll down and locate Windows Error Reporting Service.
- Right-click on it and select Properties.
- Change the Startup Type to Disabled.
- Click Apply and then OK.
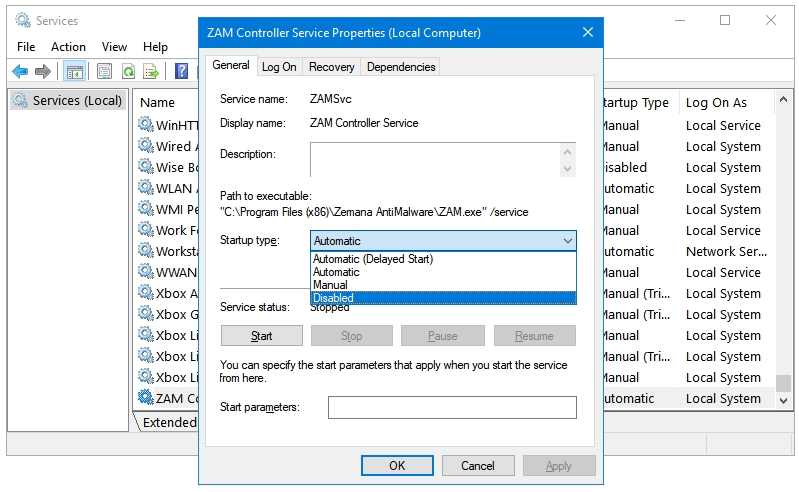
- Restart your computer for the changes to take effect.
Method 2: Disable Automatic Error Reporting in System Settings
- Open Control Panel.
- Click on System and Security.
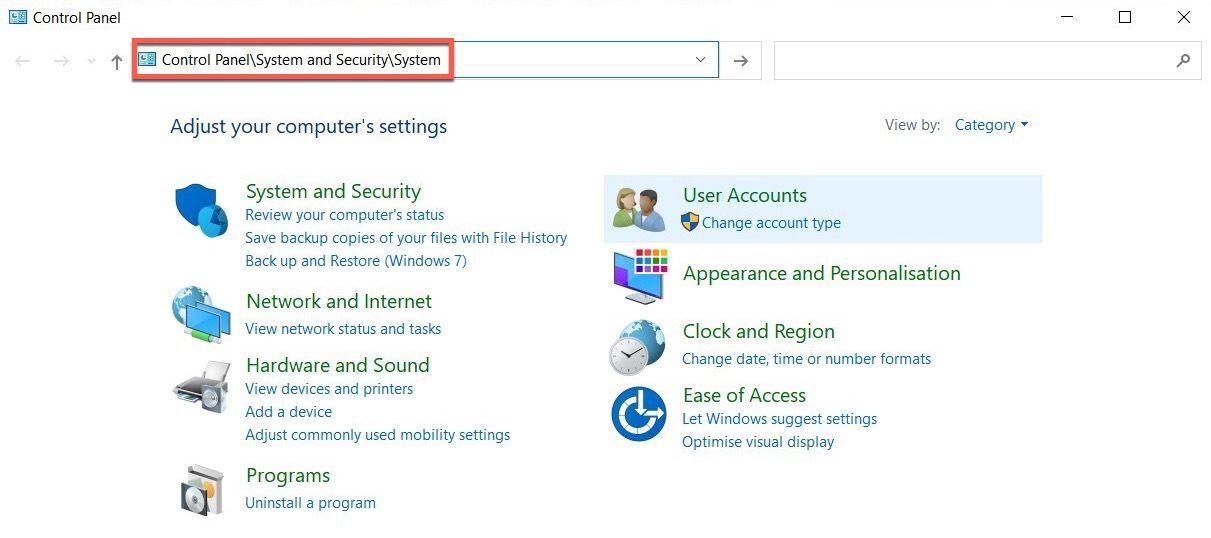
- Click on Security and Maintenance.
- Expand the Maintenance section.
- Click on Settings next to Automatic Maintenance.
- Uncheck the box next to Automatically apply repairs.
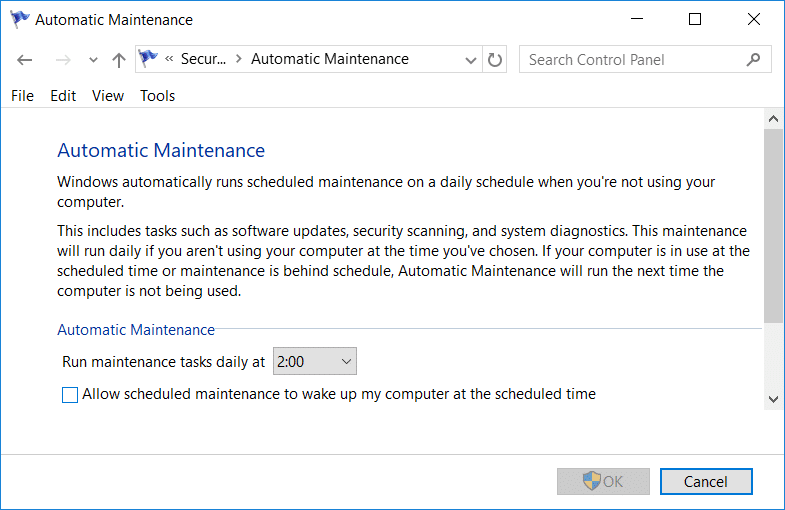
- Click OK to save the changes.
Method 3: Clear Temporary Files
- Open File Explorer.
- Navigate to the C:\Windows\Temp folder.
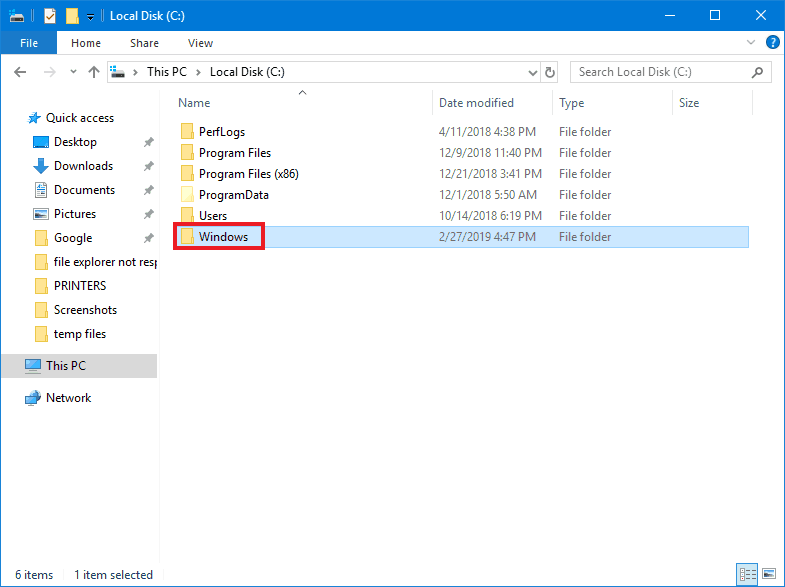
- Press Ctrl + A to select all files and folders.
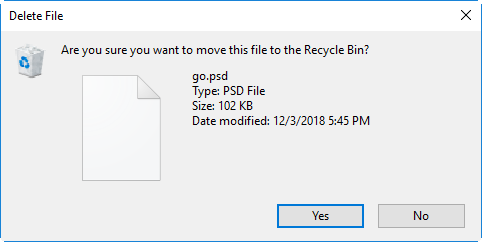
- Press Shift + Delete to permanently delete them.
- Confirm the deletion when prompted.
- Open Run dialog by pressing Win + R.
- Type %temp% and press Enter.
- Press Ctrl + A to select all files and folders.
- Press Shift + Delete to permanently delete them.
- Confirm the deletion when prompted.
Method 4: Update Graphics Drivers
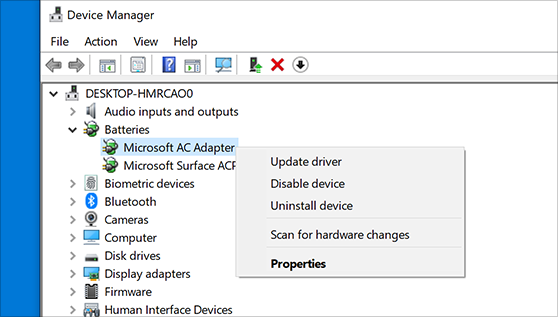
- Open Device Manager.
- Expand the Display adapters category.
- Right-click on your graphics card and select Update driver.
- Choose Search automatically for updated driver software.
- Follow the on-screen instructions to complete the driver update process.
- Restart your computer for the changes to take effect.
Method 5: Perform System File Check
- Open Command Prompt as an administrator.
- Type sfc /scannow and press Enter.
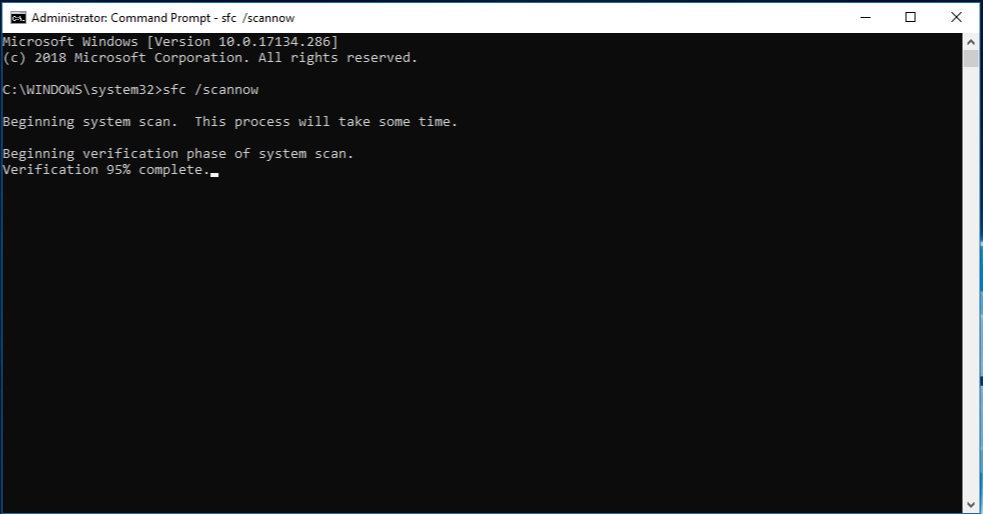
- Wait for the scan to complete.
- If any corrupt system files are found, they will be automatically repaired.
- Restart your computer for the changes to take effect.
Can’t delete werfault.exe -u -p -s, possible solutions
If you’re unable to delete werfault.exe -u -p -s and experiencing werfault.exe application errors in Windows 10, here are some possible solutions to resolve the issue.
1. Restart your computer: Sometimes, a simple restart can fix temporary glitches and resolve the error.
2. Run a system scan: Use the built-in Windows Defender or any trusted antivirus software to scan your system for malware or viruses that may be causing the error.
3. Disable Windows Error Reporting Service: Go to the Services app, locate “Windows Error Reporting Service,” right-click on it, and select “Properties.” Set the startup type to “Disabled” and click “Apply” followed by “OK.”
4. Perform a clean boot: Temporarily disable startup programs and non-Microsoft services to identify any conflicts causing the error.
5. Update your graphics driver: Visit the manufacturer’s website and download the latest graphics driver compatible with your Windows 10 version.
Remember to create a system restore point before making any changes and always exercise caution when dealing with system files.