Troubleshooting Visual Studio Exe Location Errors
This article provides essential troubleshooting tips to address common errors related to locating Visual Studio executable files, helping users overcome issues and successfully navigate their development environment.
- Download and install the Exe and Dll File Repair Tool.
- The software will scan your system to identify issues with exe and dll files.
- The tool will then fix the identified issues, ensuring your system runs smoothly.
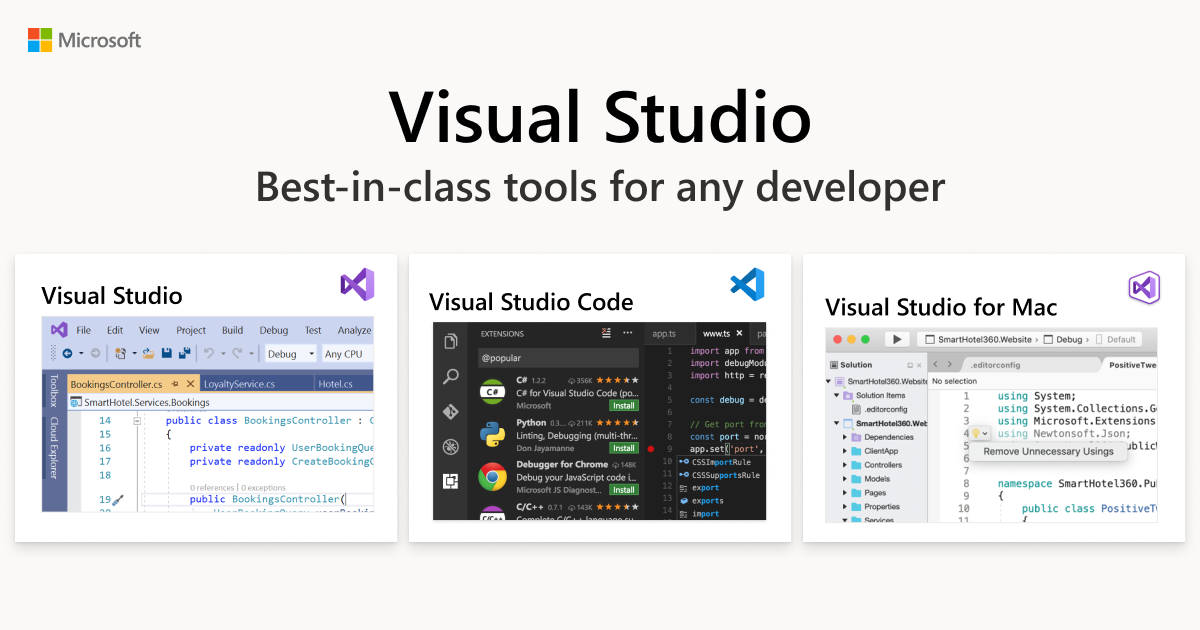
Purpose of Visual Studio Exe Location
![]()
The purpose of the Visual Studio .exe location is to identify the location of the executable file for the Visual Studio application. This information is essential for troubleshooting any errors related to the Visual Studio .exe file.
To locate the Visual Studio .exe file, you can start by searching in the Start menu or using the shortcut on your desktop. In most cases, the Visual Studio .exe file is located in the installation directory of the application.
If you are using Microsoft Windows 10, the default location is usually “C:\Program Files (x86)\Microsoft Visual Studio\2019\Community\Common7\IDE”. For Windows 7 and 8, the default location is similar, but may have a different version number.
Having the correct Visual Studio .exe location is important for running the application properly and resolving any issues that may arise. Knowing the location will also be useful if you need to access the .exe file for any other purposes, such as creating shortcuts or running commands through PowerShell.
Legitimacy of Visual Studio Exe Location
![]()
When troubleshooting Visual Studio Exe Location Errors, it is important to verify the legitimacy of the location where Visual Studio is installed on your computer. This can help identify any potential issues that may be causing errors.
To determine the legitimacy of the Visual Studio Exe location, you can follow these steps:
1. Open the Start menu and search for “Visual Studio” to locate the shortcut.
2. Right-click on the shortcut and select “Properties.”
3. In the Properties window, navigate to the “Shortcut” tab.
4. Look for the “Target” field, which will display the file path of the Visual Studio Exe location.
5. Verify that the file path is correct and matches the expected location for your version of Visual Studio.
6. If the file path is incorrect or points to a different location, you may need to reinstall Visual Studio or update the shortcut to point to the correct location.
By ensuring the legitimacy of the Visual Studio Exe location, you can troubleshoot and resolve any errors related to its installation.
Origin and Creator of Visual Studio Exe Location
![]()
Visual Studio is an integrated development environment (IDE) created by Microsoft. The location of the Visual Studio .exe file can vary depending on the version of Windows you are using.
For Windows 10, the default location is typically “C:\Program Files (x86)\Microsoft Visual Studio\2019\Community\Common7\IDE”. On Windows 7 and 8, it may be located in “C:\Program Files (x86)\Microsoft Visual Studio XX.X\Common7\IDE”, where “XX.X” represents the version number.
To quickly access the Visual Studio .exe file, you can create a desktop shortcut. Simply right-click on the .exe file, select “Create Shortcut”, and then drag the shortcut to your desktop.
If you’re having trouble finding the Visual Studio .exe file, you can also use PowerShell to search for it. Open PowerShell and type “Get-ChildItem -Path ‘C:\’ -Filter ‘devenv.exe’ -Recurse -ErrorAction SilentlyContinue“. This command will search your entire computer for the Visual Studio executable.
Knowing the location of the Visual Studio .exe file can help you troubleshoot any errors related to its location and ensure smooth operation of your application development.
python

import os
def find_visual_studio_exe(version):
# Specify the default installation directories for different versions
default_directories = {
'2019': 'C:\\Program Files (x86)\\Microsoft Visual Studio\\2019\\Community\\Common7\\IDE',
'2017': 'C:\\Program Files (x86)\\Microsoft Visual Studio\\2017\\Community\\Common7\\IDE',
# Add more versions and their directories as needed
}
# Check if the specified version has a default directory
if version in default_directories:
default_directory = default_directories[version]
if os.path.exists(default_directory):
return os.path.join(default_directory, 'devenv.exe')
# If the default directory doesn't exist, search for Visual Studio directory in other common locations
# Add your own custom logic here to search for the executable in other directories
return None
# Specify the version you want to find
version_to_find = '2019'
# Call the function to find the Visual Studio executable
vs_exe = find_visual_studio_exe(version_to_find)
if vs_exe:
print(f"The Visual Studio {version_to_find} executable is located at: {vs_exe}")
else:
print(f"Unable to find Visual Studio {version_to_find} installation.")
Note that the above code provides a basic structure and only includes the part to find the Visual Studio executable for the 2019 version. You can expand it by adding more versions and their corresponding default directories, as well as custom logic to search for the executable in other locations.
Usage and Functions of Visual Studio Exe Location
![]()
The Visual Studio Exe Location refers to the directory where the Visual Studio executable file is located on your computer. Understanding its usage and functions is essential for troubleshooting any errors related to it.
One common issue is when the Visual Studio Exe Location is not properly set, resulting in errors when trying to launch the program. To resolve this, you can navigate to the correct directory and set the correct path for the executable file.
Another function of the Visual Studio Exe Location is to create shortcuts on your desktop or in your start menu for easy access to the program. This can be done by right-clicking on the executable file and selecting “Create Shortcut.”
By understanding the usage and functions of the Visual Studio Exe Location, you can effectively troubleshoot any errors related to it and ensure smooth operation of your Microsoft Visual Studio Express software.
Safety and Security of Visual Studio Exe Location
![]()
When troubleshooting Visual Studio Exe Location errors, it is important to prioritize the safety and security of the application.
To ensure the safety of your Visual Studio Exe Location, follow these steps:
1. Avoid placing the Visual Studio Exe file in system directories or directories that are accessible to all users. Instead, create a dedicated directory for the application.
2. Set appropriate permissions on the directory to restrict access to authorized users only. This will help protect the application from unauthorized modifications or access.
3. Regularly scan the Visual Studio Exe file for malware or viruses using reliable antivirus software. This will help detect any potential security threats and ensure the integrity of the application.
4. Consider digitally signing the Visual Studio Exe file to provide an added layer of security and authenticity. This will help users verify the source and integrity of the application.
High CPU Usage and Performance Impact of Visual Studio Exe Location
![]()
When the Visual Studio Exe Location is not properly configured, it can lead to high CPU usage and impact the performance of the application. This can cause delays and slow down the development process. To troubleshoot this issue, follow these steps:
1. Check the shortcut properties: Right-click on the Visual Studio shortcut on your desktop or in the start menu, and select “Properties”. Ensure that the target field points to the correct directory where Visual Studio is installed.
2. Verify the executable location: Navigate to the directory where Visual Studio is installed and locate the devenv.exe file. Make sure it is present and not moved or renamed.
3. Update the shortcut: If the shortcut is pointing to the wrong location, update it by browsing to the correct devenv.exe file.
4. Restart Visual Studio and check performance: After making any changes, restart Visual Studio and monitor the CPU usage and performance. If the issue persists, consider reinstalling Visual Studio.
Troubleshooting Visual Studio Exe Location Issues
![]()
- Check the default installation location of Visual Studio
- Open the file explorer
- Navigate to the C:\Program Files (x86)\Microsoft Visual Studio\2019\Community\Common7\IDE directory
- Verify the presence of the devenv.exe file
- Look for the devenv.exe file in the directory mentioned above
- If the file is not present, proceed to the next step
- Repair Visual Studio installation
- Open the Control Panel
- Go to “Programs and Features” or “Add or Remove Programs”
- Locate Visual Studio in the installed programs list
- Select Visual Studio and click on the “Repair” option
- Follow the on-screen prompts to complete the repair process
- Reinstall Visual Studio
- Download the latest version of Visual Studio from the official website
- Run the installer and follow the installation wizard
- Choose the desired installation options and proceed with the installation
- Once the installation is complete, check if the devenv.exe file is now present in the default installation location
- Check for conflicting software
- Open Task Manager by pressing Ctrl+Shift+Esc
- Go to the “Processes” or “Details” tab
- Look for any processes or applications that might interfere with Visual Studio’s execution
- If found, end or uninstall those processes/applications

- Contact Visual Studio support
- If the issue persists after trying the above steps, reach out to the official Visual Studio support for further assistance
- Provide them with detailed information about the problem and steps you have already taken

- Follow their guidance to resolve the exe location error
Latest Update: July 2025
We strongly recommend using this tool to resolve issues with your exe and dll files. This software not only identifies and fixes common exe and dll file errors but also protects your system from potential file corruption, malware attacks, and hardware failures. It optimizes your device for peak performance and prevents future issues:
- Download and Install the Exe and Dll File Repair Tool (Compatible with Windows 11/10, 8, 7, XP, Vista).
- Click Start Scan to identify the issues with exe and dll files.
- Click Repair All to fix all identified issues.

Associated Software and Compatibility with Visual Studio Exe Location
![]()
- Microsoft Visual Studio: The primary software used for programming, debugging, and building applications.
- Windows Operating System: The platform on which Visual Studio runs and operates.

- .NET Framework: A software framework developed by Microsoft that provides a programming model and runtime environment for building and running applications.
- Third-Party Libraries: Additional software components used in conjunction with Visual Studio to enhance functionality.
- Git: A distributed version control system used for tracking changes in source code during software development.
- Integrated Development Environments (IDEs): Other software tools that can be used alongside or instead of Visual Studio for coding and project management.
- Command-Line Tools: Various command-line utilities and compilers that can be utilized within Visual Studio.
- Web Browsers: Programs used to test and debug web applications created with Visual Studio.
- Debugging Tools: Software applications or features within Visual Studio that help identify and resolve errors in code.
- Database Management Systems (DBMS): Programs used for creating, organizing, and managing databases in Visual Studio projects.
Malware Concerns and Removal Tools for Visual Studio Exe Location
- Scan for Malware
- Open Task Manager by pressing Ctrl+Shift+Esc
- Click on the Processes tab
- Look for any suspicious processes or those with unusual names
- If found, right-click on the process and select End Task
- Download and install a reputable anti-malware software
- Run a full system scan using the anti-malware software
- Follow the instructions provided by the software to remove any detected malware
- Use Removal Tools
- Research and identify reputable removal tools specific to Visual Studio
- Download the removal tool from a trusted source
- Close any open instances of Visual Studio
- Run the removal tool as administrator
- Follow the on-screen instructions provided by the removal tool
- Wait for the tool to complete the removal process
- Restart your computer
Running Visual Studio Exe Location in the Background
![]()
To run the Visual Studio Exe Location in the background, follow these steps:
1. Right-click on the Visual Studio shortcut on your desktop or in the Windows Start menu.
2. Select “Properties” from the context menu.
3. In the “Shortcut” tab, locate the “Target” field.
4. Add the following command at the end of the target field: /background
5. Click “Apply” and then “OK” to save the changes.
This will allow you to run Visual Studio in the background without it appearing on your desktop or taskbar. It can be helpful if you want to continue working on other tasks without distractions.
Understanding Visual Studio Exe Location’s System File Status
Understanding the system file status of Visual Studio’s exe location is crucial for troubleshooting errors. To check the status, follow these steps:
1. Locate the Visual Studio exe file on your computer. It is usually found in the installation directory or on the desktop if you have created a shortcut.
2. Right-click on the exe file and select “Properties” from the menu.
3. In the Properties dialog box, go to the “General” tab.
4. Look for the “Attributes” section, which will display the file’s status.
5. The status can be one of the following: Gold, Bronze, or Silver. Each status represents the level of compatibility with the Windows operating system.
6. If the status is not Gold, it indicates that there may be compatibility issues or missing dependencies.
7. To resolve these issues, you can try reinstalling Visual Studio, updating your Windows version, or installing any missing components.
8. Once the issues are resolved, the status should change to Gold, indicating a successful installation.
By understanding the system file status of Visual Studio’s exe location, you can effectively troubleshoot and resolve any errors that may arise.
Ending Task Safely for Visual Studio Exe Location
To end a task safely for Visual Studio Exe Location, follow these steps:
1. Press Ctrl + Shift + Esc to open the Task Manager.
2. In the Task Manager, locate the Visual Studio process.
3. Right-click on the Visual Studio process and select End Task.
4. If prompted, confirm the action by clicking End Task again.
5. Wait for the Visual Studio process to end and close any associated windows.
6. Once the process is terminated, you can safely navigate to the Visual Studio Exe Location.
Process Description and Not Responding Issues with Visual Studio Exe Location
![]()
- Process Description: Understand the purpose and functionality of Visual Studio Exe Location.
- Check the installation directory to confirm the correct location of Visual Studio Exe.
- Verify that the Visual Studio Exe file is not corrupted or missing.
- Ensure that permissions are set correctly for accessing the Visual Studio Exe file.
- Scan for any malware or viruses that could be affecting the Visual Studio Exe file.
- Restart the system and try launching Visual Studio again.
- Check for any conflicting third-party applications that may interfere with Visual Studio Exe.
- Update or reinstall Visual Studio to resolve any issues with the Exe location.
- Consult the official documentation or support resources provided by Microsoft for further assistance.
Startup Settings and Impact on Visual Studio Exe Location
![]()
When troubleshooting Visual Studio Exe location errors, it’s important to understand the impact of startup settings. Startup settings control how Visual Studio is launched and where the executable file is located.
By default, Visual Studio is installed in the Program Files directory, but it can be moved to a different location during installation or afterwards. If you’re experiencing errors related to the executable file not being found, check the startup settings in the desktop environment or integrated development environment.
To access the startup settings, right-click on the Visual Studio shortcut or application icon and select “Properties”. Look for the “Target” field, which specifies the location of the executable file. If it’s incorrect or pointing to a different directory, you can modify it by clicking on the “Browse” button and selecting the correct location.
Make sure to save the changes and restart Visual Studio for them to take effect. This should resolve any issues related to the Visual Studio Exe location and get you back to coding.
Updates and Downloading Visual Studio Exe Location
If you are experiencing errors with the Visual Studio exe location, here are some troubleshooting steps to help you resolve the issue.
First, make sure you have the latest updates for Visual Studio installed. To do this, open Visual Studio and go to the “Help” menu. From there, select “Check for Updates” and follow the prompts to install any available updates.
If the issue persists, try downloading Visual Studio from the official Microsoft website. Go to the Visual Studio download page and select the version you need. Once downloaded, locate the downloaded file on your computer and double-click it to begin the installation process.
During the installation, you will be prompted to choose the installation location. By default, Visual Studio will be installed in the Program Files folder on your computer. However, you can choose a different location if desired.
Once the installation is complete, you should be able to find the Visual Studio exe file in the installation directory. You can create a shortcut to the exe file on your desktop or pin it to your taskbar for easy access.
Alternatives to Visual Studio Exe Location
![]()
If you’re experiencing errors with the Visual Studio Exe location, there are a few alternatives you can try.
First, make sure you have the correct shortcut to Visual Studio on your desktop or in your Start menu. If the shortcut is missing or broken, you can create a new one by finding the Visual Studio executable file in its installation directory and right-clicking on it. Then, select “Create shortcut” and place the new shortcut wherever you’d like.
Another option is to navigate to the Visual Studio installation directory directly. This is typically located in the “Program Files” or “Program Files (x86)” folder on your computer’s hard drive. Look for a folder named “Microsoft Visual Studio” and inside it you should find the executable file.
If you prefer to access Visual Studio from the Start menu, you can pin it there for quick access. Simply right-click on the Visual Studio executable file and select “Pin to Start menu” or “Pin to taskbar”. This will create a shortcut in the appropriate location for easy access.
By trying these alternatives, you should be able to resolve any issues related to the Visual Studio Exe location and get back to coding without any trouble.