Troubleshooting searchapp.exe Memory Leaks
This article provides a comprehensive guide to troubleshooting memory leaks in searchapp.exe, offering effective solutions to identify and resolve the issue.
- Download and install the Exe and Dll File Repair Tool.
- The software will scan your system to identify issues with exe and dll files.
- The tool will then fix the identified issues, ensuring your system runs smoothly.
Introduction to searchapp.exe memory leak
searchapp.exe is a process related to Windows SearchApp, responsible for indexing and searching files on your computer. However, some users may experience memory leaks with searchapp.exe, resulting in high CPU usage and system slowdowns.
To troubleshoot this issue, you can try the following steps:
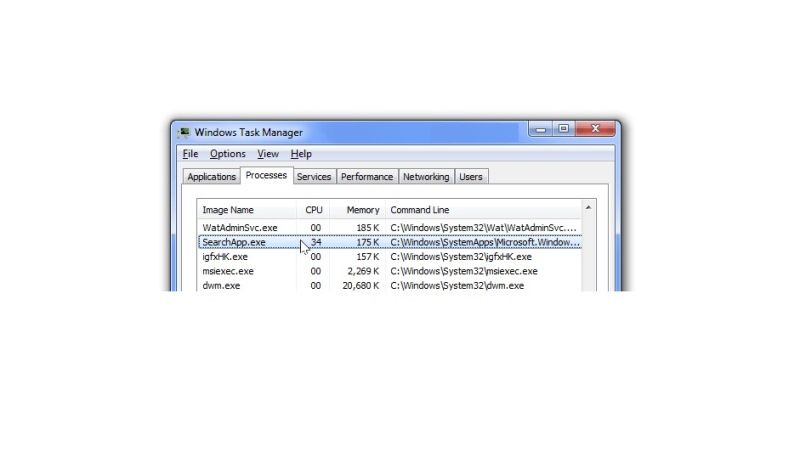
1. Open Task Manager and check the CPU usage. If searchapp.exe is utilizing a significant amount of CPU, it may be causing the memory leak.
2. Disable Windows Search temporarily to see if the issue persists. Open Command Prompt as an administrator and enter the command “net.exe stop “Windows search” to suspend the process.
3. Monitor the resource usage in Task Manager or Resource Monitor to identify any spikes in CPU or memory usage.
4. Update Windows to the latest version and install any available Security Updates or Quality Updates.
5. Disable unnecessary features like Cortana and feeds to reduce the workload on searchapp.exe.
6. Consider using third-party antivirus software instead of Windows Defender or Norton 360, as they may interfere with searchapp.exe.
7. If the issue continues, you can seek further assistance on forums like @askwoody or Microsoft’s Answer board.
Is searchapp.exe memory leak safe and legitimate?
searchapp.exe memory leak is not safe or legitimate. It can cause high CPU usage and slow down your device. If you’re experiencing this issue, there are a few troubleshooting steps you can take.
First, check if there are any updates available for Windows 10 Home 21H1 or 20H2. Microsoft often releases updates to address known issues, including memory leaks.
Next, you can try disabling searchapp.exe to see if it resolves the problem. Open the Command Prompt as an administrator and enter the command “taskkill /f /im searchapp.exe“. This will temporarily suspend searchapp.exe and may improve CPU usage.
If the issue persists, you can also try disabling Windows Search completely. Go to the Windows Settings, click on “Privacy,” then “Search and Windows Search,” and toggle off the option for “Allow Windows to search online and include web results.”
Exploring the purpose and origin of searchapp.exe memory leak
The searchapp.exe memory leak is a common issue that users may encounter on their Windows devices. This memory leak can cause high CPU usage and slow down system performance. To troubleshoot this problem, there are a few steps you can take.
First, open the Resource Monitor by pressing Ctrl+Shift+Esc and go to the CPU tab. Look for the searchapp.exe process and check its CPU usage. If it’s consuming a significant amount of CPU, it may be the cause of the memory leak.
To further investigate, you can disable the searchapp.exe process temporarily. Open the Task Manager by pressing Ctrl+Shift+Esc and go to the Processes tab. Right-click on the searchapp.exe process and select Suspend Process. This will pause the process and prevent it from consuming additional resources.
If suspending the process resolves the memory leak issue, it’s recommended to permanently disable the searchapp.exe process. To do this, open the Command Prompt as an administrator and run the following command: sc config searchapp start=disabled. This will prevent the searchapp.exe process from starting automatically.
Understanding the usage and running behavior of searchapp.exe memory leak
1. Identifying the problem: If you notice high CPU or memory usage, it could indicate a searchapp.exe memory leak.
2. Causes of memory leaks: Memory leaks in searchapp.exe can be caused by various factors, such as software bugs, outdated drivers, or conflicts with other applications.
3. Troubleshooting steps: To resolve searchapp.exe memory leaks, you can try a few troubleshooting steps like updating Windows, running a malware scan, disabling unnecessary startup programs, or reinstalling the application.
4. Monitoring and managing resources: Regularly monitoring CPU and memory usage can help you detect any abnormal behavior and take necessary actions.
5. Seeking assistance: If troubleshooting steps don’t resolve the issue, consider seeking help from forums like @askwoody or Microsoft’s Answer board, where experts can provide further guidance.
Identifying if searchapp.exe memory leak is associated with malware
If you suspect that the searchapp.exe memory leak on your Windows device is associated with malware, there are several steps you can take to troubleshoot the issue.
First, check for any suspicious activity or signs of malware infection on your system. Run a full scan with a reliable antivirus program, such as Norton 360, to detect and remove any potential threats.
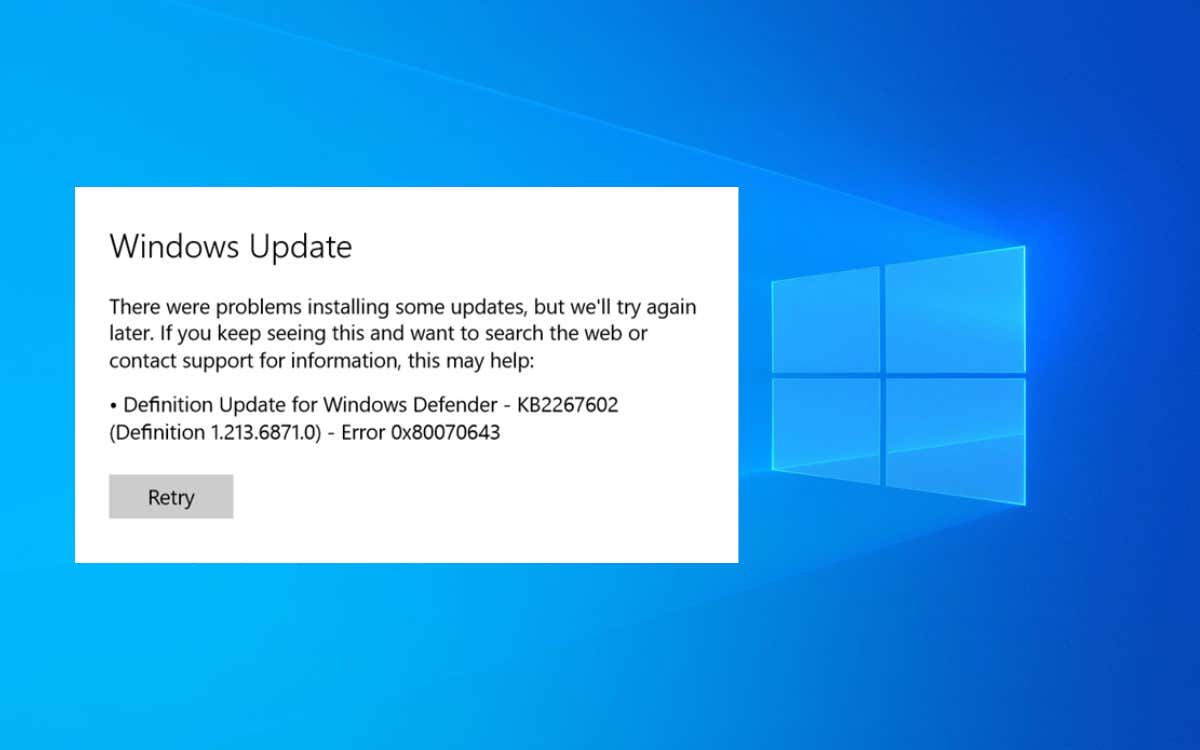
Next, ensure that your device is running the latest Windows updates, including the Security Update KB5008212. Keeping your system up to date can help address known vulnerabilities and improve overall performance.
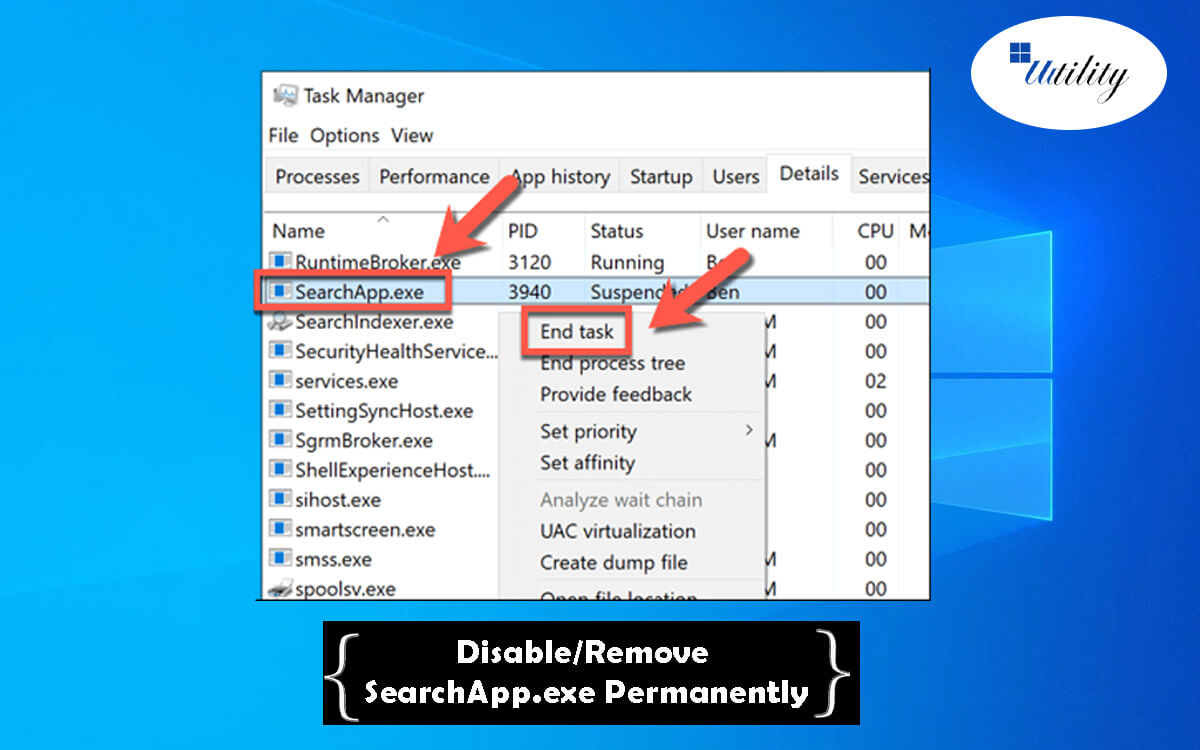
If the memory leak persists, you can try disabling the searchapp.exe process temporarily. To do this, open the Task Manager by pressing Ctrl + Shift + Esc, navigate to the Processes tab, locate searchapp.exe, right-click on it, and select End Task.
Alternatively, you can try suspending the searchapp.exe process by using the Resource Monitor. Open the Resource Monitor by searching for it in the Start menu or using the Windows Key + R shortcut and typing resmon. In the Resource Monitor, go to the CPU tab, locate searchapp.exe, right-click on it, and choose Suspend Process.
Troubleshooting and resolving issues related to searchapp.exe memory leak
Troubleshooting and resolving searchapp.exe memory leaks can help improve the performance of your system. If you’re experiencing high CPU usage or system slowdowns, follow these steps to address the issue:
1. Check for Updates: Ensure that you have the latest Windows updates installed, including the latest Security Updates and Quality Updates. These updates often include bug fixes and performance improvements.
2. Disable SearchApp: If you don’t use the Windows Search feature frequently, you can disable the SearchApp to prevent memory leaks. Open the Windows Services Manager, locate the “Windows Search” service, right-click on it, and select “Properties.” Set the startup type to “Disabled” and click “Apply.”
3. Suspend Windows SearchApp: Another option is to suspend the Windows SearchApp temporarily. Open the Task Manager, go to the “Processes” tab, locate “SearchApp.exe,” right-click on it, and select “Suspend Process.” This will pause the process and reduce its impact on system resources.
4. Monitor Resource Usage: Keep an eye on your system’s resource usage using the Task Manager. If you notice high CPU or memory usage related to SearchApp.exe, take note of any specific patterns or triggers that could be causing the issue.
Examining the impact of high CPU usage caused by searchapp.exe memory leak
If you’re experiencing high CPU usage due to searchapp.exe memory leaks, consider following these steps:
1. Identify the searchapp.exe process in your Task Manager.
2. Check if you have the latest Windows updates installed, such as Security Update KB5008212.
3. Disable searchapp.exe temporarily by suspending the process in Task Manager.
4. If you’re using Windows 10 Home 21H1 or 20H2, try disabling Cortana and Microsoft SearchApp through the settings.
5. Clear your search history and disable feeds to reduce the strain on CPU resources.
6. Consider using alternative search options or third-party tools to replace searchui.exe or Microsoft SearchApp.
7. Monitor CPU usage to ensure the problem has been resolved.
Overview of searchapp.exe memory leak as a system file and its associated software
The searchapp.exe memory leak is a common issue that users may encounter with this system file and its associated software. This article titled “Troubleshooting searchapp.exe Memory Leaks” provides an overview of this problem and offers helpful solutions.
When dealing with searchapp.exe memory leaks, it is important to be aware of the potential impact on system performance. High CPU usage and slowed performance are common symptoms of this issue.
To address the problem, follow these steps:
1. Identify the cause: Determine if the memory leak is caused by a specific software or hardware component. Check for any recent updates or changes that may have triggered the issue.
2. Update software: Ensure that all software, including the operating system, is up to date. This can help resolve any known bugs or compatibility issues.
3. Check for conflicting programs: Some software applications may conflict with searchapp.exe, leading to memory leaks. Review the list of installed programs and uninstall any unnecessary or conflicting software.
4. Optimize system resources: Adjust system settings to optimize memory usage. Close unnecessary background processes and limit the number of running applications to reduce the strain on system resources.
5. Seek professional assistance: If the issue persists, consider contacting technical support or seeking assistance from knowledgeable online communities, such as @askwoody or AskWoody Plus.
Latest Update: July 2025
We strongly recommend using this tool to resolve issues with your exe and dll files. This software not only identifies and fixes common exe and dll file errors but also protects your system from potential file corruption, malware attacks, and hardware failures. It optimizes your device for peak performance and prevents future issues:
- Download and Install the Exe and Dll File Repair Tool (Compatible with Windows 11/10, 8, 7, XP, Vista).
- Click Start Scan to identify the issues with exe and dll files.
- Click Repair All to fix all identified issues.

Understanding the creator and description of searchapp.exe memory leak process
The searchapp.exe memory leak process is a common issue that many users face on their Windows 10 Home 21H1 or 20H2 PCs. This process, related to Windows SearchApp.exe, can cause high CPU usage and slow down your system. Understanding the creator and description of this process is crucial for troubleshooting.
To resolve this issue, you can follow a few steps. First, check if you have the latest Windows updates installed, as Microsoft often releases patches to fix memory leaks. You can also try suspending the searchapp.exe process temporarily to see if it improves your system’s performance. If these steps don’t work, you may need to dive deeper into your system settings and check for any conflicting software or settings that could be causing the memory leak.
Safe methods to end task searchapp.exe memory leak
Safe methods to end the searchapp.exe memory leak:
1. Open the Task Manager by pressing Ctrl + Shift + Esc.
2. Locate the searchapp.exe process in the Processes tab.
3. Right-click on searchapp.exe and select “End Task.”
4. If the memory leak persists, try restarting your computer to refresh system resources.
5. Update your operating system and ensure you’re running the latest version of Windows.
6. Disable unnecessary startup programs that may be contributing to the memory leak.
7. Consider using a trusted antivirus program to scan for any malware or viruses that could be causing the issue.
8. If the problem persists, reach out to online forums or tech communities for further assistance.
9. Be cautious of any third-party software claiming to fix memory leaks, as they may introduce additional risks.
Dealing with unresponsive searchapp.exe memory leak instances
If you’re dealing with unresponsive searchapp.exe memory leak instances, there are a few troubleshooting steps you can take.
First, try clearing the Windows Search index by going to Settings > Search > Searching Windows and clicking on the “Advanced Search Indexer Settings” link. Then, click on the “Advanced” tab and click on the “Rebuild” button. This will rebuild the search index and may help resolve any memory leaks.
If that doesn’t work, you can disable Windows Search temporarily by going to Services (type “services.msc” in the Windows search bar) and finding the “Windows Search” service. Right-click on it and select “Stop” to disable it.
You can also try updating your Windows version to the latest build. This can be done by going to Settings > Update & Security > Windows Update and clicking on the “Check for updates” button.
If none of these solutions work, it may be helpful to reach out to the searchapp.exe community for further assistance. You can try posting on forums like @askwoody or AskWoody Plus to get suggestions from others who may have experienced similar issues.
Available removal tools for addressing searchapp.exe memory leak
- Step 1: Identify the presence of a memory leak
- Open Task Manager by pressing Ctrl+Shift+Esc
- Select the Processes tab
- Look for searchapp.exe in the list of running processes
- Note the memory usage of searchapp.exe
- Step 2: Update or reinstall the application
- Visit the official website of the application that uses searchapp.exe
- Look for updates or patches related to the memory leak issue
- If available, download and install the updates
- If no updates are available, consider reinstalling the application
- Step 3: Use a reliable antivirus or antimalware program
- Ensure your computer has an up-to-date and reputable antivirus or antimalware program installed
- Perform a full system scan to detect and remove any malicious software
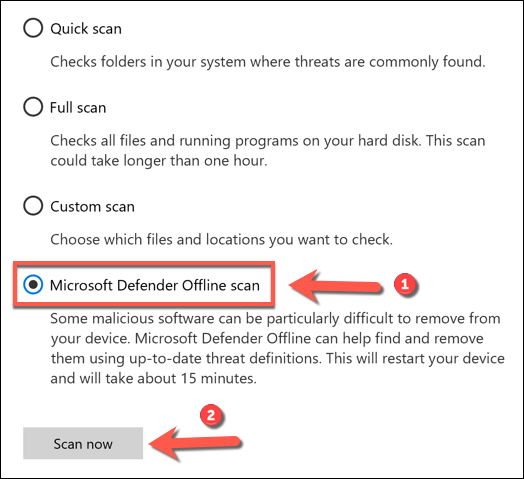
- Restart your computer after the scan is complete
- Step 4: Optimize your computer’s performance
- Clear temporary files and folders using the Disk Cleanup tool
- Defragment your hard drive using the Disk Defragmenter tool
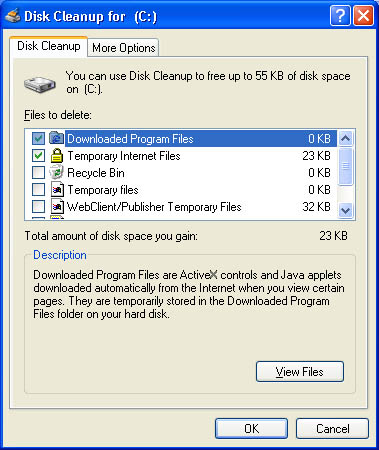
- Disable unnecessary startup programs using the Task Manager
- Ensure your computer has sufficient RAM (Random Access Memory) for smooth operation
- Step 5: Seek professional assistance
- If the memory leak issue persists after trying the above steps, it is recommended to seek help from a professional computer technician or the software developer
- Provide them with detailed information about the issue and the steps you have already taken

- They may be able to provide more advanced troubleshooting techniques or offer a specific solution for the searchapp.exe memory leak problem
Managing searchapp.exe memory leak during startup
If you’re experiencing a memory leak with searchapp.exe during startup, there are a few troubleshooting steps you can take.
First, make sure you have the latest Windows updates installed, as Microsoft often releases fixes for known issues.
Next, check if any third-party software or drivers are conflicting with searchapp.exe. Disable or uninstall any recently installed programs or drivers to see if the memory leak persists.
You can also try running a system scan using a reliable antivirus software to rule out any malware causing the issue.
If the problem continues, you can try suspending the searchapp.exe process using the Task Manager. Right-click on searchapp.exe, select “Suspend,” and monitor if the memory usage stabilizes.
Additionally, clearing the Windows Search index or rebuilding it can sometimes resolve memory leak issues. You can do this by going to the Indexing Options in the Control Panel and selecting “Advanced.”
If none of these steps work, it’s recommended to seek further assistance from the Windows community forums or Microsoft support.
Evaluating the performance impact of searchapp.exe memory leak
To evaluate the performance impact of a searchapp.exe memory leak, follow these troubleshooting steps:
1. Monitor CPU usage: Keep an eye on CPU usage to identify if it jumps significantly when searchapp.exe is running. This could indicate a memory leak issue.
2. Check for suspended processes: Look for any suspended instances of searchapp.exe or searchui.exe. These processes may suggest a memory leak.
3. Update Windows: Make sure your Windows operating system is up to date with the latest version, such as Windows 10 Home 21H1 or 20H2. Updates often include bug fixes and performance improvements.
4. Disable unnecessary services: Temporarily disable any unnecessary services or applications running in the background. This can help identify if any conflicts or resource-hogging programs are contributing to the memory leak.
5. Seek community support: Visit forums like @askwoody or Microsoft’s own support forums to see if other users have experienced similar issues. They may offer suggestions or solutions.
Updates and download options for searchapp.exe memory leak
- Check for Windows Updates:
- Open Settings by clicking on the Start button and selecting Settings.
- In the Settings window, click on Update & Security.
- Click on Windows Update in the left sidebar.

- Click on Check for updates to see if any updates are available for your system.
- If updates are found, click on Download and install to install them.

- Restart your computer after the update process is complete.
- Update Device Drivers:
- Open Device Manager by pressing Win + X and selecting Device Manager from the menu.
- In the Device Manager window, expand the categories to find the device drivers related to searchapp.exe.
- Right-click on each driver and select Update driver.
- Choose Search automatically for updated driver software and follow the on-screen instructions to update the drivers.
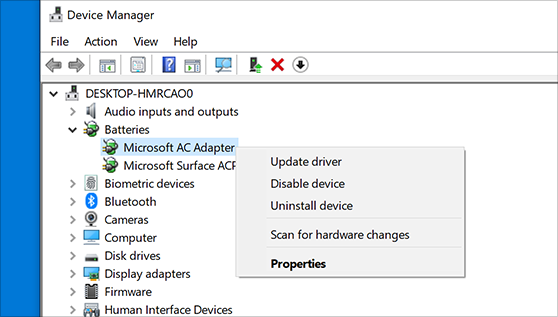
- Restart your computer after the driver updates are complete.
- Download the Latest Version of searchapp.exe:
- Visit the official website of the software or manufacturer associated with searchapp.exe.
- Look for a Downloads or Support section on the website.
- Search for the latest version of searchapp.exe specifically designed to fix memory leak issues.
- Download the latest version of searchapp.exe from the website.
- Once the download is complete, run the installer and follow the on-screen instructions to install the updated version.
Compatibility considerations for searchapp.exe memory leak on different Windows versions
Troubleshooting searchapp.exe Memory Leaks
| Windows Version | Compatibility Considerations |
|---|---|
| Windows 7 | Ensure the latest service pack and updates are installed. |
| Windows 8 | Apply the latest cumulative update for Windows 8. |
| Windows 10 | Update to the latest Windows 10 version and install the latest patches. |
| Windows Server 2008 | Install the latest service pack and updates for Windows Server 2008. |
| Windows Server 2012 | Apply the latest cumulative update for Windows Server 2012. |
Alternatives to searchapp.exe memory leak
If you’re experiencing a memory leak issue with searchapp.exe, there are a few alternatives you can try to troubleshoot the problem.
First, make sure you’re running the latest version of Windows 10 Home 21H1 or 20H2, as these updates often include bug fixes and improvements for searchapp.exe.
Next, check if there are any updates available for the searchapp.exe file itself. You can do this by visiting the Microsoft Windows website or searching for updates through Windows Update.
If the issue persists, try disabling any third-party software or add-ons that may be conflicting with searchapp.exe. This could include antivirus programs, firewalls, or browser extensions.
Additionally, consider clearing your cookies and browsing history, as these can sometimes cause memory leaks.
If none of these solutions work, it may be worth reaching out to the Microsoft community for further assistance. You can visit forums such as @askwoody or Microsoft’s official support forums to seek help from other users and experts.