
Silent Installation Script for EXE File
Unlocking Efficiency: Introducing the Whispers Behind EXE Installs
- Download and install the Exe and Dll File Repair Tool.
- The software will scan your system to identify issues with exe and dll files.
- The tool will then fix the identified issues, ensuring your system runs smoothly.
Overview of the Script to Install EXE Silently
This section provides an overview of the script to install an EXE file silently. Silent installation allows for the installation of applications without any user intervention or pop-ups.
To execute the script, open PowerShell or CMD and navigate to the directory where the EXE file is located. Use the command “Start-Process -Wait -FilePath ‘path\to\file.exe'” to initiate the installation process. This will run the installation silently, without any GUI or user prompts.
Silent installations are useful for IT professionals, software deployment, and companies looking to automate the installation process. It helps minimize human error, saves time, and ensures a smooth installation experience.
By using this script, you can easily install EXE files silently, reducing the need for manual intervention and streamlining the installation process.
Latest Update: July 2025
We strongly recommend using this tool to resolve issues with your exe and dll files. This software not only identifies and fixes common exe and dll file errors but also protects your system from potential file corruption, malware attacks, and hardware failures. It optimizes your device for peak performance and prevents future issues:
- Download and Install the Exe and Dll File Repair Tool (Compatible with Windows 11/10, 8, 7, XP, Vista).
- Click Start Scan to identify the issues with exe and dll files.
- Click Repair All to fix all identified issues.

Safety of the Script and Potential Errors
When working with a silent installation script for an EXE file, it is crucial to prioritize the safety of the script and minimize potential errors.
To ensure safety, verify the source and integrity of the EXE file before proceeding. It is recommended to use reputable sources or trusted vendors.
When creating the script, consider using PowerShell as it provides greater flexibility and control over installations. PowerShell allows for silent installations without any GUI or user intervention, making it ideal for automated processes.
When specifying the path to the EXE file, ensure that it is correct and accessible.
To avoid resource conflicts or compatibility issues, check for any prerequisites or dependencies required by the EXE file.
When executing the script, use the Start-Process -Wait command to ensure that the installation is completed before moving on to the next step.
Remember to handle any potential errors by adding error handling mechanisms to the script. This will help identify and resolve issues efficiently.
By following these guidelines, IT professionals, software developers, and companies can streamline the installation process, reduce human error, and improve overall system efficiency.
Troubleshooting and Repairing the Script if Needed
- Check for Syntax Errors: Review the script for any syntax errors that may be causing issues.
- Verify File Path: Ensure that the correct file path is specified in the script to locate the EXE file.
- Confirm File Existence: Check if the EXE file actually exists in the specified location.
- Update Permissions: Make sure that the user running the script has the necessary permissions to access and execute the EXE file.
- Check Dependencies: Verify if the EXE file requires any additional software or libraries to run properly.
- Verify Command Line Arguments: Ensure that any required command line arguments are correctly specified in the script.
- Review Logging and Error Handling: Check if the script includes proper logging and error handling mechanisms to identify any issues during execution.
- Update Antivirus Exclusions: Confirm that the EXE file and script are excluded from any antivirus scans or monitoring that could interfere with the installation.
- Test on Multiple Machines: Perform the installation script on multiple machines to identify if the issue is specific to a particular system.
- Check for Software Conflicts: Investigate whether any conflicting software or processes might be interfering with the installation.
python

import subprocess
def install_exe_silently(exe_path):
try:
# Use subprocess to run the executable silently
subprocess.run([exe_path, '/S', '/D=C:\InstallDirectory'], check=True)
print("Installation completed successfully.")
except subprocess.CalledProcessError as e:
print(f"Installation failed with error code: {e.returncode}")
print(e.output)
# Usage example
install_exe_silently('C:\Path\to\your\installer.exe')
In the above code, the `install_exe_silently` function takes the path of the executable file as an argument. It then uses `subprocess.run` to execute the installer silently using the appropriate command-line arguments. The `/S` argument is commonly used for silent installations, and `/D=C:\InstallDirectory` specifies the installation directory.
Please note that the exact command-line arguments may vary depending on the installer you are using. Make sure to refer to the documentation or help provided with your specific installer to determine the appropriate arguments for silent installation.
Removing the Script: Steps to Uninstall
- Step 1: Open the Control Panel.
- Step 2: Click on the “Programs” or “Programs and Features” option.
- Step 3: Locate the installed EXE file in the list of installed programs.
- Step 4: Right-click on the EXE file and select “Uninstall” or “Remove”.
- Step 5: Follow any on-screen prompts or instructions to complete the uninstallation process.
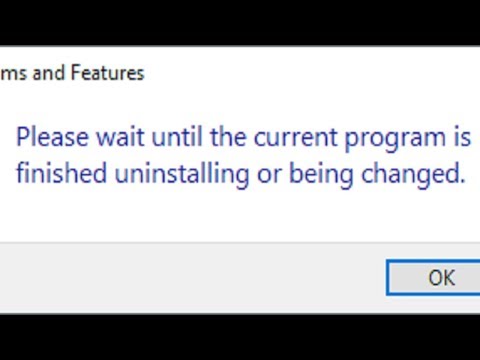
- Step 6: Wait for the uninstallation to finish.
- Step 7: Restart your computer to ensure the changes take effect.
