Exe File Execution and Troubleshooting in PowerShell
This article discusses the execution and troubleshooting of .exe files in PowerShell, providing insights and guidance for users.
- Download and install the Exe and Dll File Repair Tool.
- The software will scan your system to identify issues with exe and dll files.
- The tool will then fix the identified issues, ensuring your system runs smoothly.
Purpose of running exe from PowerShell with arguments
Running an executable (exe) file from PowerShell with arguments allows for more flexibility and customization in the execution process. By using PowerShell, you can easily pass parameters or arguments to the exe file, which can be helpful in troubleshooting or automating tasks.
To run an exe file with arguments in PowerShell, use the Start-Process cmdlet followed by the path to the exe file and the arguments enclosed in quotes. For example: Start-Process “C:\Program Files\MyApp.exe” -ArgumentList “/option1 value1 /option2 value2”.
When running an exe file with arguments, it’s important to ensure that the arguments are properly formatted and enclosed in quotes if they contain spaces or special characters. It’s also crucial to run PowerShell as an administrator if the exe file requires elevated privileges.
By utilizing PowerShell to run exe files with arguments, IT professionals and system administrators can effectively troubleshoot and deploy applications, configure settings, and automate tasks.
Safety considerations when running exe from PowerShell with arguments
- Check the source and integrity of the executable file
- Verify the authenticity and trustworthiness of the source from where the executable file was obtained.
- Ensure that the file has not been tampered with or infected by malware.
- Analyze the arguments being passed to the executable
- Review the command or script that includes the arguments to be passed to the executable.
- Ensure that the arguments are necessary and relevant to the intended execution.

- Avoid passing sensitive information as arguments.
- Run the executable in a controlled environment
- Consider running the executable in a sandbox or virtual machine to isolate its effects.
- Use tools like Windows Defender Application Guard to run potentially risky executables in a protected environment.

- Use PowerShell’s execution policy to restrict and control script execution
- Set the appropriate execution policy to prevent the execution of unsigned or potentially malicious scripts.
- Use the Set-ExecutionPolicy cmdlet to configure the execution policy.
- Regularly update PowerShell and associated modules
- Keep PowerShell up to date to benefit from security patches and bug fixes.
- Update any modules used in conjunction with PowerShell to ensure compatibility and security.
Legitimacy of running exe from PowerShell with arguments
When running an exe file from PowerShell with arguments, it is important to ensure the legitimacy and effectiveness of the process. To do this, follow these steps:
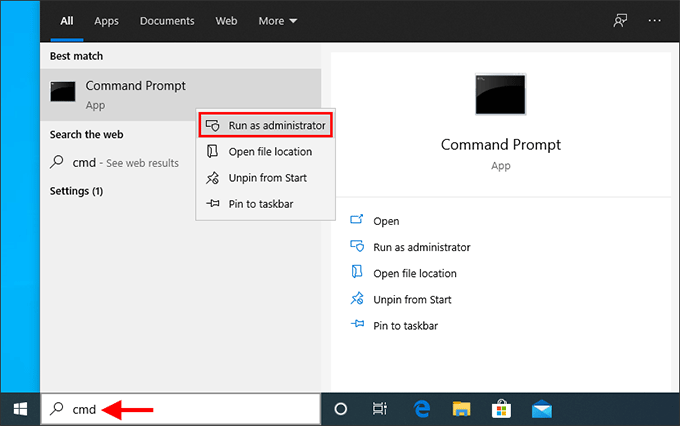
1. Open PowerShell as an administrator to have the necessary permissions.
2. Use the “Start-Process” command followed by the path to the exe file in quotes.
3. Add any necessary arguments by using the “-ArgumentList” parameter followed by the arguments in quotes.
4. If the arguments contain spaces or special characters, enclose them in double quotes and use the backtick (`) to escape any special characters.
5. To troubleshoot any issues, use the “echoargs” tool to display the parameter/argument pairs that are being passed.
6. Check for any required response files or iss files that may be needed for the installation.
7. If using InstallShield, consider using the “InstallShield Silent” mode for a silent installation.
8. If running a cmd or SQL Server command, use the “Start-Process” command followed by the cmd or SQL Server command in quotes.
Origin and creator of the exe file for PowerShell execution
The .exe file for PowerShell execution in Windows was created by Microsoft. It allows users to run PowerShell scripts and commands directly from the command line or through a script file. This feature is especially useful for automating tasks and managing system configurations.
To execute an .exe file in PowerShell, use the Start-Process cmdlet followed by the path to the .exe file. For example, Start-Process -FilePath “C:\Path\to\file.exe”.
When troubleshooting .exe file execution in PowerShell, make sure to check the following:
– Verify that the file path is correct.
– Ensure that you have the necessary permissions to run the file. Try running PowerShell as an administrator.
– Check for any command line arguments or switches that need to be included with the .exe file.
– Look for any specific troubleshooting steps provided by the application or tool you are using.
If you encounter any issues, reach out to IT peers or consult online forums for assistance. PowerShell experts can provide valuable insights and solutions as well.
Usage and benefits of running exe from PowerShell with arguments
When running an exe file from PowerShell with arguments, there are several benefits and use cases to consider.
First, using PowerShell to execute an exe file with arguments allows for automation and scripting of tasks. This can be especially useful for IT professionals and system administrators who need to perform repetitive tasks or manage multiple machines.
Additionally, running an exe file from PowerShell with arguments provides flexibility and control over the execution process. It allows for specifying specific parameters or options that may be required for the application or task at hand.
Troubleshooting is also made easier when running an exe file from PowerShell. It provides the ability to capture and view any error messages or output generated by the application, helping to identify and resolve issues more efficiently.
To run an exe file from PowerShell with arguments, use the Start-Process cmdlet followed by the path to the exe file and the necessary arguments or parameters. For example:
Start-Process -FilePath "C:\Path\to\file.exe" -ArgumentList "arg1", "arg2"
By utilizing PowerShell for exe file execution and troubleshooting, users can take advantage of the power and capabilities of the command-line interface while streamlining their workflow and improving efficiency.
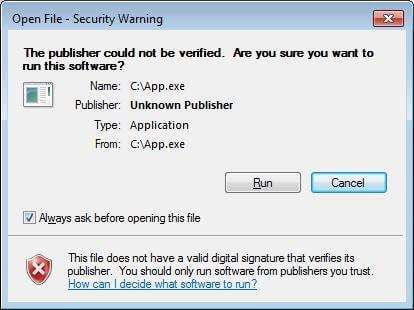
Malware risks associated with running exe from PowerShell with arguments
When running an exe file from PowerShell with arguments, there are certain malware risks that you should be aware of. Malicious actors can exploit this functionality to execute harmful commands or scripts on your system. To mitigate these risks, it is important to follow best practices and take necessary precautions.
Firstly, ensure that you are running the latest version of PowerShell to benefit from the latest security updates and features. Additionally, only run scripts from trusted and verified sources. Be cautious when using arguments or parameters that execute external commands, as these can potentially be used to launch malware.
To further protect your system, consider running PowerShell with limited privileges or as an administrator only when necessary. Regularly update your antivirus software and scan your system for any potential threats. Lastly, educate yourself on the various ways malware can be disguised and be vigilant in detecting any suspicious activity.
Inability to delete or remove exe file executed from PowerShell
If you are unable to delete or remove an .exe file executed from PowerShell, there are a few troubleshooting steps you can take to resolve this issue.
First, ensure that you are running PowerShell as an administrator. This will give you the necessary permissions to delete the file.
If that doesn’t work, you can try using the Start-Process cmdlet in PowerShell to run a command prompt as an administrator. From there, you can use the “del” or “rd” commands to delete the file.
Another option is to use the Task Scheduler to run a PowerShell script that deletes the file. You can create a basic script that uses the Remove-Item cmdlet to delete the file, and then schedule it to run as a task.
If none of these solutions work, you may need to check if the file is being used by another process. You can use tools like Process Explorer to identify and terminate any processes that are using the file.
Exe file running in the background from PowerShell execution
When running an exe file in PowerShell, it may continue running in the background even after the PowerShell execution has finished. To troubleshoot this, you can use the following steps:
1. Open PowerShell as an administrator.
2. Use the Start-Process cmdlet to run the exe file. For example, Start-Process -FilePath “C:\path\to\file.exe”.
3. If the exe file still runs in the background, you can use the Get-Process cmdlet to find the process ID (PID) of the running exe file. For example, Get-Process -Name “file.exe”.
4. Once you have the PID, you can use the Stop-Process cmdlet to end the process. For example, Stop-Process -ID PID.
5. If you’re unsure about the process name or path, you can use the Task Manager or the Get-Process cmdlet to find the necessary information.
6.
High CPU usage caused by running exe from PowerShell with arguments
High CPU usage can be caused by running an exe file from PowerShell with arguments. To troubleshoot this issue, there are several steps you can take:
1. Check the arguments being passed to the exe file. Make sure they are correct and necessary for the execution.
2. Verify that the exe file itself is not causing the high CPU usage. You can do this by running the exe file outside of PowerShell and monitoring the CPU usage.
3. If the issue persists, try running the exe file with different arguments or switches to see if that resolves the high CPU usage.
4. Consider using the Start-Process cmdlet in PowerShell to run the exe file. This cmdlet provides more control over the process, including the ability to run it as an administrator.
5. If you are running the exe file as part of a scheduled task or automation process, check the task scheduler settings and ensure that the task is not running excessively or in a loop.
Latest Update: July 2025
We strongly recommend using this tool to resolve issues with your exe and dll files. This software not only identifies and fixes common exe and dll file errors but also protects your system from potential file corruption, malware attacks, and hardware failures. It optimizes your device for peak performance and prevents future issues:
- Download and Install the Exe and Dll File Repair Tool (Compatible with Windows 11/10, 8, 7, XP, Vista).
- Click Start Scan to identify the issues with exe and dll files.
- Click Repair All to fix all identified issues.

System file implications of running exe from PowerShell with arguments
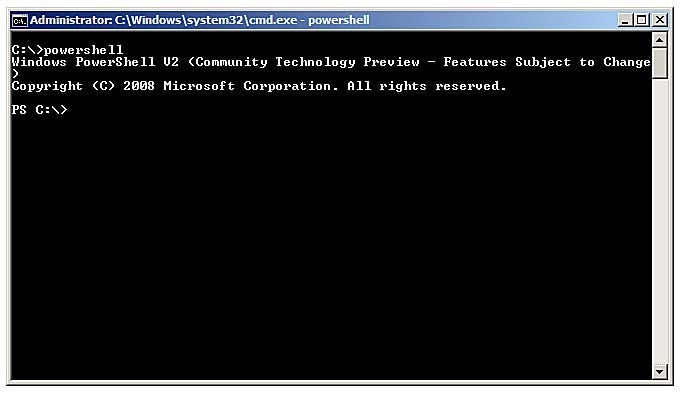
- Step 1: Open PowerShell by searching for it in the Start menu or using the Run dialog (press Win + R and type “powershell”).
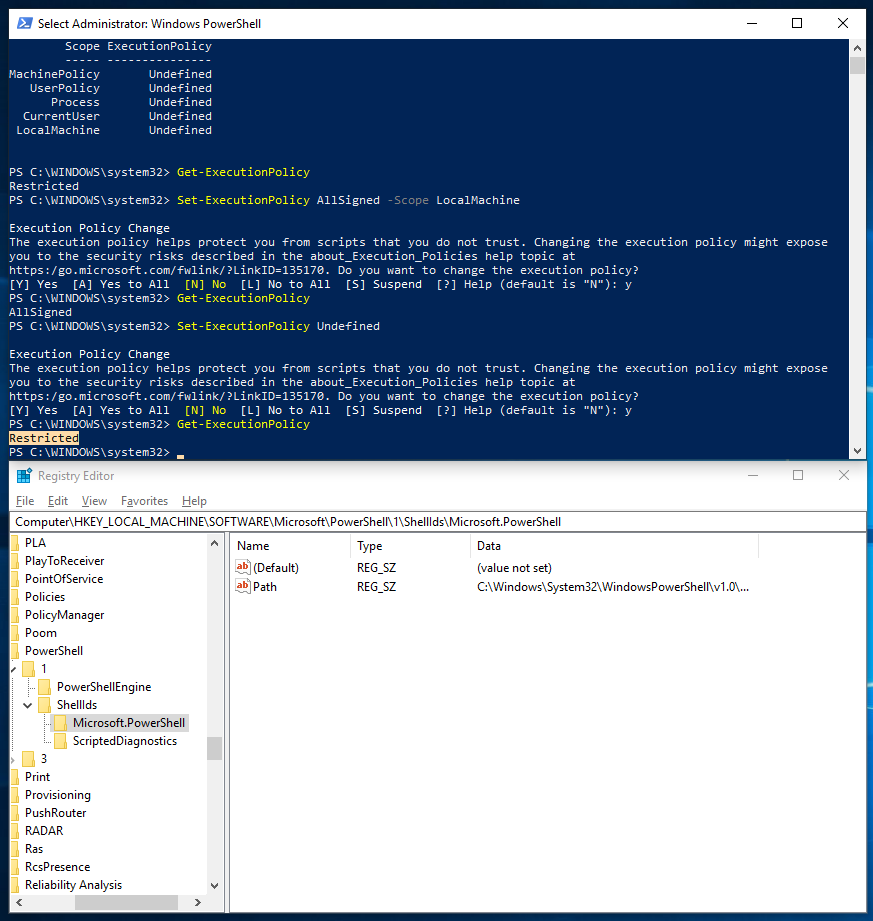
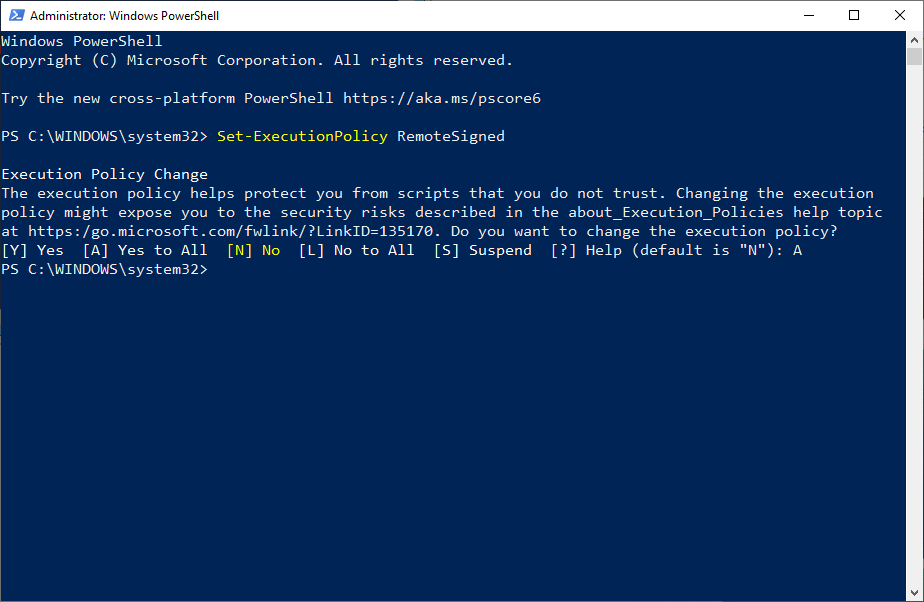
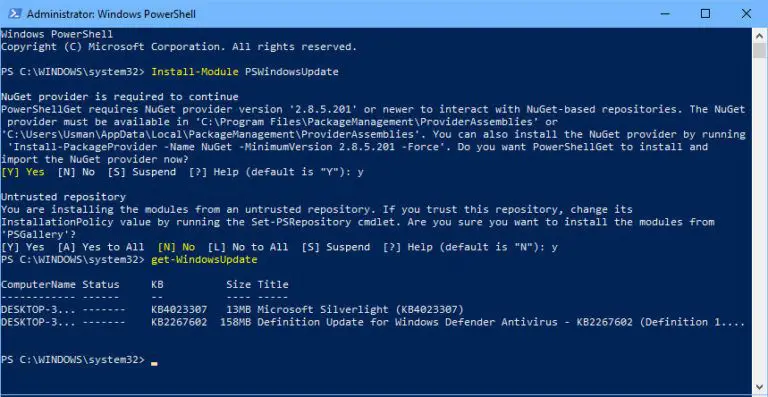
- Step 2: Check the execution policy by running the command “Get-ExecutionPolicy” in PowerShell. The execution policy determines whether scripts can be run on the system.
- Step 3: If the execution policy is set to “Restricted”, change it to “RemoteSigned” by running the command “Set-ExecutionPolicy RemoteSigned”.
- Step 4: Verify that the script or executable file you want to run is located in a directory listed in the PATH environment variable. This allows PowerShell to find the file when it is called.
- Step 5: Open File Explorer by pressing Win + E and navigate to the directory where the script or executable file is located.
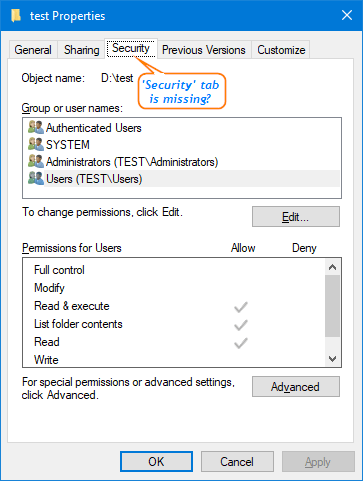
- Step 6: Right-click on the file and select “Properties” from the context menu.
- Step 7: In the “Properties” window, go to the “Security” tab and make sure that the user account running PowerShell has the necessary permissions to execute the file.
- Step 8: If the file is located on a network share, ensure that the user account has the appropriate network access rights.
- Step 9: If the file is located on a removable storage device, make sure the device is connected properly and accessible.
- Step 10: If the file still cannot be executed, try running PowerShell as an administrator. Right-click on the PowerShell shortcut and select “Run as administrator”.
- Step 11: Finally, if none of the above steps resolve the issue, check for any system file corruption by running the “sfc /scannow” command in an elevated Command Prompt. This command will scan system files for integrity violations and attempt to repair them.
Associated software and dependencies for running exe from PowerShell
- Check if the required software and dependencies are installed:
- Open the Start Menu and search for the software or dependency needed.
- If the software or dependency is not installed, download and install it from a trusted source.
- Verify the file associations:
- Right-click on the EXE file and select Properties.
- Go to the General tab and ensure that the Opens with field points to the correct program.
- If the association is incorrect, click on the Change button and select the appropriate program.
- Check for system-wide environment variables:
- Open the Start Menu and search for System.
- Select System from the search results to open the System Properties window.
- Click on the Advanced tab and then click on the Environment Variables button.
- Under the System variables section, check if the required variables for the software or dependency are defined.
- If any variables are missing, click on the New button to add them.
- Update or reinstall the software or dependency:
- Go to the official website of the software or dependency.
- Download the latest version of the software or dependency.
- Uninstall the current version of the software or dependency from Control Panel if it is already installed.
- Run the installer for the new version and follow the on-screen instructions to complete the installation.
- Check for compatibility issues:
- Review the software or dependency’s documentation or official website for any known compatibility issues with PowerShell.
- If compatibility issues exist, search for workarounds or updates provided by the software or dependency’s developer.
- Apply the recommended solutions or updates to resolve the compatibility issues.
Safety measures when ending a task for exe executed from PowerShell
Safety measures when ending a task for an exe executed from PowerShell:
1. To end a task executed from PowerShell, use the Stop-Process cmdlet followed by the process ID or name.
2. Ensure that you are running PowerShell as an administrator to have the necessary permissions to end tasks.
3. If the task is not ending properly, use the -Force parameter with the Stop-Process cmdlet to forcefully terminate the process.
4. Be cautious when using the -Force parameter, as it may result in data loss or system instability.
5. Before ending a task, save any unsaved work or data to prevent loss of progress.
6. If ending a task results in an error or unexpected behavior, consult with IT peers or a PowerShell expert for troubleshooting assistance.
7. Regularly save your work and create backups to avoid potential data loss in case of unexpected termination.
8. Consider using a response file or configuration file to automate the task and minimize the need for manual intervention.
Description and purpose of the exe process executed from PowerShell
The exe process executed from PowerShell serves the purpose of running an executable file (.exe) in PowerShell. This process allows users to execute various commands and perform actions through PowerShell, such as installing applications, troubleshooting issues, or running scripts.
To execute an exe file in PowerShell, use the Start-Process cmdlet followed by the path to the exe file. You can also use -ArgumentList to pass any arguments or parameters required by the exe file. For troubleshooting purposes, you can use echoargs to display the arguments being passed to the exe file.
It’s important to note that when executing an exe file from PowerShell, it’s recommended to run PowerShell as an administrator to ensure proper permissions are granted. Additionally, some exe files may require specific arguments, response files, or configuration settings, so it’s important to refer to the documentation or seek expert assistance if needed.
Troubleshooting tips for issues with running exe from PowerShell
- Check the file path and name:
- Ensure that the file path is correct and the file exists in the specified location.
- Verify that the file name and extension are accurate.
- Verify execution policy:
- Open PowerShell as administrator.
- Run the command Get-ExecutionPolicy to check the current execution policy.

- If the execution policy is set to Restricted, change it to a more permissive policy like RemoteSigned or Unrestricted using the command Set-ExecutionPolicy RemoteSigned.
- Enable script execution:
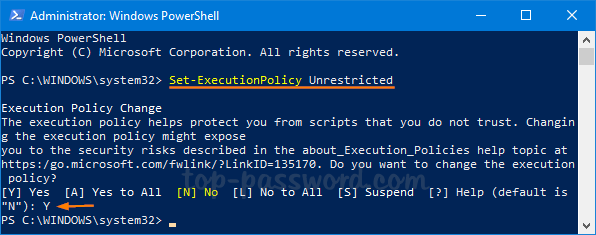
- Open PowerShell as administrator.
- Run the command Set-ExecutionPolicy -Scope CurrentUser -ExecutionPolicy Unrestricted to allow script execution for the current user.
- Confirm the action by typing Y and pressing Enter.
- Check file permissions:
- Right-click the file and select Properties.
- Go to the Security tab and ensure that the current user has the necessary permissions to access and execute the file.
- Run PowerShell as administrator:
- Right-click the PowerShell icon and select Run as administrator.
- Confirm any prompts that appear.
- Disable antivirus or firewall:
- If you suspect that your antivirus or firewall is blocking the execution of the exe file, temporarily disable them.
- Refer to the documentation of your antivirus or firewall software for instructions on how to disable them.
- Check for conflicting software:
- Some software may interfere with the execution of exe files in PowerShell.
- Temporarily uninstall or disable any recently installed software that might be causing conflicts.
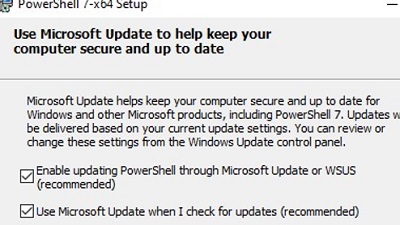
- Update PowerShell:
- Check if there are any updates available for PowerShell.
- Open Windows PowerShell and run the command Update-Help to update the help files.
- Visit the official Microsoft website to download and install the latest version of PowerShell if necessary.
Impact on performance when running exe from PowerShell with arguments
When running an .exe file from PowerShell with arguments, it can have an impact on performance. To ensure effective PowerShell execution, follow these steps:
1. Use the correct syntax to pass arguments to the .exe file. Use the -ArgumentList parameter followed by the arguments in a string format.
2. Consider the setup of the .exe file and how it handles arguments. Some .exe files may require a response file or an iss file to be specified.
3. If you are experiencing issues, try running the .exe file in record mode to see the arguments that are being passed. You can use the echoargs -verb record command to achieve this.
4. Make sure that the .exe file and any required files are located in the correct directory. You may need to navigate to the appropriate directory using the cd command in PowerShell.
5. If you are encountering errors related to permissions or the firewall, consider using the Start-Process cmdlet with the -Verb RunAs and -ArgumentList parameters to run the .exe file with elevated privileges.
Updates and version compatibility for running exe from PowerShell
Exe File Execution and Troubleshooting in PowerShell
| PowerShell Version | Windows 7 | Windows 8 | Windows 10 |
|---|---|---|---|
| Windows PowerShell 2.0 | Yes | Yes | Yes |
| Windows PowerShell 3.0 | No | Yes | Yes |
| Windows PowerShell 4.0 | No | Yes | Yes |
| Windows PowerShell 5.1 | No | No | Yes |
| PowerShell Core 6.x | No | No | Yes |
Downloading and acquiring the exe file for PowerShell execution
To download and acquire the exe file for PowerShell execution, follow these steps:
1. Open your preferred web browser.
2. Search for the name of the exe file you need to download.
3. Locate a trusted and reliable source to download the file from.
4. Click on the download link provided.
5. Save the exe file to a location on your computer that you can easily access.
6. Once the download is complete, navigate to the saved location.
7. Right-click on the exe file and select “Run as administrator” to ensure proper execution.
8. If you encounter any issues during the execution, troubleshoot by checking the command line arguments, verifying the file path, or consulting relevant online resources.
9.
Alternatives to running exe from PowerShell with arguments
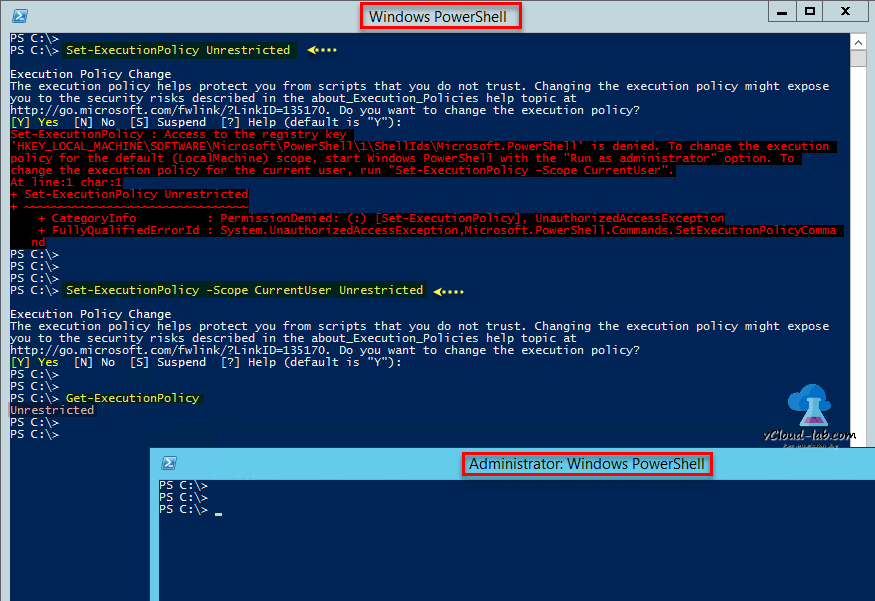
- Open PowerShell as an administrator.
- Type the following command and press Enter: Get-ExecutionPolicy
- If the result is Restricted, type the following command and press Enter: Set-ExecutionPolicy RemoteSigned
- Confirm the change by typing Y and pressing Enter.
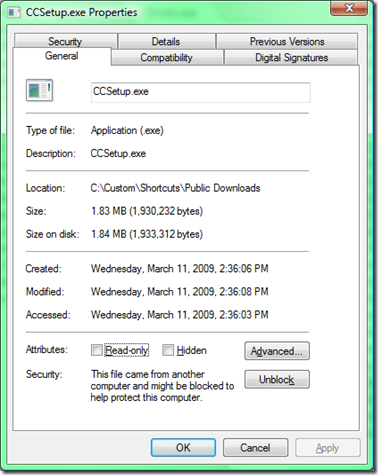
Repair Method 2: Unblock the Executable
- Locate the executable file that you want to run.
- Right-click on the file and select Properties.
- In the General tab, check if there is an Unblock button.
- If the button is present, click on it and then click Apply or OK.
Repair Method 3: Use the Start-Process cmdlet
- Open PowerShell as an administrator.
- Type the following command and press Enter: Start-Process -FilePath “path\to\executable.exe” -ArgumentList “argument1”, “argument2”
- Replace “path\to\executable.exe” with the actual path to the executable file.
- Replace “argument1”, “argument2” with the desired arguments for the executable (if applicable).
Repair Method 4: Run PowerShell with Bypass Execution Policy
- Open Command Prompt as an administrator.
- Type the following command and press Enter: powershell.exe -ExecutionPolicy Bypass
- A new PowerShell window will open with the execution policy bypassed.
- Type the following command and press Enter: “path\to\executable.exe” argument1 argument2
- Replace “path\to\executable.exe” with the actual path to the executable file.
- Replace argument1 and argument2 with the desired arguments for the executable (if applicable).
Compatibility with different versions of Windows when running exe from PowerShell
Sure! Here’s an example of a responsive HTML table with inline CSS for the compatibility with different versions of Windows when running an .exe file from PowerShell:
“`html
Exe File Execution and Troubleshooting in PowerShell
| Windows Version | Compatibility |
|---|---|
| Windows 10 | Fully Compatible |
| Windows 8.1 | Fully Compatible |
| Windows 7 | Partially Compatible |
| Windows Vista | Partially Compatible |
| Windows XP | Not Compatible |
“`
You can copy and paste this code into an HTML file and open it in a web browser to see the responsive table. The table will adapt its layout when viewed on screens smaller than 600 pixels wide.