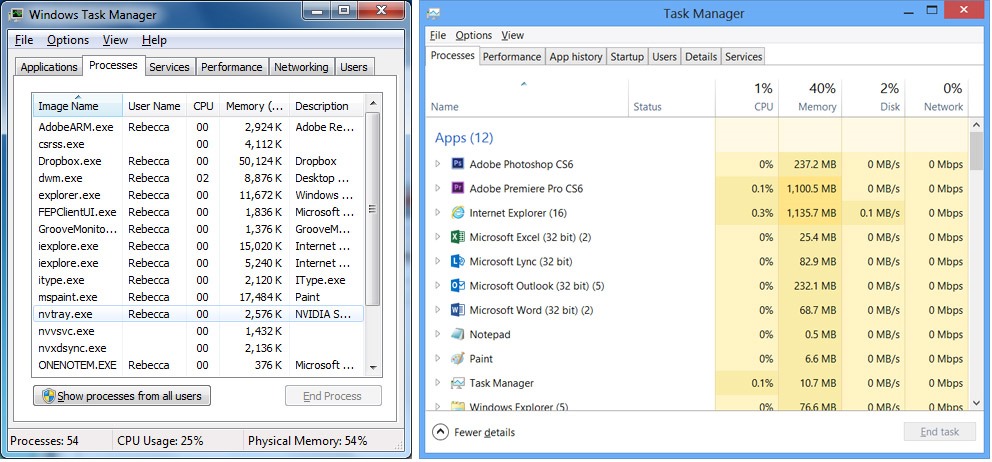
MsMpEng.exe High Memory and CPU Fixes
This article explores various fixes for the high memory and CPU usage issues related to MsMpEng.exe, aiming to provide users with effective solutions.
- Download and install the Exe and Dll File Repair Tool.
- The software will scan your system to identify issues with exe and dll files.
- The tool will then fix the identified issues, ensuring your system runs smoothly.
Purpose of msmpeng.exe high memory
To fix this issue, you can try the following steps:
1. Open the Start menu and type “Control Panel” to access the Control Panel settings.
2. In the Control Panel, search for “Microsoft Security Essentials” and click on it to open the program.
3. In the MSE window, go to the Settings tab and click on “Real-time protection.”
4. Uncheck the option “Turn on real-time protection” to temporarily disable it.
5. Alternatively, you can adjust the scanning schedule or exclude certain files or folders from being scanned.
6. Once you have made the necessary changes, click on “Apply” and then “OK” to save the settings.
Is msmpeng.exe high memory safe?
If you’re wondering whether msmpeng.exe high memory usage is safe, the answer is yes. Msmpeng.exe is a legitimate process associated with Microsoft Security Essentials (MSE) or Windows Defender, depending on your operating system. It is responsible for scanning and protecting your computer against malware and other threats.
However, if msmpeng.exe is consuming an unusually high amount of memory or CPU resources, it can slow down your computer. To fix this issue, you can try the following steps:
1. Exclude certain files or folders from being scanned by Windows Defender/MSE.
2. Update your antivirus software to the latest version.
3. Perform a full system scan to ensure your computer is free from malware.
4. Disable Windows Defender/MSE temporarily and use an alternative antivirus program.
5. Check for conflicting software that may be causing the high memory usage.
6. Adjust Windows Defender/MSE settings to optimize performance.
Origin and creator of msmpeng.exe high memory
The msmpeng.exe high memory issue is a common problem faced by Windows users. Originating from Microsoft Defender, msmpeng.exe is a process responsible for real-time scanning and protection against malware. However, it sometimes consumes excessive CPU resources, leading to system slowdowns. To fix this issue, follow these steps:
1. Open the Start menu and search for “Control Panel.”
2. In the Control Panel, navigate to “Windows Defender Firewall” or “Windows Security.”
3. Click on “Virus & threat protection” and then “Manage settings.”
4. Scroll down and click on “Exclusions.”
5. Add the msmpeng.exe file to the exclusion list by clicking on “Add an exclusion” and selecting “File.”
6. Locate msmpeng.exe in the directory and click “Exclude this file.”
7. Restart your computer for the changes to take effect.
By excluding msmpeng.exe from real-time scanning, you can alleviate the high memory usage issue and improve system performance.
Legitimacy of msmpeng.exe high memory
If you are experiencing high memory usage and CPU usage due to the msmpeng.exe process, there are several fixes you can try.
First, check for updates for your Windows operating system and Windows Defender. Outdated versions can cause performance issues.
You can also try excluding certain files or directories from Windows Defender scans. This can help reduce the workload on msmpeng.exe.
If you are using Windows 10, you can disable real-time protection temporarily by right-clicking the Windows Defender icon on the taskbar and selecting “Open”. Then, click on “Virus & threat protection” and toggle off “Real-time protection”.
Another option is to limit the CPU usage of msmpeng.exe. You can do this by accessing the Group Policy editor or the Windows Registry Editor.
Lastly, scanning for malware and cleaning up your system can help resolve any underlying issues that may be causing high memory and CPU usage.
Description and function of msmpeng.exe high memory process
MsMpEng.exe is a process related to Windows Defender, the built-in antivirus program in Windows. It runs in the background and is responsible for scanning and protecting your computer from malware, viruses, and other security threats. However, some users may experience high memory and CPU usage from the MsMpEng.exe process, which can slow down their computer.
To fix this issue, there are a few steps you can take. First, make sure that your Windows Defender is up to date. You can do this by opening the Windows Security app from the Start menu and checking for updates.
If that doesn’t solve the problem, you can try excluding certain files or folders from being scanned by Windows Defender. This can be done by going to the Windows Security app, clicking on “Virus & Threat Protection,” and then selecting “Manage Settings.”
Another option is to schedule the Windows Defender scan to run at a time when you’re not actively using your computer. This can be done by going to the Windows Security app, clicking on “Virus & Threat Protection,” and then selecting “Manage Settings.”
Running msmpeng.exe high memory in the background
If you’re experiencing high memory usage from msmpeng. exe running in the background, there are several fixes you can try. One solution is to exclude certain files or folders from Windows Defender’s scanning process. This can be done through the Windows Defender settings in the Control Panel or using Group Policy if you’re on a Windows Pro or Enterprise edition. Another option is to schedule Windows Defender scans for a time when you’re not using your computer. This can help reduce the impact on your CPU and memory during active usage.
Additionally, you can disable Windows Defender real-time protection temporarily if you’re certain that your computer is safe from malware.
High CPU usage caused by msmpeng.exe high memory
First, open the Control Panel and navigate to “Windows Defender” or “Windows Security” depending on your operating system.
Next, click on “Virus & Threat Protection” and then “Manage Settings.”
Scroll down to the “Exclusions” section and click on “Add or remove exclusions.”
Here, you can add an exclusion for msmpeng.exe to prevent it from scanning certain files or directories that may be causing the high CPU usage.
Alternatively, you can try disabling real-time protection temporarily to see if that resolves the issue.
If the problem persists, you may need to update Windows Defender or perform a full system scan to check for any malware or viruses that could be causing the high CPU usage.
Latest Update: July 2025
We strongly recommend using this tool to resolve issues with your exe and dll files. This software not only identifies and fixes common exe and dll file errors but also protects your system from potential file corruption, malware attacks, and hardware failures. It optimizes your device for peak performance and prevents future issues:
- Download and Install the Exe and Dll File Repair Tool (Compatible with Windows 11/10, 8, 7, XP, Vista).
- Click Start Scan to identify the issues with exe and dll files.
- Click Repair All to fix all identified issues.

Impact of msmpeng.exe high memory on system performance
The high memory usage of msmpeng.exe can significantly impact system performance. To fix this issue, follow these steps:
1. Open the Control Panel and navigate to “Windows Defender.”
2. Click on “Virus & threat protection settings.”
3. Under “Exclusions,” click on “Add or remove exclusions.”
4. Select “Add an exclusion” and choose “Folder.”
5. Browse and select the directory where msmpeng.exe is located.
6. Restart your computer.
Alternatively, you can try these additional fixes:
1. Update Windows Defender to the latest version.
2. Disable Windows Defender real-time protection temporarily.
3. Disable automatic sample submission in Windows Defender settings.
4. Scan your computer for malware using a reliable antivirus program.
5. Modify the Windows Defender schedule to run during non-peak hours.
6. If the issue persists, consider disabling Windows Defender and using a different antivirus program.
Troubleshooting msmpeng.exe high memory issues
-
Perform a full system scan
- Open Windows Security by clicking on the Start button, selecting Settings, and then Update & Security.
- Click on Windows Security.
- Click on Virus & Threat Protection.
- Click on Quick Scan or Full Scan depending on your preference.
- Wait for the scan to complete and follow any on-screen instructions.
-
Exclude msmpeng.exe from Windows Defender
- Open Windows Security by clicking on the Start button, selecting Settings, and then Update & Security.
- Click on Windows Security.
- Click on Virus & Threat Protection.
- Click on Manage Settings under Virus & Threat Protection Settings.
- Scroll down and click on Exclusions.
- Click on Add or remove exclusions.
- Click on Add an exclusion and select File.
- Navigate to the location of msmpeng.exe (usually C:\Program Files\Windows Defender) and select it.
- Click Open and then OK.
-
Update Windows Defender
- Open Windows Security by clicking on the Start button, selecting Settings, and then Update & Security.
- Click on Windows Security.
- Click on Virus & Threat Protection.
- Click on Check for updates.
- Wait for Windows Defender to check for updates and follow any on-screen instructions to install them.
-
Disable Windows Defender temporarily
- Open Windows Security by clicking on the Start button, selecting Settings, and then Update & Security.
- Click on Windows Security.
- Click on Virus & Threat Protection.
- Click on Manage Settings under Virus & Threat Protection Settings.
- Toggle the switch under Real-time protection to Off.
- Confirm the action by clicking on Yes.
-
Perform a clean boot
- Press Windows Key + R to open the Run dialog box.
- Type msconfig and press Enter.
- In the System Configuration window, go to the Services tab.
- Check the box next to Hide all Microsoft services.
- Click on Disable all.
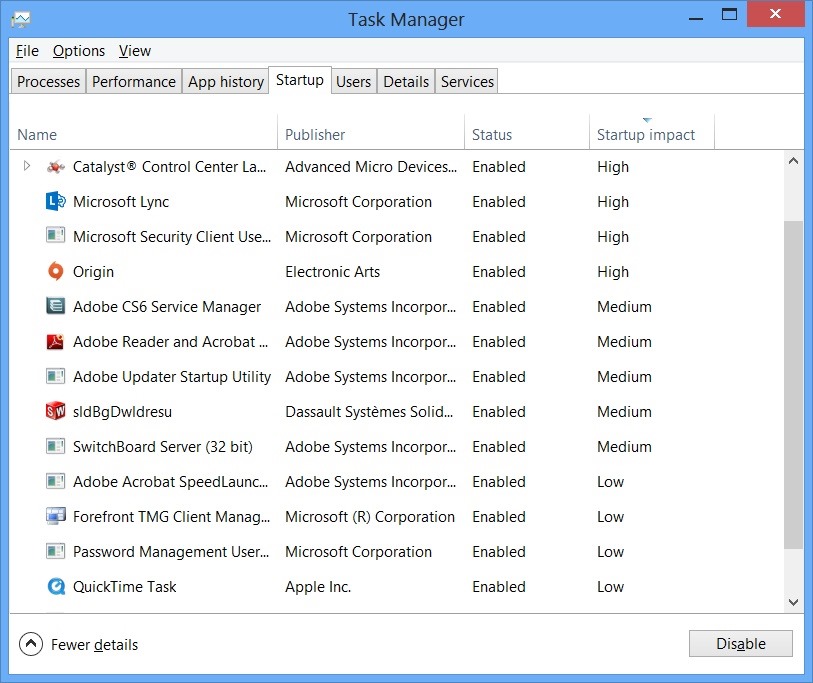
- Go to the Startup tab and click on Open Task Manager.
- In the Task Manager, disable all the startup items by right-clicking on each item and selecting Disable.
- Close the Task Manager and click on OK in the System Configuration window.
- Restart your computer.
Removing msmpeng.exe high memory with a removal tool

- Download a reliable removal tool from a trusted source.
- Save the removal tool to a location on your computer where you can easily access it.
- Close all running programs to ensure the removal tool can work effectively.
- Locate the downloaded removal tool file on your computer.
- Double-click on the removal tool file to run it.
- Follow the on-screen instructions provided by the removal tool to start the scanning process.
- Wait for the scanning process to complete as it may take some time depending on the size of your system and the number of files being scanned.
- Review the scan results presented by the removal tool.

- Select the option to remove msmpeng.exe or any other related threats identified by the removal tool.
- Confirm the removal action when prompted by the removal tool.
- Wait for the removal process to complete as it may take a few minutes.
- Restart your computer to ensure that msmpeng.exe and any related components are completely removed from memory.
- After the restart, check if the msmpeng.exe high memory issue has been resolved.
Compatibility with different Windows versions
- Check system requirements:
– Ensure that your computer meets the minimum system requirements for the Windows version you are using. - Update Windows:
– Open Windows Settings by pressing Windows key + I.
– Click on Update & Security.
– Select Windows Update from the left menu.
– Click on Check for updates and install any available updates.
– Restart your computer if prompted. - Run Windows Compatibility Mode:
– Right-click on the program or application causing the issue.
– Select Properties.
– Go to the Compatibility tab.
– Check the box next to Run this program in compatibility mode for:.
– Choose the appropriate Windows version from the drop-down menu.
– Click Apply and then OK. - Install Windows Updates for Compatibility:
– Open Windows Settings by pressing Windows key + I.
– Click on Update & Security.
– Select Windows Update from the left menu.
– Click on Check for updates and install any available updates.
– Restart your computer if prompted. - Check for driver updates:
– Press Windows key + X and select Device Manager.
– Expand the relevant category for the driver you want to update.
– Right-click on the driver and select Update driver.
– Choose to automatically search for updated driver software.
– Follow the on-screen instructions to complete the update process.
– Restart your computer if prompted.
Alternatives to msmpeng.exe high memory
- Disable Windows Defender real-time protection: Turning off real-time scanning can help reduce the memory usage of msmpeng.exe.
- Exclude certain files or folders from Windows Defender scanning:
– Add specific files or folders to the exclusion list in Windows Defender settings to prevent msmpeng.exe from scanning them.
– This can be especially useful for excluding non-essential or trusted files that are causing high memory usage. - Update Windows Defender: Keeping Windows Defender up to date with the latest definitions and software updates can address known bugs or performance issues.
- Scan your system for malware:
– Use a reliable antivirus program to perform a full system scan and remove any potential malware that may be causing high memory usage.
– This can help eliminate the need for msmpeng.exe to consume excessive resources. - Limit Windows Defender’s scanning schedule: Adjust the scanning schedule to a time when your computer is less likely to be in use, reducing the impact on system performance.
- Disable Windows Defender and use an alternative antivirus program:
– If you frequently encounter high memory usage and CPU usage issues with msmpeng.exe, consider using a different antivirus software that may be more resource-friendly.
– Be sure to fully uninstall Windows Defender to prevent conflicts between different antivirus programs. - Upgrade your system hardware: If you consistently experience high memory usage with msmpeng.exe, upgrading your RAM or switching to a faster processor can help alleviate the issue.
- Seek assistance from Microsoft Support:
– If none of the above solutions resolve the msmpeng.exe high memory problem, contacting Microsoft Support can provide further guidance and potential fixes.
– They may have specific troubleshooting steps or updates available to address the issue.
Malware associated with msmpeng.exe high memory
- Scan for Malware
- Update Windows Defender
- Exclude msmpeng.exe from Scans
- Disable Windows Defender
- Perform a Clean Boot
- Remove Third-Party Antivirus Software
Scan for Malware:
- Open Windows Security by clicking on the Start button and selecting Settings. Then, click on Update & Security and choose Windows Security.
- In the Windows Security window, click on Virus & threat protection in the left-hand menu.
- Click on Quick scan or Full scan to start scanning for malware. The scan will check for any malicious software that may be causing the high memory usage.
- If any malware is found, follow the on-screen instructions to remove it.
Update Windows Defender:
- Open Windows Security by clicking on the Start button and selecting Settings. Then, click on Update & Security and choose Windows Security.
- In the Windows Security window, click on Virus & threat protection in the left-hand menu.
- Click on Check for updates to search for and install any available updates for Windows Defender.
- Restart your computer after the updates are installed.
Exclude msmpeng.exe from Scans:
- Open Windows Security by clicking on the Start button and selecting Settings. Then, click on Update & Security and choose Windows Security.
- In the Windows Security window, click on Virus & threat protection in the left-hand menu.
- Scroll down to the Exclusions section and click on Add or remove exclusions.
- Click on Add an exclusion and select Folder.
- Browse to the location of msmpeng.exe (usually located in the C:\Program Files\Windows Defender folder) and select it.
- Click OK to confirm the exclusion.
Disable Windows Defender:
- Open Windows Security by clicking on the Start button and selecting Settings. Then, click on Update & Security and choose Windows Security.
- In the Windows Security window, click on Virus & threat protection in the left-hand menu.
- Click on Manage settings under Virus & threat protection settings.
- Toggle the Real-time protection switch to the Off position.
- Click Yes in the confirmation prompt.
Perform a Clean Boot:
- Open the Run dialog by pressing the Windows key + R on your keyboard.
- Type msconfig and press Enter to open the System Configuration window.
- In the System Configuration window, go to the Services tab.
- Check the box next to Hide all Microsoft services to prevent disabling essential Windows services.
- Click on Disable all to disable all the remaining services.
- Go to the Startup tab and click on Open Task Manager.
- In the Task Manager, disable all the startup items by selecting them and clicking on Disable.
- Close the Task Manager and go back to the System Configuration window.
- Click on Apply and then OK to save the changes.
- Restart your computer for the changes to take effect.
Remove Third-Party Antivirus Software:
- Open the Control Panel by clicking on the Start button and selecting Control Panel.
- In the Control Panel, click on Uninstall a program under the Programs section.
- Scroll through the list of installed programs and locate any third-party antivirus software.
- Select the antivirus software and click on Uninstall or Remove.
- Follow the on-screen instructions to complete the uninstallation process.
- Restart your computer after the antivirus software is removed.
Inability to delete msmpeng.exe high memory
- Disable Windows Defender Real-time Protection
- Open Windows Defender Security Center by clicking on the Start button, then selecting Settings and clicking on Update & Security.
- In the left pane, click on Windows Defender.
- Under Virus & threat protection settings, click on Manage settings.
- Toggle off the Real-time protection switch.
- Add MsMpEng.exe to Windows Defender Exclusion List
- Open Windows Defender Security Center by clicking on the Start button, then selecting Settings and clicking on Update & Security.
- In the left pane, click on Windows Defender.
- Under Virus & threat protection settings, click on Manage settings.
- Scroll down to the Exclusions section and click on Add or remove exclusions.
- Click on Add an exclusion and select Folder.
- Navigate to the folder containing msmpeng.exe (usually located in C:\Program Files\Windows Defender) and click on Select Folder.
- Perform a System File Check
- Open Command Prompt as an administrator by pressing Win+X and selecting Command Prompt (Admin).
- Run the command sfc /scannow and wait for the process to complete.
- If any corrupted files are found, the system will attempt to repair them automatically.
- Disable Windows Defender using Group Policy
- Open Group Policy Editor by pressing Win+R and typing gpedit.msc. Press Enter.
- In the left pane, navigate to Computer Configuration > Administrative Templates > Windows Components > Windows Defender.
- Double-click on Turn off Windows Defender in the right pane.
- Select Enabled and click on Apply and OK.
- Restart your computer for the changes to take effect.
Should I end task for msmpeng.exe high memory?
If you are experiencing high memory usage from the msmpeng.exe process, there are a few steps you can take to address the issue.
First, open the Windows Defender Security Center by clicking on the Windows Defender icon in the taskbar or searching for it in the Start menu.
Next, navigate to the Virus & threat protection tab and click on Scan options.
Here, you can choose to exclude certain files or folders from being scanned, which can help reduce memory usage.
Additionally, you can try limiting the CPU usage of the msmpeng.exe process by adjusting the Windows Defender’s scan schedule.
To do this, go to the Settings tab in the Windows Defender Security Center and click on Exclusions.
From there, you can add specific files, folders, or file types to exclude from scanning.
These steps should help alleviate the high memory usage caused by msmpeng.exe and improve the overall performance of your computer.
Downloading updates for msmpeng.exe high memory
To download updates for the msmpeng.exe high memory issue, follow these steps:
1. Open the Control Panel on your Windows computer.
2. Look for the “Windows Update” or “Windows Security” option and click on it.
3. In the Windows Update or Windows Security window, look for the “Check for updates” button and click on it.
4. Windows will now check for any available updates for your computer.
5. If updates are found, click on the “Download” or “Install” button to start the update process.
6. Wait for the updates to download and install on your computer.
7. Once the updates are installed, restart your computer to apply the changes.
8. After restarting, check if the msmpeng.exe high memory issue has been resolved.