Silent PowerShell Install EXE File
This article explores the silent installation process of an EXE file using PowerShell, providing a concise guide for executing installations without user intervention.
- Download and install the Exe and Dll File Repair Tool.
- The software will scan your system to identify issues with exe and dll files.
- The tool will then fix the identified issues, ensuring your system runs smoothly.
Purpose and Usage of Installing Exe Files with PowerShell
Installing EXE files with PowerShell allows for silent installations, eliminating the need for user intervention during the process. This is particularly useful for IT Pros and companies looking to streamline their software installations.
To install an EXE file silently using PowerShell, you can use the Start-Process command with the -Wait parameter. For example, you can run “Start-Process -Wait ‘C:\Temp\setup.exe’ /s” to install an EXE file located in the C:\Temp directory silently.
Silent installations are beneficial as they reduce the chances of human error and provide a more efficient way to deploy applications across multiple systems. Additionally, PowerShell allows for automation, making it easier to handle complex installation processes.
By using PowerShell to install EXE files silently, you can save time and resources, especially when dealing with large-scale deployments or network printers. This approach is ideal for IT professionals and companies who want to minimize user interruptions and ensure smooth installations.
Safety and Legitimacy of Installing Exe Files with PowerShell
When installing EXE files with PowerShell, it is important to ensure safety and legitimacy. To do this, follow these steps:
1. Confirm the source: Always download EXE files from reputable sources to avoid malware or viruses.
2. Verify legitimacy: Check the digital signature of the EXE file to ensure it is from a trusted publisher.
3. Silent installation: Use the Start-Process -Wait command to silently install the EXE file without any GUI or pop-ups.
4. Specify the path: Provide the full path to the EXE file, such as C:\Setup.exe, to ensure it is executed correctly.
5. Pass arguments: If the EXE file requires any specific parameters or arguments, include them in the command using the -ArgumentList parameter.
Origin and Creator of Exe Files Installed with PowerShell
The origin of EXE files installed with PowerShell can be traced back to their creator, Ansgar Wiechers. These files serve the purpose of silently installing applications or scripts without the need for a GUI. This method is favored by IT professionals and system administrators as it saves time and resources.
To execute an EXE file with PowerShell, use the Start-Process cmdlet followed by the path to the installer file. For example, Start-Process C:\Setup.exe. This will initiate the installation process without any popups or user intervention.
PowerShell provides a more efficient and automated approach to installing applications compared to traditional methods such as Batch files or Windows Installer. The ability to run EXE files silently is particularly useful in large-scale deployments using tools like SCCM or the Deployment Toolkit.
By using PowerShell to install EXE files silently, system administrators can avoid human errors and streamline the installation process across multiple systems. It’s also worth noting that PowerShell can be used to update PowerShell versions, install Microsoft Office 365, and even install network printers.
Malware Concerns and Removal Tools for Exe Files Installed with PowerShell
When dealing with exe files installed using PowerShell, it’s important to be aware of potential malware concerns. Malicious actors often use PowerShell to execute harmful scripts or install malware on your computer. To protect yourself, it’s crucial to have the right removal tools and take necessary precautions.
To remove malware installed through PowerShell, you can use antivirus software specifically designed to detect and remove these threats. Additionally, regularly scanning your computer for malware with trusted security tools is essential.
When installing exe files with PowerShell, always be cautious and verify the source of the file. Avoid downloading files from untrustworthy websites or unknown sources.
If you encounter a suspicious exe file, you can use the following PowerShell command to scan it:
“`powershell
Get-MpThreatCatalog | Get-MpThreatDetection -Path
“`
This command will scan the specified file for threats and provide you with a report.
Remember to keep your PowerShell version updated, as newer versions often come with improved security features. Regularly updating your Windows operating system and other software applications is also crucial to prevent vulnerabilities that malware can exploit.
Compatibility and Troubleshooting Issues when Installing Exe Files with PowerShell
When installing EXE files with PowerShell, it is important to consider compatibility and troubleshooting issues. Here are some tips to help you navigate this process smoothly:
1. Check compatibility: Ensure that the EXE file you are trying to install is compatible with your operating system and PowerShell version. Update your PowerShell version if needed.
2. Use the correct syntax: When running the installation command, use the correct syntax and include any necessary arguments. For example, use Start-Process followed by the path to the EXE file.
3. Troubleshoot installation errors: If you encounter any errors during installation, check the error message for clues. You can also try running the installation in a different way, such as using Start-Process -Wait.
4. Consider permissions: Make sure you have the necessary permissions to install software on your system. Running PowerShell as an administrator may be required.
5. Test the installation: After the installation, verify that the application or resource is functioning properly. Test any relevant features or functionalities.
Latest Update: July 2025
We strongly recommend using this tool to resolve issues with your exe and dll files. This software not only identifies and fixes common exe and dll file errors but also protects your system from potential file corruption, malware attacks, and hardware failures. It optimizes your device for peak performance and prevents future issues:
- Download and Install the Exe and Dll File Repair Tool (Compatible with Windows 11/10, 8, 7, XP, Vista).
- Click Start Scan to identify the issues with exe and dll files.
- Click Repair All to fix all identified issues.

High CPU Usage and Performance Impact of Exe Files Installed with PowerShell
When using PowerShell to install EXE files silently, it’s important to be aware of the potential impact on CPU usage and performance.
Silent installations can be resource-intensive and may cause high CPU usage, especially if the installation process involves complex scripts or large application packages. This can result in slower system performance and longer installation times.
To mitigate these issues, it’s recommended to optimize your PowerShell scripts and use efficient coding practices. You can also consider using alternative installation methods, such as using MSI packages or utilizing deployment tools like SCCM or Windows Deployment Toolkit.
Another option is to update your PowerShell version, as newer versions often include performance improvements. Additionally, consider checking for any available updates for the software you’re installing, as newer versions may have addressed performance issues.
By being mindful of the potential impact on CPU usage and performance, you can ensure a smoother and more efficient installation process.
Associated Software and Startup Configurations for Exe Files Installed with PowerShell
- Restore Default File Associations:
- Open the Start menu.
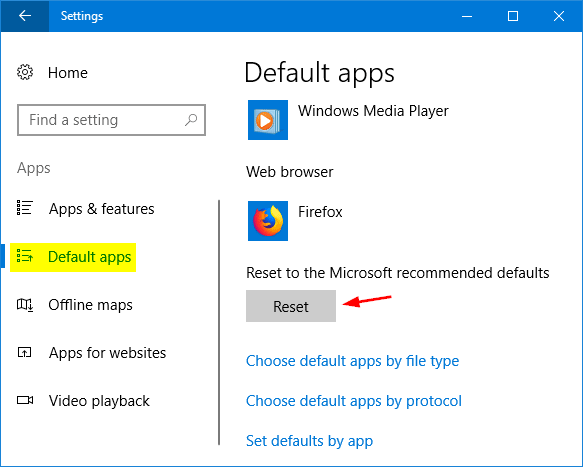
- Type Control Panel and open it.
- Click on Programs and then select Default Programs.
- Choose Set Associations.
- Scroll down and locate the file type associated with the PowerShell-installed EXE file.
- Select the file type and click on Change program.
- Choose the appropriate program from the list or click on More apps to find the desired program.
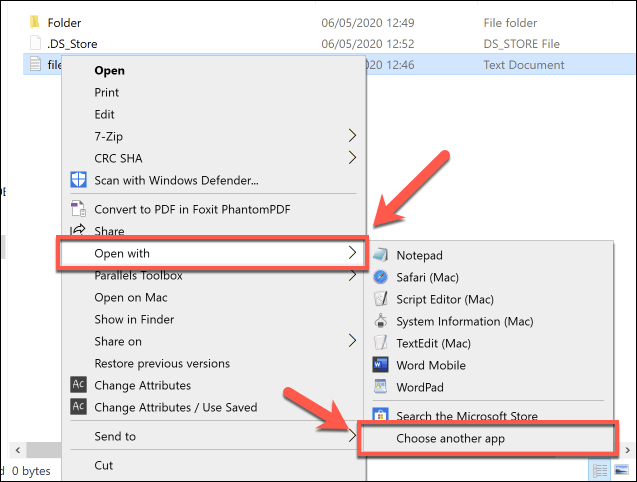
- Click on OK to save the changes.
- Modify Startup Configurations:
- Press Win + R to open the Run dialog box.
- Type msconfig and press Enter.
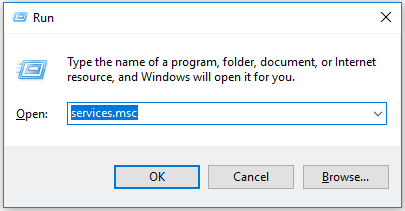
- In the System Configuration window, navigate to the Startup tab.
- Locate the entry related to the PowerShell-installed EXE file.
- Uncheck the box next to the entry to disable it from startup.
- Click on Apply and then OK.
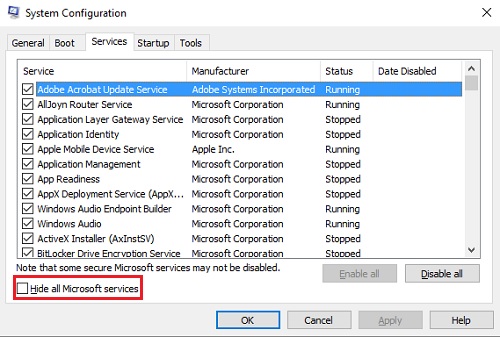
- Restart the computer for the changes to take effect.
Background Processes and Not Responding Behavior of Exe Files Installed with PowerShell
When using PowerShell to install EXE files silently, it’s important to understand the background processes and potential not responding behavior that may occur.
During the installation process, PowerShell executes the installer file in the background without any user interface or popups. This allows IT Pros to automate installations and upgrades, saving time and reducing human error. However, it’s crucial to keep in mind that some EXE installers may have different behaviors when executed silently.
To monitor the installation progress and ensure that the EXE file is not encountering any issues, you can use the Process object in PowerShell. By running Get-Process -Name “setup.exe”, you can check for the presence of the installer process.
Additionally, if you encounter any not responding behavior, it’s recommended to check the Task Manager for any related processes that might be consuming excessive resources. Killing these processes can help resolve any hanging or frozen installations.
Understanding the background processes and potential not responding behavior of EXE files installed with PowerShell is essential for smooth and efficient deployments.
Importance of Regular Updates for Exe Files Installed with PowerShell
Regular updates for EXE files installed with PowerShell are crucial for maintaining the security and functionality of your system. By keeping your EXE files up to date, you can protect against potential vulnerabilities and ensure that your applications are running smoothly.
Regularly updating your EXE files is especially important if you are using PowerShell for silent installations. Outdated EXE files may not be compatible with the latest PowerShell version, leading to errors and failed installations.
To update your EXE files, follow these steps:
1. Check for updates: Regularly check for updates from the software vendor or developer. They may release new versions with bug fixes, security patches, and performance improvements.
2. Download the latest version: Once an update is available, download the new EXE file from a trusted source.
3. Replace the old EXE file: Locate the old EXE file on your system and replace it with the new version.
4. Test the installation: Before deploying the updated EXE file, test the installation to ensure it works correctly.
Downloading and Installation Alternatives to Exe Files with PowerShell
When it comes to downloading and installing alternatives to EXE files with PowerShell, there are a few options you can consider. One approach is to use the “Start-Process” cmdlet to run the installation file silently. This allows you to install the application without any user interaction or popups. Another option is to use the “Invoke-WebRequest” cmdlet to download the installation file directly from a URL, and then use “Start-Process” to run the downloaded file silently.
Additionally, you can use tools like “winget” or “sccm application” to install applications silently. It’s also important to ensure that you have the latest version of PowerShell installed, as older versions may not support some of these methods. By using these techniques, you can streamline the installation process and avoid any unnecessary interruptions or prompts.
System File Integration and Impact of Exe Files Installed with PowerShell
Silent PowerShell Install EXE File
When performing a silent install of an EXE file using PowerShell, it’s important to understand the system file integration and its impact. This process allows for seamless integration of the EXE file into the system, ensuring smooth operation and compatibility.
To begin, open PowerShell and navigate to the directory where the EXE file is located using the “cd” command. Once there, execute the following command: “.\[filename].exe /silent“. This command runs the EXE file silently, without any popups or prompts.
During the installation, the EXE file may make changes to system files and registry entries. It’s crucial to review the documentation provided by the software vendor or developer to understand the specific impact on your system.
Remember to always run PowerShell with administrative privileges to ensure proper execution and access to system resources.
Difficulty in Deleting Exe Files Installed with PowerShell
Difficulty in deleting EXE files installed with PowerShell can be frustrating, but there are ways to overcome this challenge. One option is to use the “Remove-Item” cmdlet in PowerShell to delete the EXE file. However, sometimes the file may be locked or in use, preventing deletion. In such cases, you can use the “taskkill” command in CMD to terminate any processes associated with the EXE file before attempting deletion again.
Another approach is to use a batch file that runs PowerShell with administrative privileges and includes the “Remove-Item” command. This can help bypass any permission restrictions. Additionally, if the EXE file is installed as part of an application package, you may need to uninstall the entire package using the appropriate command or tool, such as SCCM.