Windows 11 MSTeams.exe Bad Image Error Fix
This article discusses the steps to fix the MSTeams.exe Bad Image Error in Windows 11.
- Download and install the Exe and Dll File Repair Tool.
- The software will scan your system to identify issues with exe and dll files.
- The tool will then fix the identified issues, ensuring your system runs smoothly.
Introduction to windows 11 msteams.exe bad image function
If you’re encountering the “MSTeams.exe Bad Image” error on your Windows 11 PC, don’t worry. We’ve got you covered with a simple fix.
First, try updating Microsoft Teams to the latest version. This can often resolve compatibility issues and bug-related errors.
If that doesn’t work, you can try a few troubleshooting methods. One option is to use the MiniTool Power Data Recovery tool to repair any corrupted files that may be causing the error.
Another solution is to reinstall Microsoft Teams. This can help fix any issues with the application itself. You can download the setup file from the Microsoft website and follow the on-screen instructions to reinstall it.
If none of these methods work, you can try using the Command Prompt to fix the error. Open the Command Prompt as an administrator and run the command “sfc /scannow” to scan and repair any system file issues.
Is windows 11 msteams.exe bad image safe?
If you’re encountering the “Windows 11 MSTeams.exe Bad Image” error, don’t worry, there are steps you can take to fix it. This error is often caused by a corrupt or missing file in the Microsoft Teams application. To resolve this issue, try these troubleshooting steps:
1. Update Microsoft Teams: Make sure you have the latest version of Microsoft Teams installed on your Windows 11 PC. Updates often include bug fixes and performance improvements.
2. Reinstall Microsoft Teams: If updating doesn’t solve the issue, try reinstalling Microsoft Teams. First, uninstall the application through the Control Panel or Settings. Then, download the latest version from the Microsoft website and reinstall it.
3. Run System File Checker: Use the built-in System File Checker tool to scan and repair any corrupted system files that may be causing the error. Open a Command Prompt as an administrator and type “sfc /scannow“.
4. Use a DLL fixer: If the error persists, you can try using a DLL fixer tool like MiniTool to repair any damaged or missing DLL files associated with Microsoft Teams.
Exploring the purpose of windows 11 msteams.exe bad image
If you’re experiencing the “Windows 11 MSTeams.exe Bad Image” error, don’t worry – we’ve got a fix for you. This error message often appears when there’s an issue with the MSTeams.exe file. To resolve it, follow these steps:
1. First, make sure your Windows operating system is up to date. Updates often include fixes for known bugs and errors.
2. Next, try reinstalling the Microsoft Teams app. Go to the official Microsoft Teams website and download the latest version of the app.
3. If reinstalling doesn’t fix the issue, try repairing the app. Right-click on the Microsoft Teams app icon and select “Repair” from the options.
4. If the error persists, you can try running a system file checker scan. Open the Command Prompt as an administrator and type “sfc /scannow“. This will scan and repair any corrupted system files.
5. Another potential solution is to create a new user account on your Windows 11. Sometimes, user account settings can cause conflicts with certain applications.
shell

sfc /scannow
4. Perform a DISM scan: Deployment Image Servicing and Management (DISM) is another Windows tool that can fix corrupted system files. Open the Command Prompt as an administrator and run the following command:
shell
DISM /Online /Cleanup-Image /RestoreHealth
5. Check for antivirus or security software conflicts: Sometimes, certain antivirus or security software may interfere with the proper functioning of executable files. Temporarily disable or uninstall any third-party security software and check if the issue persists.
Here's a sample code snippet that demonstrates how you can implement steps 2 and 3 in a PowerShell script:
powershell
# Uninstall Microsoft Teams
$uninstallString = (Get-WmiObject -Class Win32_Product | Where-Object { $_.Name -like '*Microsoft Teams*' }).UninstallString
Start-Process "msiexec.exe" -ArgumentList "/x $uninstallString /qn" -Wait
# Download and install the latest version of Microsoft Teams
$teamsInstallerUrl = "https://go.microsoft.com/fwlink/p/?LinkID=869428"
$installerPath = "$env:TEMP\TeamsInstaller.exe"
Invoke-WebRequest -Uri $teamsInstallerUrl -OutFile $installerPath
Start-Process -FilePath $installerPath -ArgumentList "/silent" -Wait
# Run System File Checker (SFC) scan
Start-Process -FilePath "cmd.exe" -ArgumentList "/c sfc /scannow" -Wait
Legitimacy of windows 11 msteams.exe bad image
If you’re experiencing the “MSTeams.exe Bad Image Error” on Windows 11, don’t worry, we have a fix for you. This error usually occurs when there is an issue with the image files associated with the MSTeams.exe program. To resolve this, follow these steps:
1. Update MSTeams: Make sure you have the latest version of Microsoft Teams installed. Check for updates in the Microsoft Store or download the latest version from the official website.
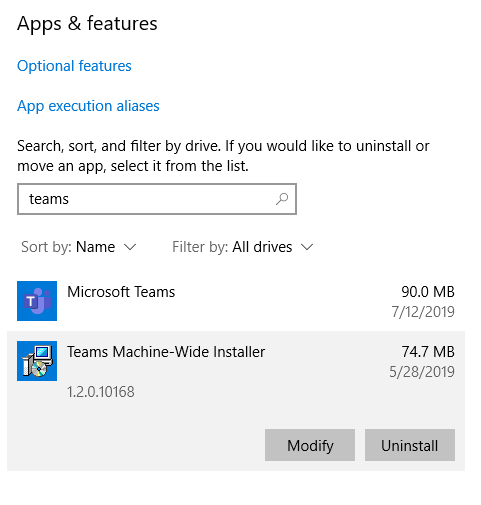
2. Repair MSTeams installation: Go to “Settings” > “Apps” > “Apps & features” and find Microsoft Teams in the list. Select it and click on “Advanced options.” Then, click on “Repair” to fix any issues with the installation.
3. Reinstall MSTeams: If repairing doesn’t work, try uninstalling and reinstalling Microsoft Teams. Go to “Settings” > “Apps” > “Apps & features,” select Microsoft Teams, and click on “Uninstall.” Then, download and install the latest version from the official website.
Should I delete windows 11 msteams.exe bad image?
To fix the Windows 11 MSTeams.exe Bad Image Error, it is recommended to delete the file causing the error. Follow these steps to resolve the issue:
1. Locate the msteams.exe file on your computer.
2. Right-click on the file and select “Delete” or press “Delete” on your keyboard.
3. Confirm the deletion if prompted.
4. Restart your computer to apply the changes.
Deleting the msteams.exe file will remove the source of the error and allow you to use Microsoft Teams without encountering the bad image error. If you still experience issues after deleting the file, you may need to reinstall Microsoft Teams or seek further assistance.
Origin and source of windows 11 msteams.exe bad image
If you’re encountering the “MSTeams.exe Bad Image” error on Windows 11, here’s how you can fix it:
1. First, make sure you have the latest version of Windows 11 installed on your device.
2. Download the Microsoft Teams installer from the official website and save it to your computer.
3. Right-click on the downloaded file and select “Run as administrator” to install Teams.
4. If you still see the error message, try repairing the installation. Press the Windows key + X and select “Apps and Features” from the menu. Find Microsoft Teams in the list, click on it, and select “Modify”. Follow the on-screen instructions to repair the installation.
5. If the error persists, you may need to uninstall and reinstall Teams. Go to “Apps and Features” again, click on Microsoft Teams, and select “Uninstall”. Then, download and install the latest version from the official website.
6. After reinstalling Teams, restart your computer and check if the error is resolved.
Understanding the usage of windows 11 msteams.exe bad image
If you’re encountering the Windows 11 MSTeams.exe Bad Image Error, here’s how to fix it.
First, download the file mentioned in the error message, MicrosoftTeams_21239.300.960.1678_x64_8wekyb3d8bbwe WebView2Loader.dll.
Next, locate the file and check its file size. If the file size is different from what it should be, you may need to redownload it or try a different source.
If the file size is correct, rename the file to something like “WebView2Loader.dll.old”. This will ensure that Windows doesn’t recognize it as the source of the error.
Finally, restart your computer and launch MSTeams.exe again. The error should now be resolved.
If you still encounter the error, it may be due to other factors such as bugs in the program or issues with your user accounts. In that case, it’s recommended to reach out to Microsoft support for further assistance.
Identifying windows 11 msteams.exe bad image as malware
If you are encountering the “Windows 11 MSTeams.exe Bad Image” error, it is important to identify it as a potential malware issue. This error typically occurs when the msteams.exe file becomes corrupted or infected. To fix this error, follow these steps:
1. Scan for Malware: Run a comprehensive antivirus scan on your system using a reliable security software to detect and remove any malware that may be causing the issue.
2. Reinstall Microsoft Teams: Uninstall Microsoft Teams from your computer and then download the latest version from the official Microsoft website. Install it again and check if the error persists.
3. Update Windows: Make sure that your Windows operating system is up to date. Go to the Windows Update settings and install any available updates.
4. Repair System Files: Use the System File Checker tool to scan and repair any corrupted system files that may be causing the error. Open the Command Prompt as an administrator and type “sfc /scannow” followed by Enter.
Troubleshooting issues with deleting windows 11 msteams.exe bad image
Troubleshooting issues with deleting Windows 11 MSTeams.exe Bad Image:
If you encounter an error with the message “MSTeams.exe Bad Image” while trying to delete the file, follow these steps to fix the issue:
1. Close any open instances of Microsoft Teams.
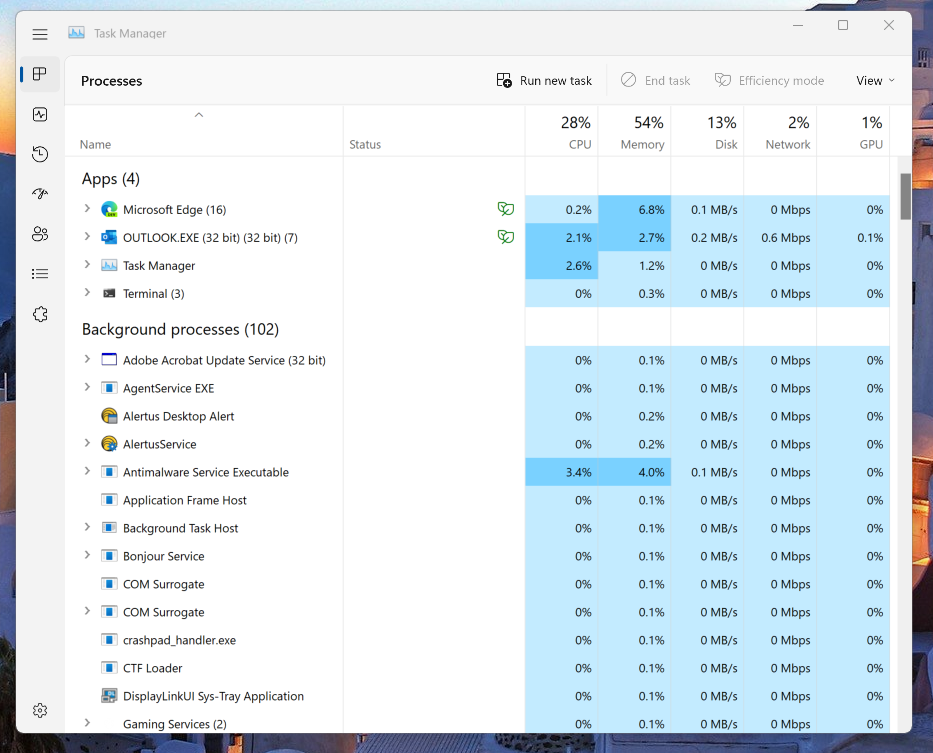
2. Open the Task Manager by pressing Ctrl + Shift + Esc.
3. In the Processes tab, locate and select the “MSTeams.exe” process.
4. Click the “End Task” button to terminate the process.
5. Open File Explorer and navigate to the location of the MSTeams.exe file.
6. Right-click on the file and select “Delete” from the context menu.
7. If you receive an error stating that the file is in use, restart your computer and try deleting it again.
8. If the issue persists, you may need to run a system scan using an antivirus program to ensure there are no malware infections affecting the file.
Windows 11 msteams.exe bad image running in the background
If you’re encountering the “Windows 11 MSTeams.exe Bad Image” error, we’ve got you covered. Here’s how to fix it:
1. Firstly, download the MicrosoftTeams_21239.300.960.1678_x64_8wekyb3d8bbwe WebView2Loader.dll file from a reliable source.
2. Next, navigate to the folder where the file was downloaded, right-click on it, and select “Copy.”
3. Now, open the File Explorer and go to the following location: C:\Program Files (x86)\Microsoft\Teams.
4. In the Teams folder, right-click anywhere and select “Paste” to replace the existing WebView2Loader.dll file.
5. After the file replacement, restart your computer to apply the changes.
High CPU usage caused by windows 11 msteams.exe bad image
If you’re experiencing high CPU usage due to the “Windows 11 MSTeams.exe Bad Image” error, we’ve got a fix for you. Follow these steps to resolve the issue:
1. First, close Microsoft Teams completely. Make sure it’s not running in the background.
2. Press the Windows key + R to open the Run dialog box. Type “appwiz.cpl” and hit Enter.
3. In the Programs and Features window, locate and select Microsoft Teams. Click on the Uninstall button.
4. After uninstalling Microsoft Teams, restart your computer.
5. Once your computer restarts, go to the official Microsoft Teams website and download the latest version of the application.
6. Install Microsoft Teams by running the downloaded file.
7. Launch Microsoft Teams and sign in with your user account.
Latest Update: April 2024
We strongly recommend using this tool to resolve issues with your exe and dll files. This software not only identifies and fixes common exe and dll file errors but also protects your system from potential file corruption, malware attacks, and hardware failures. It optimizes your device for peak performance and prevents future issues:
- Download and Install the Exe and Dll File Repair Tool (Compatible with Windows 11/10, 8, 7, XP, Vista).
- Click Start Scan to identify the issues with exe and dll files.
- Click Repair All to fix all identified issues.

Windows 11 msteams.exe bad image as a system file
If you’re encountering a “MSTeams.exe Bad Image” error on Windows 11, don’t worry, we’ve got you covered. This error typically occurs when there’s a problem with the MSTeams.exe system file. To fix it, follow these steps:
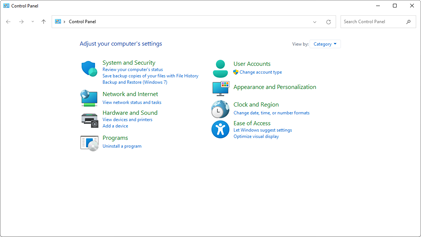
1. Open the Start Menu and type “Control Panel” to launch it.
2. In the Control Panel, click on “Programs” and then “Programs and Features.”
3. Look for Microsoft Teams in the list of installed programs and select it.
4. Click on the “Uninstall” button at the top of the window and follow the prompts to remove it.
5. Once the uninstallation is complete, restart your computer.
6. After the restart, go to the official Microsoft Teams website and download the latest version of the application.
7. Install Teams using the downloaded file and follow the on-screen instructions.
8. Once the installation is complete, launch Teams and check if the error is resolved.
Associated software with windows 11 msteams.exe bad image
- Open Settings by clicking on the Start menu and selecting the gear icon.
- Click on Apps.
- Scroll down and locate Microsoft Teams from the list of installed apps.
- Click on Microsoft Teams and select Uninstall.
- Follow the prompts to complete the uninstallation process.
- Once uninstalled, visit the official Microsoft Teams website and download the latest version of the software.
- Run the downloaded setup file and follow the on-screen instructions to install Microsoft Teams.
Repair method 2: Run System File Checker (SFC)
- Open Command Prompt as an administrator. You can do this by typing “cmd” in the Start menu search bar, right-clicking on Command Prompt, and selecting Run as administrator.
- In the Command Prompt window, type “sfc /scannow” and press Enter.
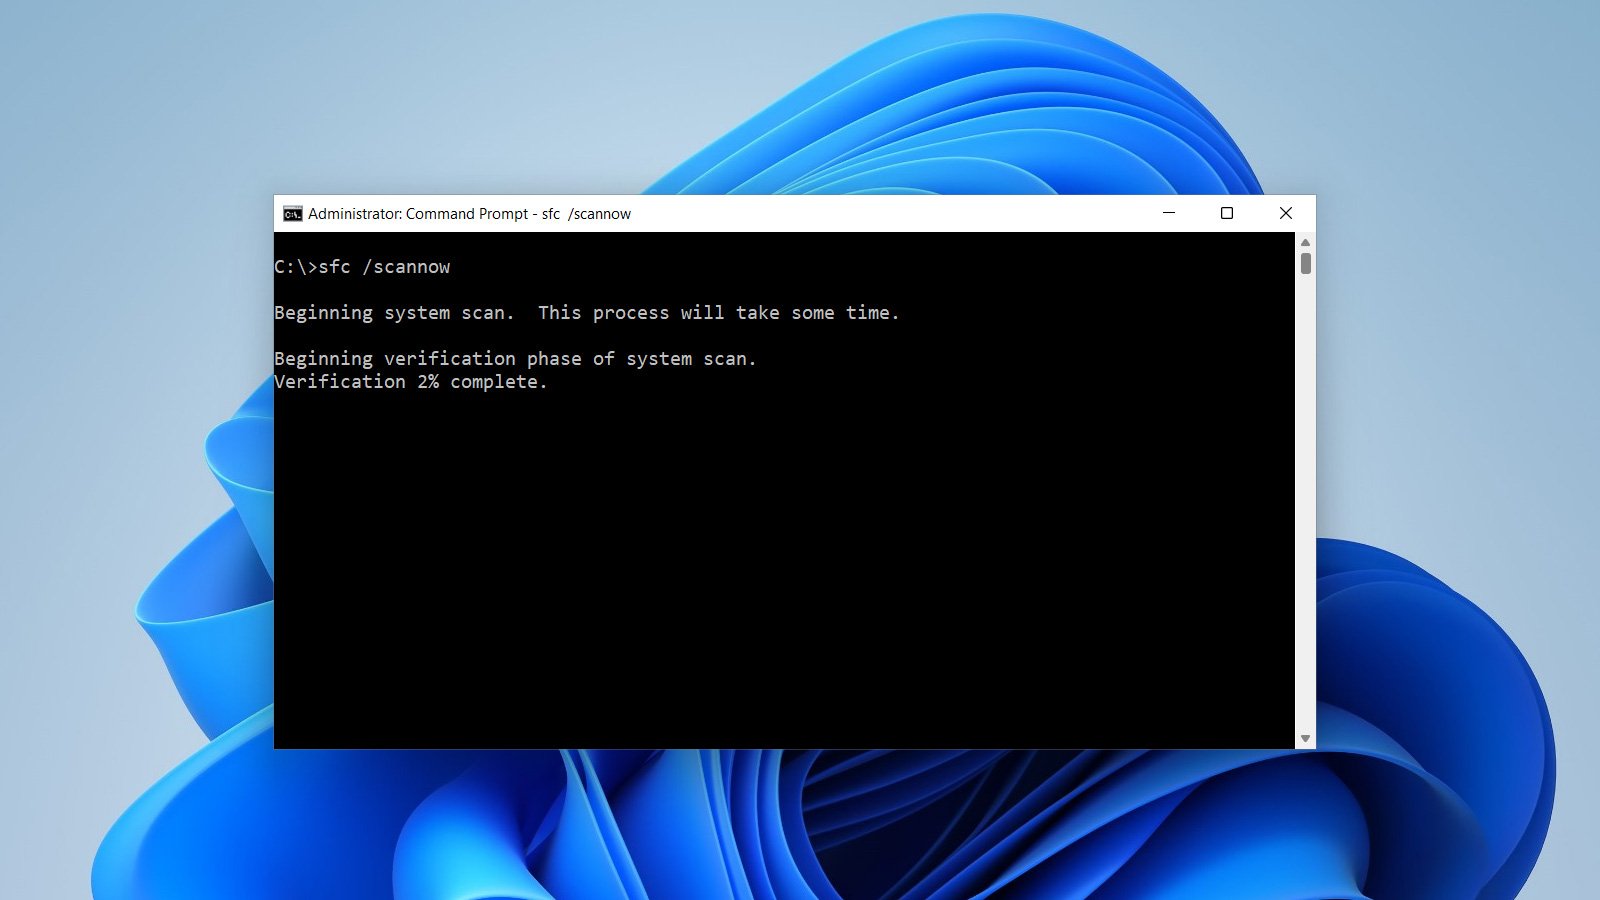
- Wait for the System File Checker to scan and repair any corrupted system files. This process may take some time.
- Once the scan is complete, restart your computer and check if the MSTeams.exe bad image error is resolved.
Repair method 3: Perform a Clean Boot
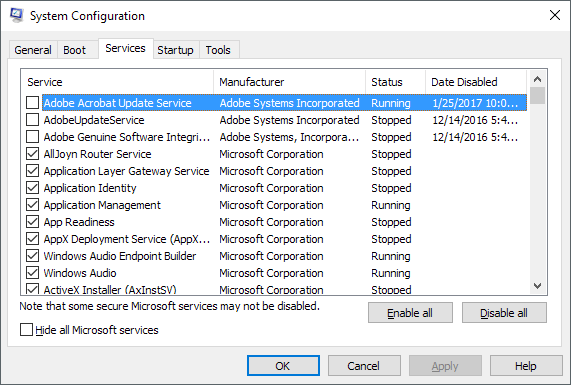
- Open the System Configuration utility by pressing Windows key + R to open the Run dialog box, then typing “msconfig” and pressing Enter.
- In the System Configuration window, go to the Services tab.
- Check the box that says “Hide all Microsoft services” to prevent disabling essential system services.
- Click on Disable all to disable all the non-Microsoft services.
- Next, go to the Startup tab and click on Open Task Manager.
- In the Task Manager window, disable all the startup programs by right-clicking on each entry and selecting Disable.
- Close the Task Manager and go back to the System Configuration window.
- Click on Apply and then OK to save the changes.
- Restart your computer for the changes to take effect.
Creator of windows 11 msteams.exe bad image
The “Windows 11 MSTeams.exe Bad Image Error Fix” article provides a solution to the application error encountered by users of Windows 11. To fix this error, follow these steps:
1. Download the required file from a trusted source.
2. Locate the downloaded file and double-click to run it.
3. A window will appear with buttons like “Next” and “Install.” Click on the appropriate button to proceed with the installation.
4. Once the installation is complete, restart your computer.
5. After restarting, try running MSTeams.exe again to check if the error persists.
Is it safe to end task for windows 11 msteams.exe bad image?
If you encounter the “MSTeams.exe Bad Image” error in Windows 11, you may wonder if it is safe to end the task. In most cases, ending the task for this error is a safe and effective solution. To fix the MSTeams.exe Bad Image error, follow these steps:
1. Press Ctrl + Shift + Esc to open the Task Manager.
2. Look for the “MSTeams.exe” process under the “Processes” tab.
3. Right-click on it and select “End Task.”
By ending the task, you force the MSTeams.exe process to stop running, which can resolve the bad image error. However, keep in mind that this fix may not work for everyone, and there could be other underlying issues causing the error.
If you continue to experience the MSTeams.exe Bad Image error, consider updating your Windows 11 operating system, reinstalling Microsoft Teams, or seeking further assistance from Microsoft support or online forums.
A detailed description of the windows 11 msteams.exe bad image process
The Windows 11 MSTeams.exe bad image error is a common issue that users may encounter while using Microsoft Teams on their Windows 11 devices. This error occurs when the msteams.exe file is unable to execute properly due to a corrupt or missing image file.
To fix this error, follow these steps:
1. Close Microsoft Teams and any other open applications.
2. Press Win + R to open the Run dialog box.
3. Type %appdata% and press Enter.
4. Locate the Microsoft folder and open it.
5. Open the Teams folder.
6. Delete the msteams.exe file.
7. Go to the official Microsoft Teams website and download the latest version of the application.
8. Run the downloaded file and follow the on-screen instructions to install Microsoft Teams.
9. Restart your computer.
10. Launch Microsoft Teams and check if the error is resolved.
Troubleshooting unresponsiveness of windows 11 msteams.exe bad image
If you’re experiencing unresponsiveness issues with Windows 11 MSTeams.exe and seeing the “Bad Image” error, here’s how to fix it:
1. Close any instances of MSTeams.exe that are currently running.
2. Press the Windows key + R to open the Run dialog box.
3. Type “cmd” and press Enter to open the Command Prompt.
4. In the Command Prompt, type “sfc /scannow” and press Enter. This will scan your system for any corrupted files and repair them if necessary.
5. Once the scan is complete, restart your computer.
6. After restarting, try launching MSTeams.exe again to see if the error persists.
7. If the issue persists, you can try reinstalling MSTeams.exe by downloading the latest version from the official Microsoft website.
8. Alternatively, you can try using the Windows 10 version of MSTeams.exe if the Windows 11 version is causing compatibility issues.
These steps should help resolve the “Bad Image” error and improve the responsiveness of MSTeams.exe on your Windows 11 system.
Removal tools for windows 11 msteams.exe bad image
To fix the MSTeams.exe bad image error on Windows 11, you can use removal tools specifically designed for this issue. These tools are designed to identify and remove any corrupted or damaged files related to MSTeams.exe.
To begin, download a reliable removal tool from a trusted source like Vladimir Popescu’s website or a reputable software library. Once downloaded, open the removal tool and follow the on-screen instructions to start the scanning process.
During the scanning process, the tool will detect any corrupted files and provide options for fixing them. Click on the Fix button to initiate the repair process.
After the repair is complete, restart your computer and check if the MSTeams.exe bad image error has been resolved. If the error persists, you may need to try alternative removal tools or consult with a technical expert for further assistance.
Managing windows 11 msteams.exe bad image on startup
If you’re experiencing the “MSTeams.exe Bad Image” error on Windows 11 startup, don’t worry – there’s a fix. Follow these steps to resolve the issue:
1. Open the File Explorer and navigate to the “C:\Program Files” folder.
2. Locate the “Teams” folder and right-click on it.
3. Select “Properties” from the context menu.
4. In the Properties window, go to the “Security” tab and click on “Advanced”.
5. In the Advanced Security Settings window, click on “Change” next to the “Owner” field.
6. Enter your username in the “Enter the object name to select” field and click “Check Names”.
7. Click “OK” to save the changes and close the windows.
8. Now, in the Teams folder, find the “Teams.exe” file and right-click on it.
9. Select “Properties” and go to the “Compatibility” tab.
10. Check the box next to “Run this program as an administrator” and click “Apply” and then “OK”.
This should resolve the “MSTeams.exe Bad Image” error on Windows 11 startup.
Performance impact of windows 11 msteams.exe bad image
The MSTeams.exe Bad Image Error can have a significant impact on the performance of Windows 11. To fix this error, follow these steps:
Step 1: Close Microsoft Teams and any other applications that are currently running.
Step 2: Open the Task Manager by pressing Ctrl+Shift+Esc and go to the Processes tab.
Step 3: Locate the MSTeams.exe process and end it by right-clicking on it and selecting End Task.
Step 4: Navigate to the folder where Microsoft Teams is installed. The default location is usually C:\Users\username\AppData\Local\Microsoft\Teams.
Step 5: Delete the entire Teams folder.
Step 6: Download the latest version of Microsoft Teams from the official website and install it.
Step 7: Restart your computer.
Updates for windows 11 msteams.exe bad image
If you’re encountering the “MSTeams.exe Bad Image” error on Windows 11, there are a few steps you can take to fix it.
First, make sure you have the latest updates installed for Windows 11. This can often resolve compatibility issues that may be causing the error.
If that doesn’t work, try reinstalling Microsoft Teams. To do this, go to the Start menu and search for “Add or remove programs.” Find Microsoft Teams in the list, select it, and click on the “Uninstall” button. Then, go to the official Microsoft Teams website and download the latest version of the application.
If the issue still persists, you can try running the Windows System File Checker tool. Open the Command Prompt as an administrator and type “sfc /scannow“. This will scan your system files for any errors and repair them if needed.
If none of these solutions work, consider reaching out to Microsoft support for further assistance.
Downloading windows 11 msteams.exe bad image
If you’re encountering the “Windows 11 MSTeams.exe Bad Image” error, don’t worry, we’ve got you covered. Here’s a simple fix to resolve this issue and get your MSTeams.exe running smoothly again.
1. First, make sure you have a stable internet connection.
2. Go to the official Windows 11 website and navigate to the “Downloads” section.
3. Look for the “Windows 11 MSTeams.exe Bad Image Error Fix” article.
4. In the article, locate the “DOWNLOAD FILE” button and click on it to download the fix.
5. Once the file is downloaded, locate it in your Downloads folder and double-click to run it.
6. Follow the on-screen instructions to install the fix.
7. After installation, restart your computer.
8. Launch MSTeams.exe again to check if the error has been resolved.
Compatibility of windows 11 msteams.exe bad image with different Windows versions
When it comes to the compatibility of the MSTeams.exe file in Windows 11, there may be instances where users encounter a “bad image” error. This error can occur when there is a mismatch between the file and the Windows version being used.
To fix this error, follow these steps:
1. First, ensure that you are using the latest version of Windows 11. If not, update your operating system.
2. Next, navigate to the official Microsoft website and download the latest version of MSTeams.exe.
3. Once downloaded, right-click on the downloaded file and select “Run as administrator” to install it.
4. If you still encounter the error, try running the application in compatibility mode. Right-click on the MSTeams.exe file, select “Properties,” and go to the “Compatibility” tab. Check the box that says “Run this program in compatibility mode for” and select the appropriate Windows version from the drop-down menu.
5. Finally, click on “Apply” and “OK” to save the changes.
Alternatives to windows 11 msteams.exe bad image
- Open Settings by clicking on the Start button and selecting Settings (gear icon).
- In the Settings window, click on Windows Update in the left panel.
- Click on the Check for updates button and wait for Windows to search for available updates.
- If any updates are found, click on the Download button and let Windows install them.
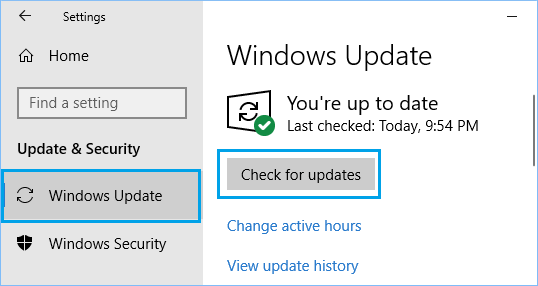
- Restart your computer once the updates are installed.
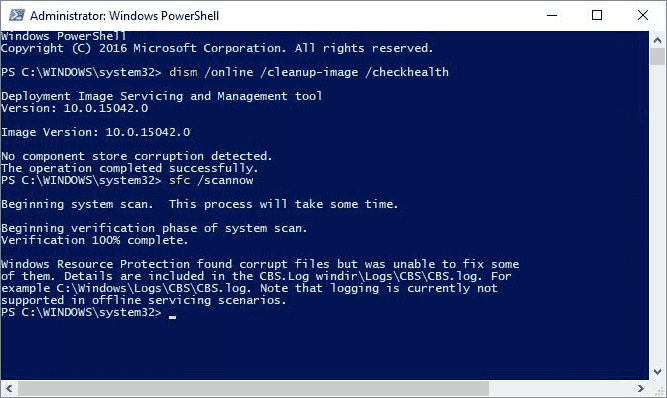
Method 2: Run System File Checker
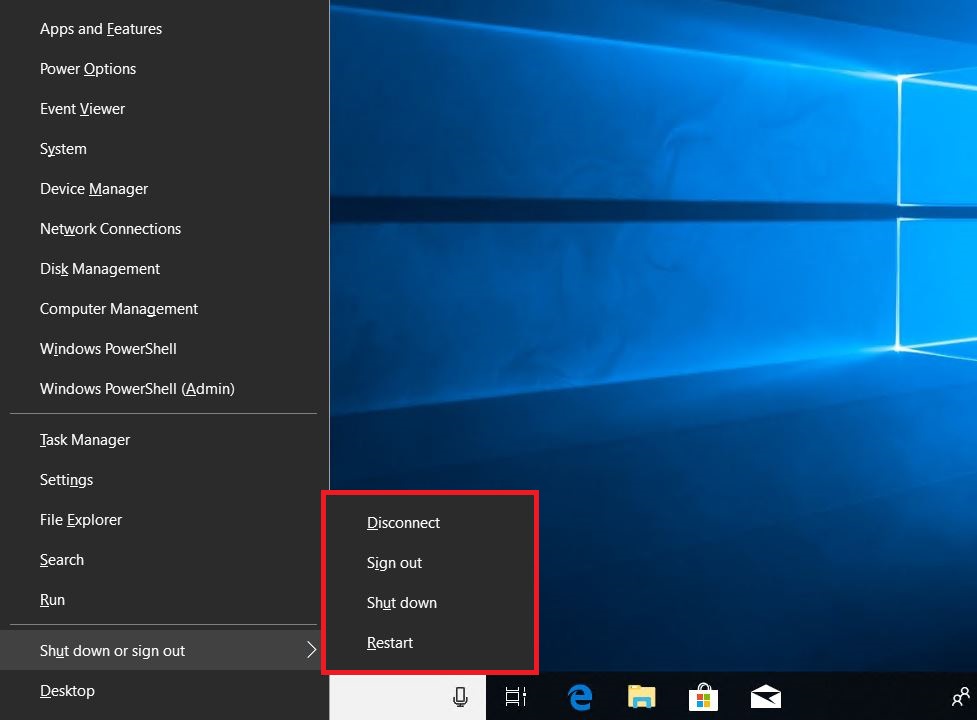
- Press Windows key + X on your keyboard and select Command Prompt (Admin) or Windows PowerShell (Admin) from the menu.
- In the command prompt or PowerShell window, type the command sfc /scannow and press Enter.
- Wait for the scan to complete. It may take some time to scan and repair any corrupted system files.
- Restart your computer once the scan and repair process is finished.
Method 3: Run DISM Tool
- Press Windows key + X on your keyboard and select Command Prompt (Admin) or Windows PowerShell (Admin) from the menu.
- In the command prompt or PowerShell window, type the command dism /online /cleanup-image /restorehealth and press Enter.
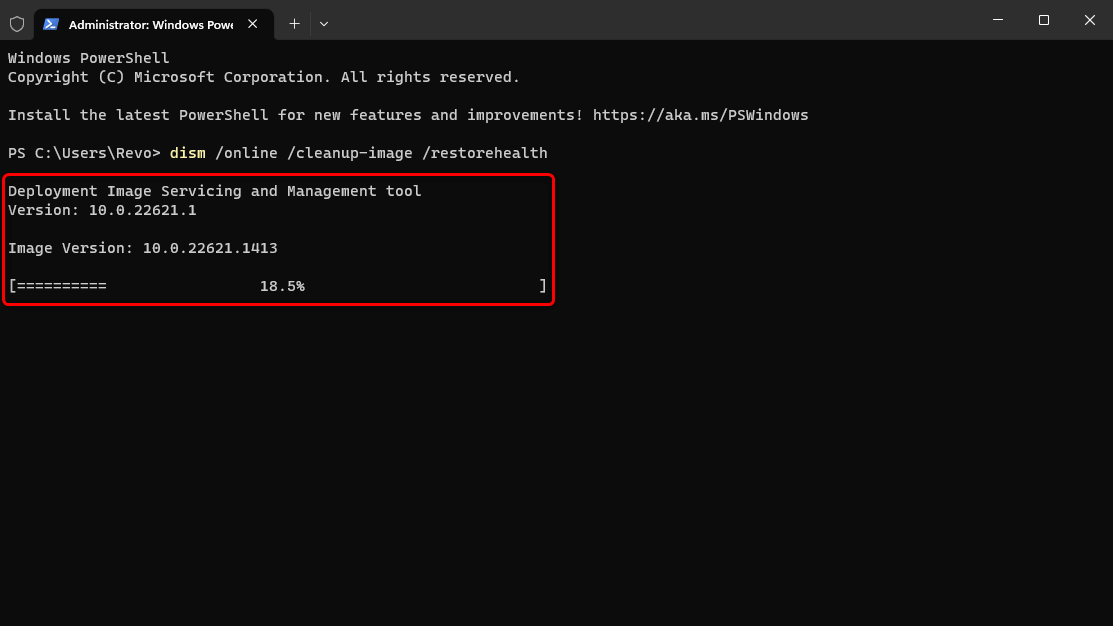
- Wait for the DISM tool to scan and repair any corrupted system files.
- Restart your computer once the scan and repair process is finished.
Method 4: Reinstall Microsoft Teams
- Press Windows key + X on your keyboard and select Apps and Features from the menu.
- In the Apps and Features window, scroll down and locate Microsoft Teams.
- Click on Microsoft Teams and select Uninstall.
- Follow the on-screen instructions to uninstall Microsoft Teams.
- Go to the official Microsoft Teams website and download the latest version of the application.
- Double-click on the downloaded file to install Microsoft Teams.

- Restart your computer after the installation process is completed.