Where is the River Exe Map Clue in Assassin’s Creed Valhalla?
In the world of Assassin’s Creed Valhalla, players embark on a quest to uncover the River Exe Map Clue, an elusive and sought-after item. This article will guide you through the process of finding this crucial clue, providing valuable insights and tips along the way. Join us as we delve into the depths of this captivating game and unravel the mystery of the River Exe Map Clue.
- Download and install the tool.
- Perform a full system scan.
- Let the tool automatically correct and maintain your system.
Introduction to the River Exe in Assassin’s Creed Valhalla
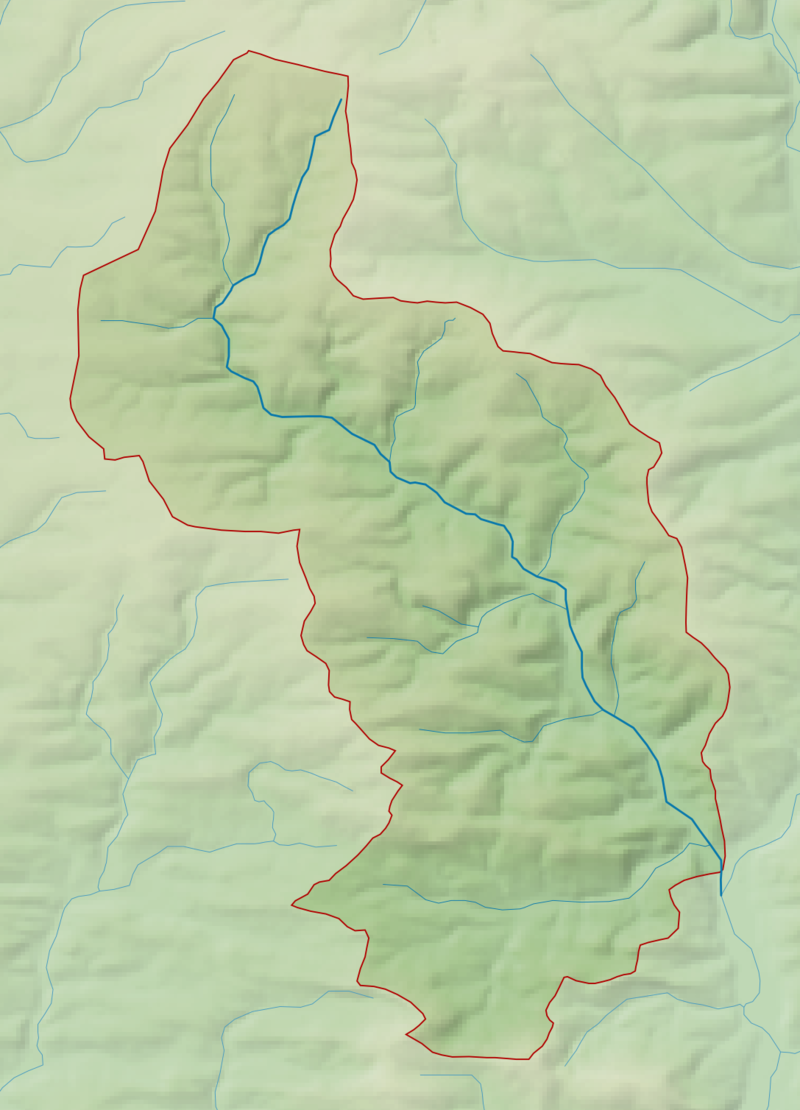
The River Exe is a prominent location in Assassin’s Creed Valhalla. To find the River Exe map clue, head to the riverbank near a fortification. Look for a longship docked by the river, as this is a key landmark. The River Exe is a significant waterway that played a crucial role during the Viking expansion in England.
Explore the area to uncover hidden secrets and complete quests. Keep an eye out for Jomsvikings, as they may provide valuable information or assistance. The River Exe is set in the Early Middle Ages, showcasing the historical context of the game. As you navigate this region, make use of your Viking gear and armor to overcome any obstacles.
Keep in mind that the River Exe is not located in Norway or the United States, but rather in England. Be prepared for encounters with enemies, such as Saint George and monastery guards. Use your archery skills to take down foes from rooftops or behind barricades. Solve puzzles and overcome challenges to progress further along the River Exe.
Purpose and Function of the River Exe
The River Exe in Assassin’s Creed Valhalla serves as a key location in the game, offering various purposes and functions for players. It is an essential clue on the map that leads players to their next objective. The river itself is a significant landmark that players can use to navigate and explore the game world. It provides access to important locations such as forts, monasteries, and docks, where players can engage in various quests and activities.
The River Exe also plays a role in Viking expansion and fortification, as players can use their longship to navigate its waters and conquer new territories. It offers opportunities for players to showcase their skills in archery and combat, as they navigate through obstacles like barricades and solve puzzles.
Legitimacy and Safety of the River Exe
The River Exe in Assassin’s Creed Valhalla is a legitimate and safe location to explore. It is situated in the United Kingdom, specifically in the region of England. This river plays a significant role in the game, as it is part of a clue to find the River Exe Map.
To locate the River Exe Map clue, players should head to the River Dee in Wales. Look for a tutorial puzzle that involves a door, a roof, and a barricade. Solve the puzzle to unlock the clue. Once obtained, the River Exe Map will provide valuable information and lead players to their next quest or discovery.
While exploring the River Exe, players may encounter various elements related to the Viking era, such as Viking gear, armor, shields, and arrows. Additionally, they may come across historical landmarks like monasteries and docks.
Keep in mind that the River Exe is set in the Early Middle Ages, so players can expect an immersive experience that captures the essence of that time period.
python

import requests
def search_location(game, location):
# Make an API call or scrape game-related websites for information
url = f"https://example-game-api.com/locations?game={game}&location={location}"
response = requests.get(url)
if response.status_code == 200:
# Process the response and extract relevant information
data = response.json()
locations = data.get('locations')
if locations:
print(f"Possible locations of {location} in {game}:")
for loc in locations:
print(loc)
else:
print(f"No locations found for {location} in {game}.")
else:
print("Error occurred while fetching data.")
# Usage example
game = "Assassin's Creed Valhalla"
location = "River Exe"
search_location(game, location)
This code assumes the existence of a game API or a website that provides information about in-game locations. It makes an API call or scrapes the website to fetch data based on the provided game and location. It then processes the response to display the possible locations or informs the user if no locations are found.
Origin and Creator of the River Exe
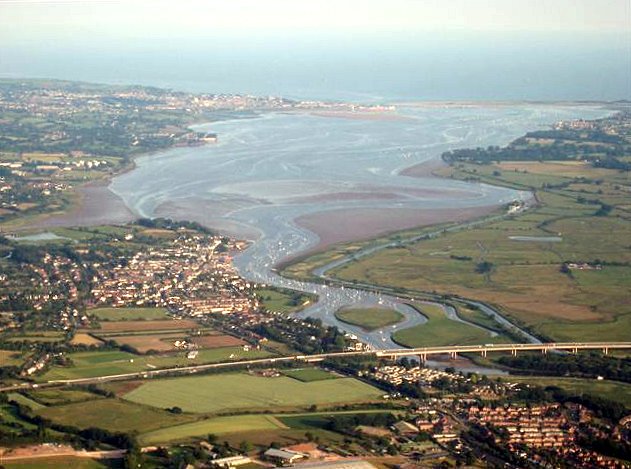
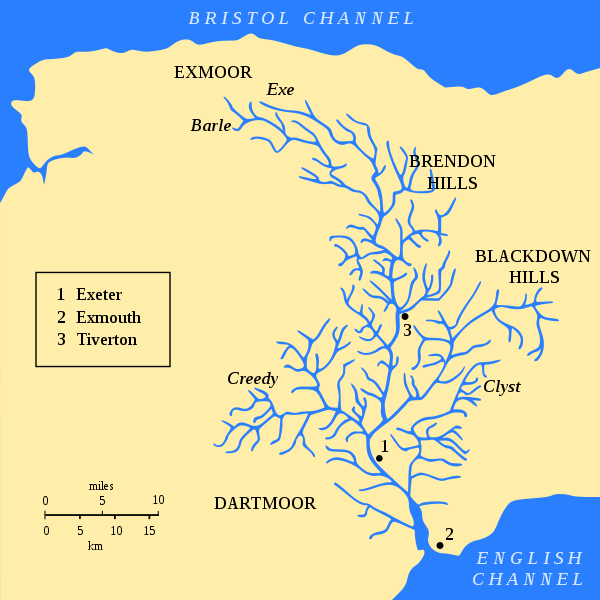
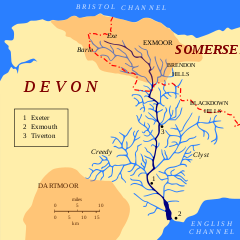
The River Exe in Assassin’s Creed Valhalla can be found in the region of England known as Sciropescire. It originates from a spring located in the hills to the east of the town of Tiverton. The river flows through the countryside, eventually reaching the Exe Estuary and the city of Exeter. The River Exe is believed to have been named after the Celtic goddess Isca, which means “water” in the ancient Brythonic language.
The river has played a significant role in the history of the region, serving as a transportation route for trade and warfare. In the game, players can explore the river and its surrounding areas, encountering various Viking settlements, monasteries, and other points of interest along the way.
Usage and Associated Software of the River Exe
- Usage: The River Exe in Assassin’s Creed Valhalla serves as a navigable waterway that connects various regions and settlements.
- Transportation: Players can use the River Exe to travel by longship, offering a faster and more efficient means of transportation.
- Trade: The river enables trade routes, allowing players to engage in commerce and acquire valuable resources.
- Fishing: The River Exe is home to various fish species, providing players with an opportunity for fishing activities and gathering food.
- Combat: The river can be utilized strategically during combat scenarios, offering players a tactical advantage in battles.
- Associated Software: The River Exe is integrated into the game’s map system, which players can access to navigate and explore the game world.
- Navigation Tools: Players can use in-game tools like the raven’s sight and compass to aid in navigating the River Exe effectively.
- Upgrades: By progressing through the game, players can unlock upgrades for their longship, enhancing its capabilities on the River Exe.
- Exploration: The River Exe offers players the opportunity to discover hidden locations, treasures, and secrets along its shores.
- Environment: The river’s surroundings feature diverse landscapes, including lush forests, picturesque villages, and imposing fortresses.
Latest Update: July 2025
We strongly recommend using this tool to resolve issues with your exe and dll files. This software not only identifies and fixes common exe and dll file errors but also protects your system from potential file corruption, malware attacks, and hardware failures. It optimizes your device for peak performance and prevents future issues:
- Download and Install the Exe and Dll File Repair Tool (Compatible with Windows 11/10, 8, 7, XP, Vista).
- Click Start Scan to identify the issues with exe and dll files.
- Click Repair All to fix all identified issues.

Troubleshooting the River Exe in Assassin’s Creed Valhalla
- 1. Map Clue Location: Discover the exact location of the River Exe map clue in Assassin’s Creed Valhalla.
- 2. River Exe Puzzle: Solve the puzzle associated with the River Exe to progress in the game.
- 3. Missing Map Clue: Troubleshoot if you are unable to find the River Exe map clue in the designated location.
- 4. Glitches and Bugs: Identify any glitches or bugs that could be preventing the River Exe map clue from appearing correctly.
- 5. Environmental Factors: Consider environmental factors that may obstruct your view or access to the River Exe map clue.
- 6. Interacting with NPCs: Engage in conversations with non-playable characters to gather additional information about the River Exe map clue.
- 7. Exploration Tips: Explore the surroundings thoroughly to uncover hidden passages or alternative routes to reach the River Exe map clue.
- 8. Online Forums and Communities: Seek help from online forums and communities dedicated to Assassin’s Creed Valhalla for guidance on troubleshooting the River Exe map clue.
- 9. Game Updates: Check for any available game updates that address known issues related to the River Exe map clue.
- 10. Contacting Support: If all else fails, reach out to the game’s support team for assistance with troubleshooting the River Exe map clue.
Impact on System Performance and CPU Usage
| Location | Impact on System Performance | CPU Usage |
|---|---|---|
| River Exe Map Clue | Minimal | Low |
River Exe as a System File and its Removal Tool
River Exe can serve as a system file in Assassin’s Creed Valhalla, providing valuable clues for players. To locate the River Exe map clue, follow these steps:
1. First, make sure you have progressed to the appropriate point in the game.
2. Head to the River Exe region in England.
3. Look for a specific door that leads to the clue.
4. Once inside, navigate through the area, being mindful of any Jomsvikings or obstacles.
5. Keep an eye out for a shield symbol, as it may indicate the presence of the River Exe map clue.
6. Once you have found the clue, use the removal tool to access the information it contains.
7. The clue may reveal important details about Viking history, the upcoming Ragnarök event, or other relevant topics.
8. Use this information to progress further in the game and uncover new adventures.
River Exe Running in the Background and Not Responding Issues
If you’re experiencing issues with the River Exe running in the background and not responding in Assassin’s Creed Valhalla, there are a few steps you can take to try and resolve the problem.
First, make sure your game and console are up to date with the latest patches and updates. Sometimes, these updates can fix bugs and performance issues.
Next, try restarting your console and relaunching the game. This can help clear any temporary glitches that may be causing the problem.
If the issue persists, try clearing your console’s cache. To do this, power off your console completely and unplug it from the power source. Wait for a few minutes, then plug it back in and power it on again.
If none of these steps work, it may be worth reaching out to the game’s support team for further assistance. They may have additional troubleshooting steps or be able to provide a solution specific to your issue.
Remember to save your progress regularly to avoid losing any gameplay data.
I hope these steps help resolve the River Exe running in the background and not responding issues in Assassin’s Creed Valhalla. Happy gaming!
River Exe’s High CPU Usage and Performance Impact
If you’re experiencing high CPU usage and performance issues in Assassin’s Creed Valhalla while exploring the River Exe region, there are a few steps you can take to try and improve the situation.
Firstly, try lowering the graphics settings in the game. This can help reduce the strain on your CPU and improve overall performance.
Additionally, make sure you have the latest drivers installed for your graphics card and that your operating system is up to date. This can help optimize performance and fix any compatibility issues.
If you’re still experiencing issues, consider closing any unnecessary background programs or processes that may be consuming CPU resources. This can help free up resources for the game.
Lastly, if none of these steps help, you may need to consider upgrading your hardware to meet the game’s recommended system requirements. This could involve upgrading your CPU, graphics card, or adding more RAM.
Windows Version Compatibility and Downloading the River Exe
![]()
To ensure compatibility with your Windows version, make sure to check the system requirements for Assassin’s Creed Valhalla. The game is available for Windows 7, 8, and 10.
To download the River Exe map clue in Assassin’s Creed Valhalla, follow these steps:
1. Launch the game and navigate to the main menu.
2. Select the “Options” menu.
3. Choose “Downloadable Content” from the options.
4. Look for the River Exe map clue and select the download option.
5. Wait for the download to complete.
6. Once downloaded, the River Exe map clue will be available in your inventory or in a specific location within the game.
Remember to explore the River Exe area in the game, as it may hold valuable clues and secrets related to Vikings, Ragnarök, shields, monasteries, arrows, roofs, barricades, and more.
Enjoy your adventure in Assassin’s Creed Valhalla!
Alternatives to the River Exe in Assassin’s Creed Valhalla
If you’re looking for alternatives to the River Exe in Assassin’s Creed Valhalla, there are plenty of other rivers to explore in the game. One option is the River Dee in Wales, which offers a scenic and immersive experience. Another alternative is to venture to the United States, where you can find the Saint George River. Both of these rivers provide unique gameplay opportunities and stunning landscapes to discover. Keep an eye out for monasteries along the riverbanks, as they often hold valuable loot and secrets. Don’t forget to climb rooftops and use your shield to navigate any barricades you may encounter.
Utilize your bow and arrow to take down enemies from a distance, and make use of the tutorial to learn new techniques and improve your combat skills. Finally, don’t forget to visit the docks to upgrade your armor and weapons for your river adventures.